Warning: This action lets you run custom PHP code on your site. Custom PHP code can break your site, rendering it unusable and inaccessible. You should only use this action if you are familiar with writing and debugging PHP code. Always test on a staging environment before deploying to your live site.
The Call a custom function/method action can call any existing global or static function on your WordPress site.
Imagine creating a recipe that executes your custom function–it’s like telling Automator “execute this code” when “these other things” happen. This action is very powerful and can be very useful to developers or site owners who want to run a custom function as a recipe.
Let’s take a look at setting this up!
Adding a new Automator action hook
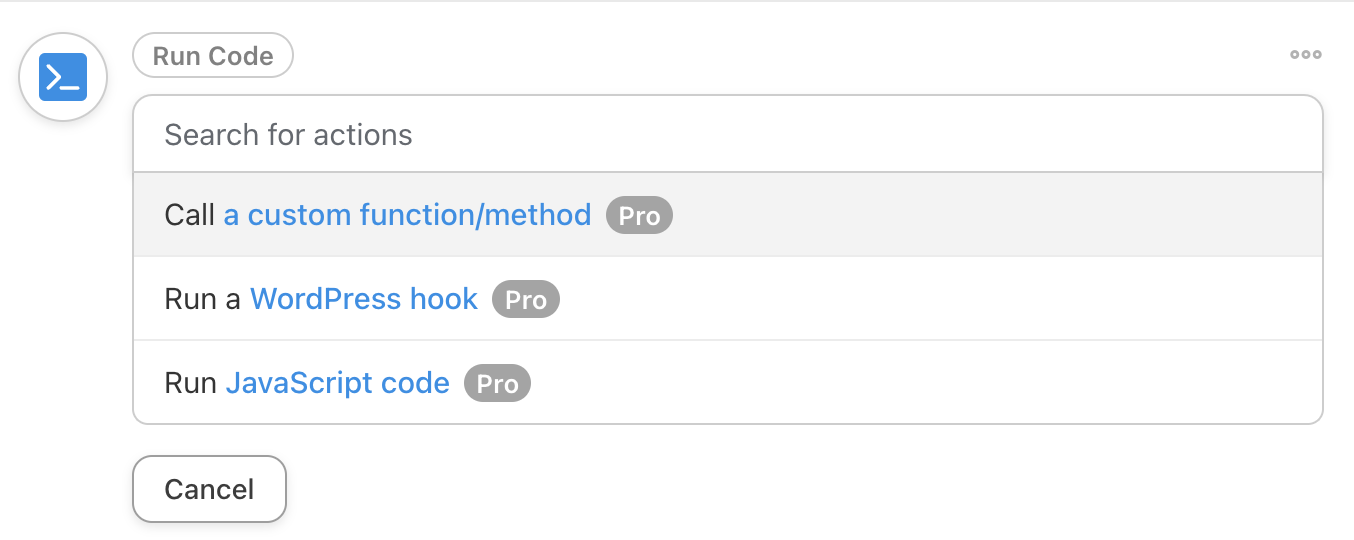
After creating a recipe, click the Add Action button and choose Run Code. Then click Call a custom function/method:
This is what you’ll see next:

The Function name is the name of the PHP function that you want the Automator Action to run, e.g. my_custom_function. This function could be defined in your child theme’s functions.php file, a custom plugin you’ve written, or even in a function in a plugin that you’ve simply installed on your site.
Pass variables fields will contain the data that you want to pass into the function. (For security, these fields only support simple values like strings and numbers, not arrays).
Each particular function takes a different number of arguments. You may skip this field if the function you’re using does not accept any arguments. Otherwise, you may pass a custom-defined values to the function by clicking the Add a variable button and entering the data you want to pass into the function.
You may add any number of values or remove them as necessary. The order of the arguments passed to the function will be based on the order you define in the Pass variables field (e.g. from top to bottom):

In this example, we will be adding just one field value since we be passing only one argument into our function. Don’t forget to save the new Automator Action we’ve just set up by clicking Save.
Go ahead and add new Triggers. In this example we’ll use the WordPress Trigger A user views a page.
Switch the status of the Recipe to live. At this point, you can try completing the recipe triggers.
Writing a function
Writing a PHP function really goes beyond the scope of this article, but let’s take a look at a simple example.
Let’s set up our custom function inside our child theme. In the function, we will redirect the user to the URL specified in the Pass variables field. In this example, we’ll set the URL to:
https://sitename.com/?my_custom_url_param=yes (replace https://sitename.com with your own domain)
Here’s how we’ll add the function to our child theme:
- Open your favorite text editor. You may use Sublime text, PHP Storm, Notepad++, Visual Studio Code, or any editor of your choice.
- Locate your theme or child theme’s functions.php file.
- Paste in the following code:
function my_custom_function( $url ){
    wp_safe_redirect( $url );
    exit;
}
- Save the file and visit the page you use earlier in trigger. You should be redirected to https://sitename.com/?my_custom_url_param=yes
Example: Return a custom product meta
/**
 * @param $product_id
 *
 * @return array|int|mixed|string
 */
function automator_get_product_meta( $product_id, $meta ) {

	// Get product
	$product = wc_get_product( $product_id );

	// if not correct Product ID, return 0
	if ( ! $product instanceof WC_Product ) {
		return 0;
	}

	// check if it's a variation
	$parent_id = $product->get_parent_id();

	// a variation, return parent product
	if ( 0 !== (int) $parent_id ) {
		$product = wc_get_product( $product->get_parent_id() );
	}

	// check again if its a product
	if ( ! $product instanceof WC_Product ) {
		return 0;
	}

	// return meta
	return $product->get_meta( $meta, true );
}
Example: Running a custom MySQL Query
/**
 * @param $user_id
 * @param $meta_key
 * @param $meta_value
 *
 * @return array
 */
function automator_run_mysql_query( $user_id, $meta_key, $meta_value ) {
	global $wpdb;

	// Update something.
	$wpdb->update(
		$wpdb->usermeta,
		array(
			'meta_value' => $meta_value,
		),
		array(
			'user_id'  => $user_id,
			'meta_key' => $meta_key,
		)
	);

	// Insert something
	$wpdb->insert(
		$wpdb->prefix . 'my-table',
		array(
			'user_id'    => $user_id,
			'meta_key'   => $meta_key,
			'meta_value' => $meta_value,
		)
	);

	// Return a value for the next action (Action token)
	return $wpdb->get_col( $wpdb->prepare( "SELECT meta_value FROM $wpdb->usermeta WHERE meta_key = %s AND user_id = %d", $meta_key, $user_id ) );
}
Error checking
You should check for the following things if you encountered any errors while adding a custom action hook:
- Make sure that the Recipe is set to Live.
- Check for any spelling errors, etc. Check that the function name matches the one that you entered in the Function name field.
- The number of arguments provided in the Pass variable field must match the number of arguments that you passed in your function.
- Check your PHP code if you run into any errors or warnings.
Warning!
If the function name or number of arguments set in the action doesn’t match your function, Uncanny Automator will display an error in the action log. However, if your function itself causes a fatal error, this could prevent your site from loading. If you are not familiar with writing PHP code, we recommend you do not use this action. Even if you are an experienced coder, be sure to test your code on a staging site before you deploy it to your live site.
That’s it! We hope this makes creating custom code for your WordPress site much easier, faster and more fun.


Comments (0)