

The Instagram integration publishes photos from your WordPress site to an Instagram Business account: share each new blog post, or post when a new page, event, product, or course is published. Once connected, the Publish a photo to an Instagram Business account action appears under Instagram in the recipe builder. This article covers the Instagram and Facebook setup it depends on, connecting the account to Uncanny Automator, and adding the action to a recipe.
If you have Uncanny Automator Lite, you’ll first need to connect your site to a free Uncanny Automator account, which gives you app credits to use with Instagram. On a paid plan, app integrations are included.
Set up an Instagram Business account and connect it to a Facebook page
Meta lets apps post only to Instagram Business accounts that are connected to a Facebook page, so only Instagram Business accounts are supported. Before you connect Uncanny Automator:
- Convert your Instagram account to an Instagram Business account. Skip this step if your account is already a Business account.
- Connect your Instagram Business account to a Facebook page. Uncanny Automator reaches your Instagram account through this page.
For help with either step, contact Facebook or Instagram support. We can’t provide support for setting up an Instagram Business account or connecting it to a Facebook page.
Connect your Instagram Business account to Uncanny Automator
Instagram uses your Facebook Pages connection: Uncanny Automator connects to the Facebook account that manages the page, then finds the Instagram Business account linked to that page. If you have already connected Facebook Pages (see Facebook Pages), the Instagram settings page lists your accounts straight away and you can go to step 4.
- In your WordPress dashboard, go to Automator > Settings > App integrations and select Instagram in the list.
- Click Connect Facebook Pages account.
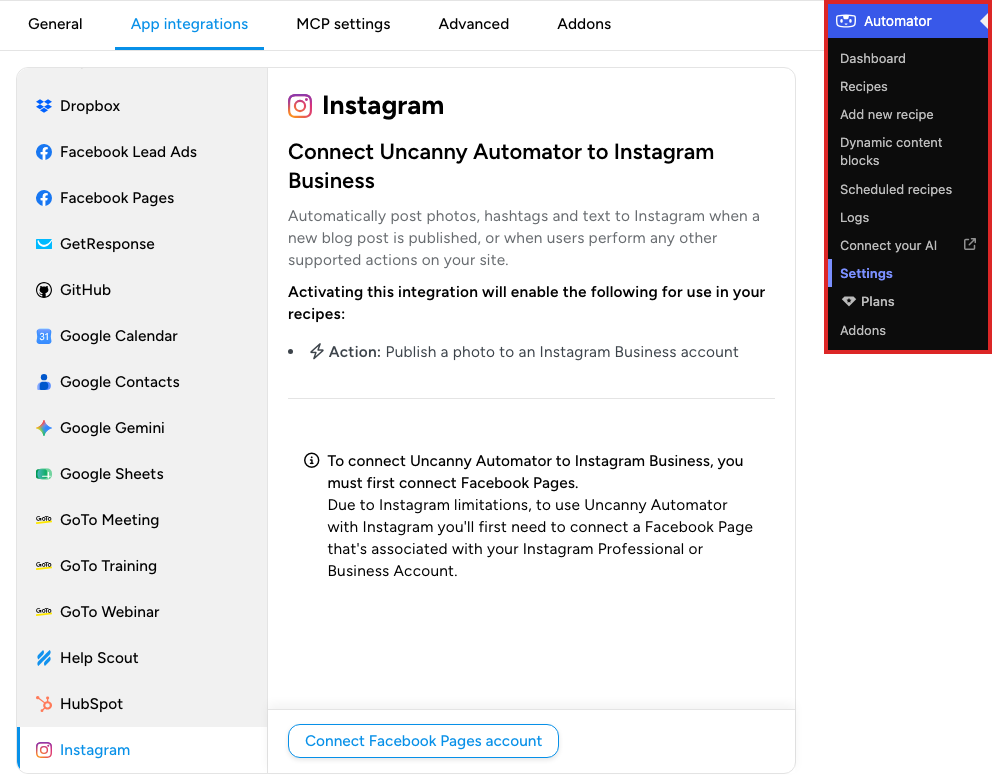
- Sign in to Facebook with the account that manages the page, and authorize Uncanny Automator, as described in Facebook Pages. When Facebook asks which Instagram accounts to allow, check the box next to your Instagram Business account.
- Back on the Instagram settings page, check Linked Instagram accounts. Each Facebook page you authorized is listed with the Instagram Business account linked to it. If a page shows “No Instagram Business or Professional account connected to this Facebook page.”, click Refresh on that row to look again.
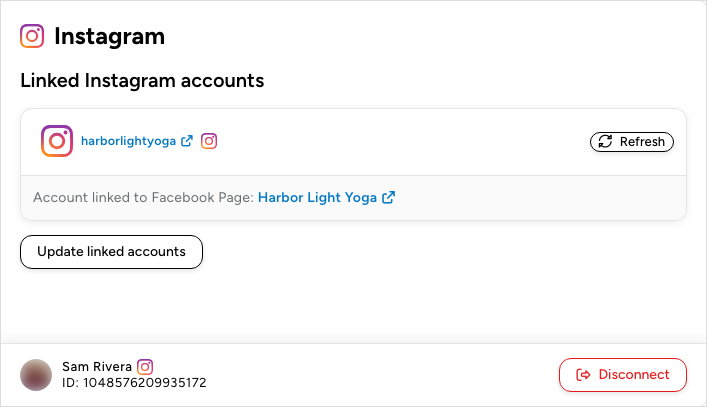
To add pages later, or to allow an Instagram account you skipped, click Update linked accounts and authorize again. If the connection fails with “There was an error connecting to your Instagram account”, repeat the authorization and make sure the box next to the Instagram account is checked.
Important: The Facebook profile you connect must be able to create content on the page, which means Facebook access with the Content task (full or partial control) or task access with the Content task. If the profile has less access, Meta refuses the post and the action reports that the Instagram account was not found. Giving the profile full control of the page is the simplest fix. If the page requires Page Publishing Authorization, complete it in Facebook first.
Until Facebook Pages is connected, the recipe builder’s picker hides Instagram while its Ready-to-use only switch is on; see Finding integrations in the recipe builder.
Publish a photo from a recipe
- Open the recipe at Automator > Recipes, or create one from Automator > Add new recipe, and add its trigger; see Creating a recipe.
- Click the + at the end of the flow. In the picker, search for Instagram, select it, and choose Publish a photo to an Instagram Business account.
- In the Set up step, choose the Instagram account.
- In Image URL or Media library ID, enter the image’s URL or its ID in your media library, or insert a token such as the post’s featured image URL with the ∗ button. The image must be a JPEG file whose name has no spaces; Meta does not accept PNG or other formats, and extended JPEG formats such as MPO and JPS are not supported.
- In Caption, enter the text and hashtags to post with the image. Tokens work here too.
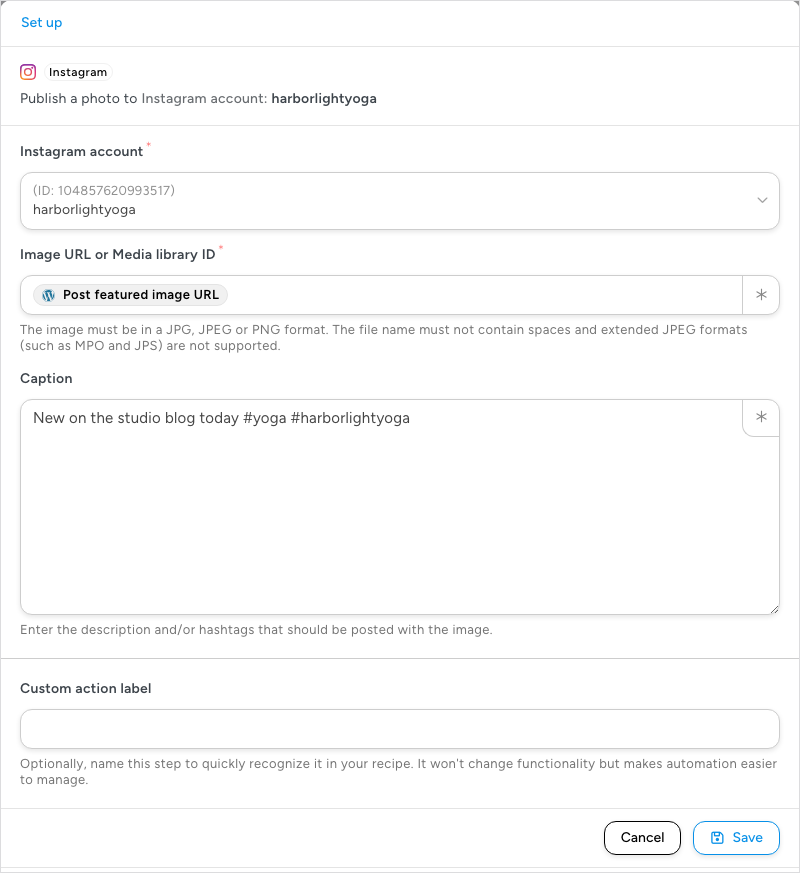
- Click Save.
Make sure the action is On, then switch Recipe on in the top bar. The action returns a Post URL token, so a later action can share or record the link to the new Instagram post.
Note: Meta limits how much one Instagram account can publish through its API: at most 50 posts in any rolling 24-hour period. A caption can have at most 2,200 characters, 30 hashtags and 20 @ mentions.
Related: Facebook Pages, Finding integrations in the recipe builder, Managing actions

Comments (0)