

GoTo Training is an online platform for delivering web-based training sessions. Connecting it to Uncanny Automator lets a recipe register people for a training session, or remove them, when they do something on your site: buy a product, complete a course, register for an event. This article covers creating the OAuth client GoTo needs, connecting your account, and the GoTo Training actions.
If you have Uncanny Automator Lite, you’ll first need to connect your site to a free Uncanny Automator account, which gives you app credits to use with GoTo Training. On a paid plan, app integrations are included. You also need a paid GoTo Training plan.
Create an OAuth client in GoTo
Uncanny Automator connects to GoTo through OAuth, which needs an OAuth client in your GoTo account. You create it once in the GoTo Developer Center; it takes a few minutes. Keep a second browser tab open on your site, because you copy values in both directions.
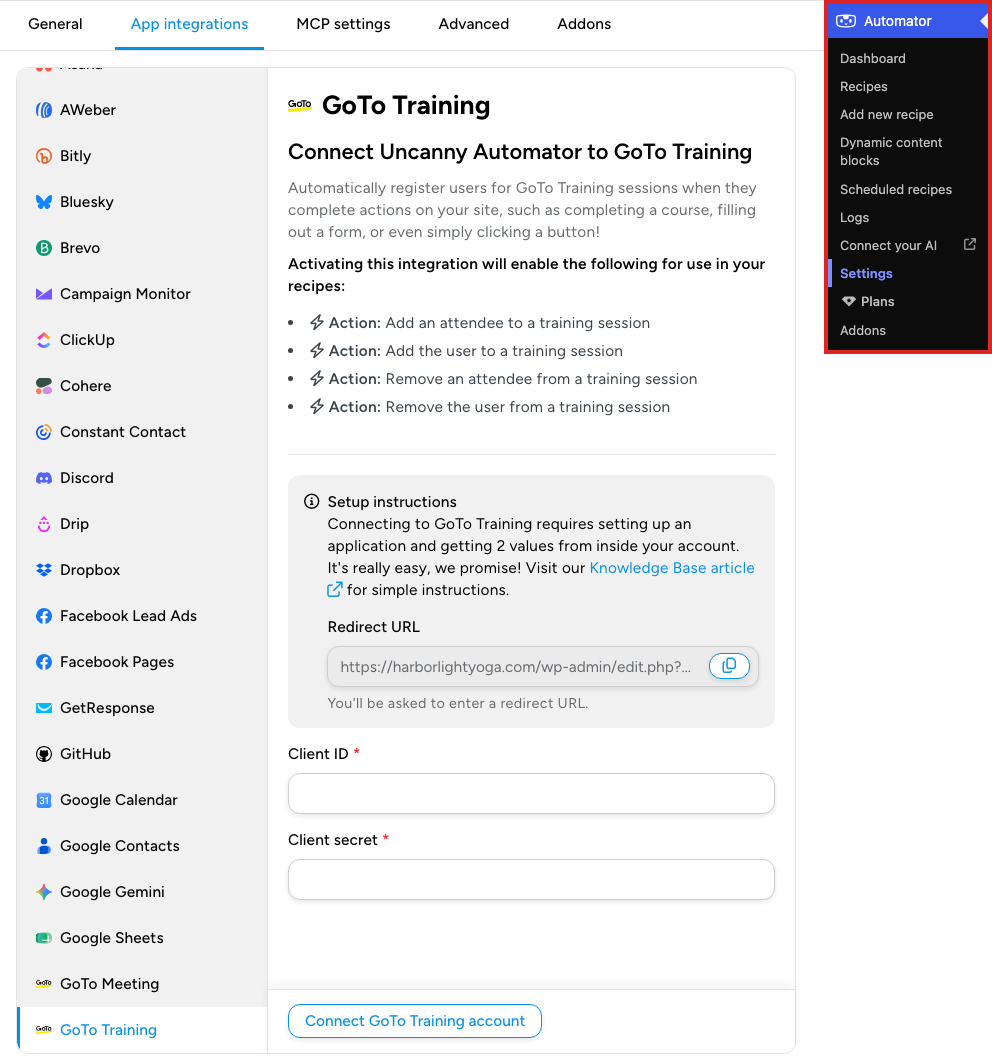
- In your WordPress dashboard, go to Automator > Settings > App integrations and select GoTo Training in the list. Copy the Redirect URL with its copy button.
- In a new tab, go to the GoTo Developer Center and sign in with your GoTo Training account.
- Open OAuth Clients in the menu and click Create a client. If you already have clients, click Create a New Client at the bottom of the list.
- On the Details page, enter any client name and add the Redirect URL from your site as the redirect URI. Click Next.

- On the Scopes page, select the GoToMeeting, GoToWebinar, or GoToTraining scope, then click Save. Uncanny Automator needs no other scope.

- On the Credentials page, copy the client ID and client secret and paste them into the settings page on your site (next section). GoTo shows the client secret only once.
- Back in GoTo, check the box that confirms you have stored the client secret and click Done.

Connect GoTo Training to Uncanny Automator
- On the GoTo Training settings page, paste the values into Client ID and Client secret.
- Click Connect GoTo Training account. GoTo asks you to sign in if needed and to allow access; click Allow. GoTo then returns you to the settings page, which now shows the connected account.
Until GoTo Training is connected, the recipe builder’s picker hides it while Ready-to-use only is switched on; see Finding integrations in the recipe builder.
GoTo Training actions
- Add the user to a training session and Remove the user from a training session act on the WordPress user the recipe runs for.
- Add an attendee to a training session registers anyone by Email, First name, and Last name, with no WordPress user needed. It returns the Join URL, Confirmation URL, and Registrant key as tokens, so a later action can email the join link.
- Remove an attendee from a training session needs the Registrant key that the add action returned.
To add one, open the recipe from Automator > Recipes, click the + at the end of the flow, search the picker for GoTo, and select GoTo Training, then the action. Choose the training session in the Set up step, click Save, and switch Recipe on.
Related: GoTo Webinar, Finding integrations in the recipe builder, Managing actions

Comments (0)