

Telegram is a messaging app for private, real-time conversations, group chats, and channels. The Telegram integration connects a Telegram bot to your WordPress site, so a recipe can send messages through the bot and start when the bot receives a message. Sending and receiving use the same setup: this article covers creating the bot, connecting it, registering your chats and channels, and finding a chat ID.
If you have Uncanny Automator Lite, you’ll first need to connect your site to a free Uncanny Automator account, which gives you app credits to use with Telegram. On a paid plan, app integrations are included.
Once connected, Telegram offers:
- Trigger: A text message is received from a chat/channel. A message comes from Telegram rather than from a logged-in visitor, so the trigger works only in a recipe of the Everyone type (see Recipe types: logged-in users and everyone).
- Action: Send a text message.
Create a Telegram bot
- In Telegram, open the @BotFather bot: search for “BotFather”, or go to t.me/botfather, which opens your Telegram app if it is installed on the device.

- Click Start. BotFather replies with instructions for creating a bot.
- Send the command
/newbot. BotFather walks you through the rest. - Enter a name for the bot. This is the display name people see.
- Enter a username. It must be unique and end with “bot”, for example
Automator_bot.
BotFather confirms the new bot and sends its token, a long secret value, in a message like this:

Important: Store the token somewhere safe. It is the value you enter in Automator to connect the bot.
Connect the bot to Automator
- In your WordPress dashboard, go to Automator > Settings > App integrations > Telegram.
- Paste the token into the Bot secret field.
- Click Connect Telegram account.
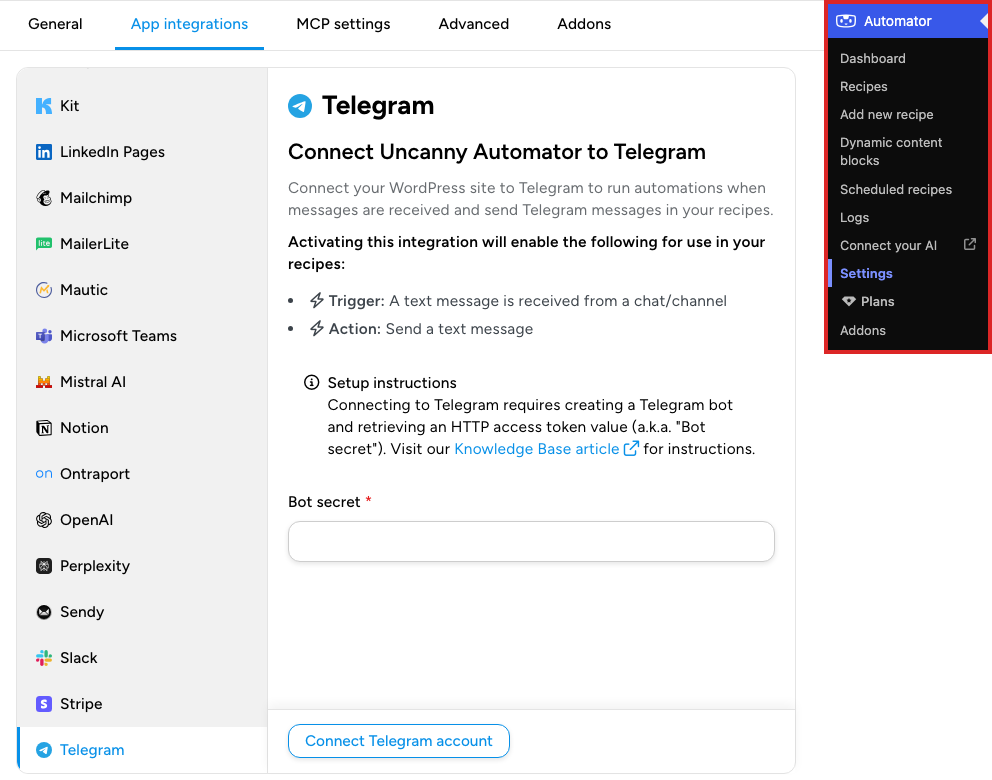
You can connect only a bot that you have read and write access to. Until Telegram is connected, the recipe builder’s picker hides it while its Ready-to-use only switch is on.
Enable webhooks and register your chats
After you connect, the Telegram tab shows an Enable webhooks switch. Turn it on and click Save settings to use the trigger: with webhooks enabled, Telegram sends the bot’s incoming messages to your site, and you can register your chats and channels so they appear in the recipe builder by name.
To register a chat or channel:
- Make sure Enable webhooks is on.
- In Telegram, add your bot to the channel or chat as an admin.
- On the Telegram tab, copy the Registration command under How to Register Your Channel/Chat.
- Paste the command into the channel or chat and send it.
- Click the Register This Channel button the bot posts in reply.
Registered chats and channels are listed under Registered Channels / Chats. If registration buttons or the trigger stop working, click Refresh webhook connection, which registers your site with Telegram again.
Choosing a chat in a recipe
In the trigger, Channel/Chat lists your registered chats and channels, plus Any to start the recipe on a text message from any of them. In the action, Chat/Channel lists the registered chats and channels too, and your bot must be an admin of the chat or channel it sends to.
The action also accepts a custom value: a numeric chat ID, such as -123456789, or a public channel’s username, such as @mychannel. Private channels need the numeric ID.
Find a group chat ID
- Add the bot to the group.
- Open this address in a browser, with your bot’s token in place of
<bot_token>:https://api.telegram.org/bot<bot_token>/getUpdates - In the response, find the
chatobject. Itsidvalue is the chat ID.
Note: Telegram does not return updates from getUpdates while a webhook is set for the bot, so look up the ID before you turn on Enable webhooks, or turn the switch off and save first, or register the chat instead.
Find a user ID
Send /start to @userinfobot in Telegram. It replies with your numeric user ID, which you can use as a custom value in the action.
Related: Recipes for Everyone, Managing tokens, Finding integrations in the recipe builder

Comments (0)