

The Slack integration posts messages from your WordPress site to Slack: a channel message when someone buys a product, a direct message to a colleague when a form needs follow-up, a new channel for each cohort. Connecting Slack lets a recipe use four actions: Send a message to a channel, Send a direct message to a Slack user, Create a channel, and Add users to a channel. This article covers connecting your workspace, adding the Uncanny Automator app to your channels, and adding a Slack action to a recipe.
If you have Uncanny Automator Lite, you’ll first need to connect your site to a free Uncanny Automator account, which gives you app credits to use with Slack. On a paid plan, app integrations are included.
Connect your site to Slack
- In your WordPress dashboard, go to Automator > Settings > App integrations and select Slack in the list.
- Click Connect Slack account.
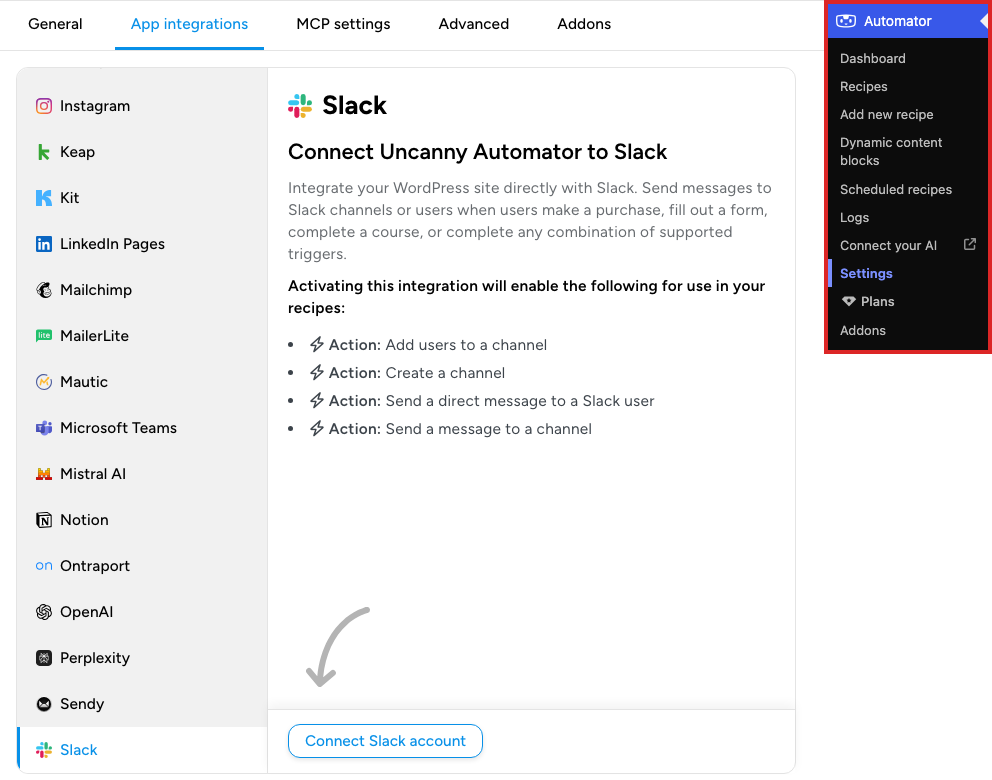
- Sign in to Slack if asked and choose the workspace. Slack shows the permissions Uncanny Automator is requesting.

- Click Allow. You return to the Slack settings page, which now shows the connected workspace.
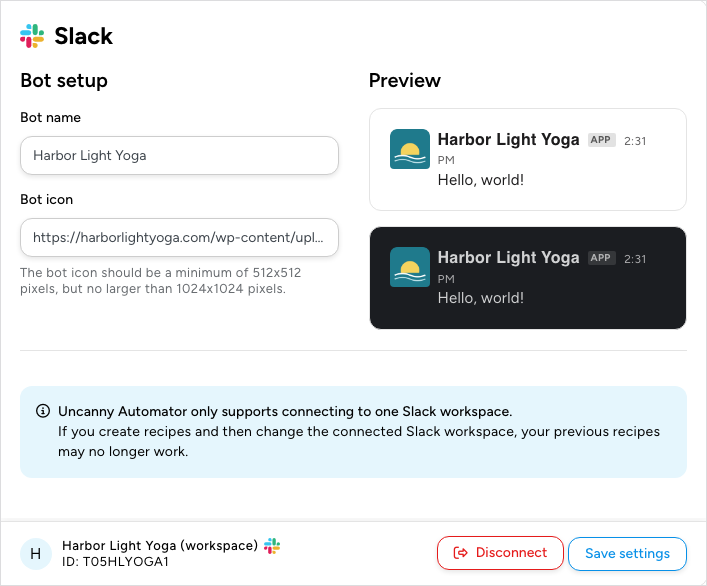
Uncanny Automator connects to one Slack workspace at a time. If you build recipes and later change the connected workspace, those recipes may stop working.
Set the bot name and icon
Once connected, the settings page shows Bot setup. Bot name and Bot icon are what your team sees as the sender when the site posts a message; the preview beside the fields shows the result. The icon is the URL of an image between 512 x 512 and 1024 x 1024 pixels. Leave both fields empty to post as Uncanny Automator with the default icon. Click Save settings when you change them.
Add the Uncanny Automator app to your channels
Slack lets an app post only in channels it has been added to, so add Uncanny Automator to every channel a recipe will post in. In Slack, for each channel:
- Open the channel and click the channel name in the header to open its details.
- Open the Agents & apps tab.
- Click Add Agent or App, or Add more if the channel already has apps.
- Click Add beside Uncanny Automator.

Add a Slack action to a recipe
- Go to Automator > Add new recipe, choose the recipe type, and click Confirm, or open an existing recipe from Automator > Recipes.
- Add the triggers that should send the message.
- Click the + at the end of the flow. The picker opens on its Integration step.
- Search for Slack and select it. With Ready-to-use only switched on, Slack is listed only after you have connected a workspace; see Finding integrations in the recipe builder.
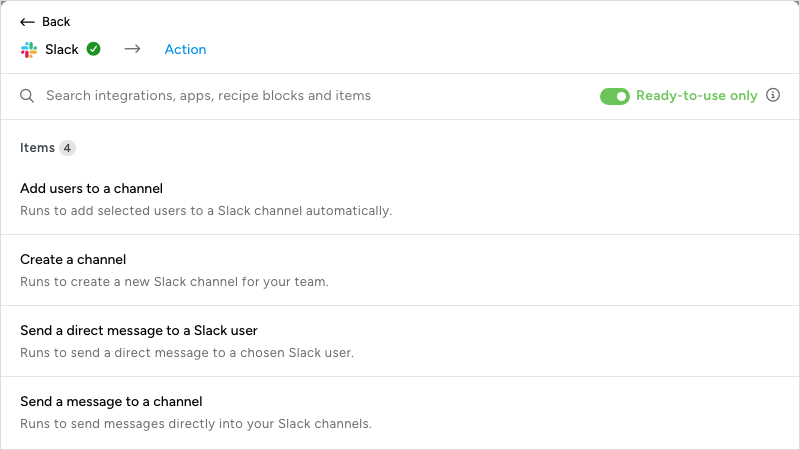
- Choose the action, for example Send a message to a channel.
- In the Set up step, choose the Channel (or the user, for a direct message) and write the Message, which supports Markdown. The bot must already be in the channel you choose. Bot name and Bot icon let this one action post under a different name or icon from the one on the settings page. Insert tokens from your triggers (the product name, the user’s display name) with the ∗ button at the end of a field so each message carries the data from the event that fired. Click Save.
Switch Recipe on in the top bar and the recipe posts to Slack each time its triggers complete.
Related: Finding integrations in the recipe builder, Managing actions, Managing tokens

Comments (0)