

The Mailchimp integration keeps your Mailchimp audiences in step with what people do on your WordPress site: add a new member to an audience, tag a customer after a purchase, add a note to a contact, or create and send a campaign when a new post is published. This article covers connecting your Mailchimp account and adding Mailchimp actions to a recipe. To start a recipe from Mailchimp instead, see Mailchimp triggers.
If you have Uncanny Automator Lite, you’ll first need to connect your site to a free Uncanny Automator account, which gives you app credits to use with Mailchimp. On a paid plan, app integrations are included.
Connect your Mailchimp account
- In your WordPress dashboard, go to Automator > Settings > App integrations and select Mailchimp in the list.
- Click Connect Mailchimp account.
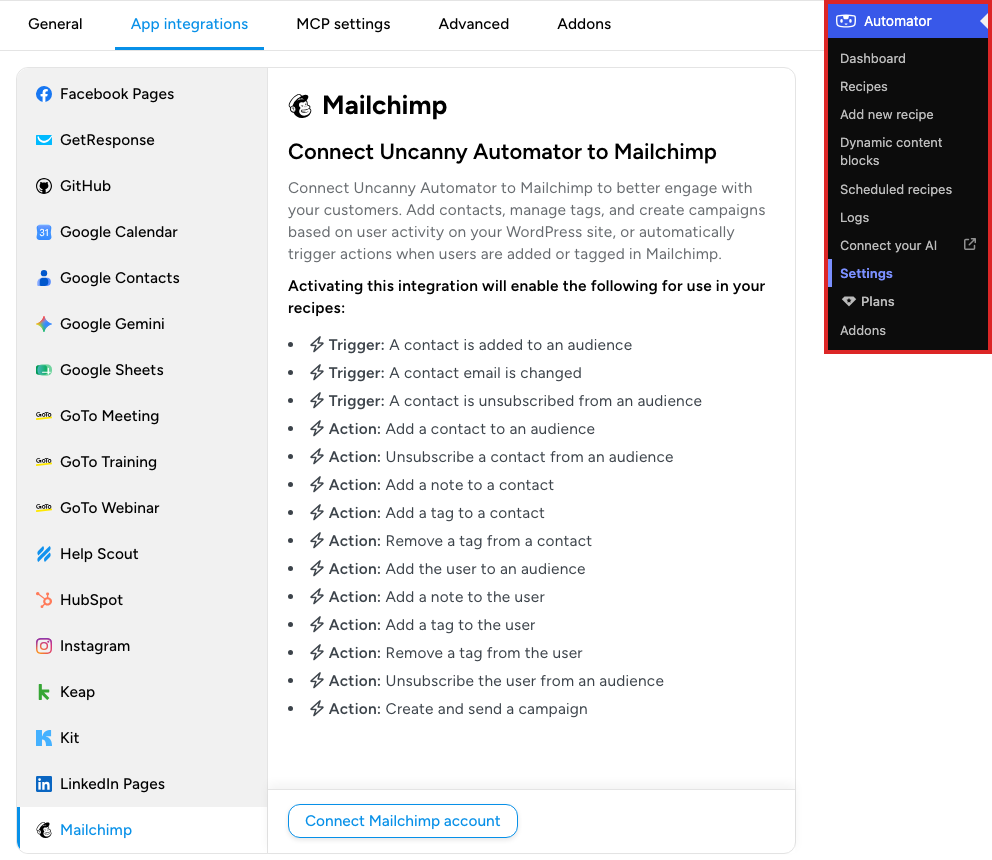
- Sign in to Mailchimp if asked. Mailchimp asks you to authorize Uncanny Automator to access your account.

- Click Allow. You return to the Mailchimp settings page, which now shows the connected account.
Uncanny Automator connects to one Mailchimp account at a time. The Enable triggers switch on the same page is needed only for Mailchimp triggers; actions work without it.
Until Mailchimp is connected, the recipe builder’s picker hides it while Ready-to-use only is switched on; see Finding integrations in the recipe builder.
Mailchimp actions
Most actions come in two forms. The form for the user acts on the WordPress user the recipe runs for. The form for a contact acts on an email address you type or insert as a token, and needs no WordPress user, so it suits recipes for Everyone, such as a form that visitors submit without logging in.
- Add the user to an audience / Add a contact to an audience
- Unsubscribe the user from an audience / Unsubscribe a contact from an audience
- Add a tag to the user / Add a tag to a contact
- Remove a tag from the user / Remove a tag from a contact
- Add a note to the user / Add a note to a contact
- Create and send a campaign
Add a Mailchimp action to a recipe
- Open the recipe at Automator > Recipes, or create one from Automator > Add new recipe, and add its trigger; see Creating a recipe.
- Click the + at the end of the flow. In the picker, search for Mailchimp, select it, then select the action.
- In the Set up step, choose the audience and fill in the fields. Add a tag to the user, for example, needs an Audience and a Tag; if one you created recently is missing, click Refresh options next to the field. The audience actions also offer Double opt-in, Update existing, Change groups?, Groups, Language code, and Merge fields. Use the ∗ button at the end of a field to insert a token from the trigger, such as the email address from a form submission.
- Click Save.
- Switch Recipe on in the top bar. The recipe updates Mailchimp each time its triggers complete.
Things to know
- A tag can be added only to someone who is already in a Mailchimp audience. If you are not sure the person will be in the audience when the recipe runs, add Add the user to an audience (or Add a contact to an audience) as an earlier action in the same recipe.
- The Merge fields list shows every merge field of the selected audience, with an address field split into its parts. Enter each value as text in the format Mailchimp expects: a date as YYYY-MM-DD, a birthday as MM/DD, and a dropdown or radio field as exactly one of the options set in Mailchimp. Checkbox choices are not merge fields in Mailchimp; use Groups for them.
- In Create and send a campaign, leaving Segment or Tag empty sends the campaign to the entire audience, and the From email address must be on a domain verified in Mailchimp. Choosing a Template makes the action ignore the Email content field.
- Templates must be built with Mailchimp’s legacy builder, because Mailchimp’s API does not fully support templates from the new builder. Mailchimp also refuses to send an email that still has default placeholder content, so replace it in the template first.
Related: Mailchimp triggers, Finding integrations in the recipe builder, Managing actions, Managing tokens


Comments (0)