

The Google Sheets integration writes to your spreadsheets from your WordPress site: a new row for every form submission or purchase, or an update to an existing row when a user’s details change. Once Google Sheets is connected, two actions appear under Google Sheets in the recipe builder: Create a row in a Google Sheet and Update a row in a Google Sheet. This article covers connecting your Google account, choosing the spreadsheets Uncanny Automator can use, and setting up both actions. To start a recipe from a spreadsheet instead, see Google Sheets Webhook Addon.
If you have Uncanny Automator Lite, you’ll first need to connect your site to a free Uncanny Automator account, which gives you app credits to use with Google Sheets. On a paid plan, app integrations are included.
Connect your Google account
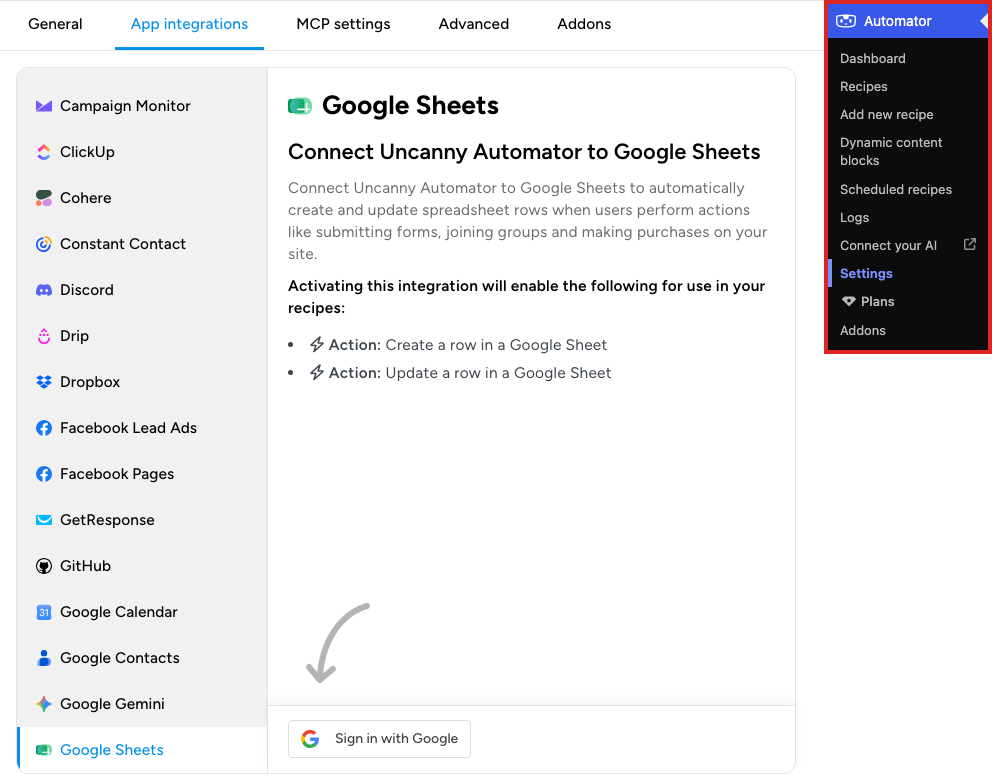
- In your WordPress dashboard, go to Automator > Settings > App integrations and select Google Sheets in the list.
- Click Sign in with Google and choose the Google account that owns or can edit your spreadsheets.
- In Google’s list of permissions, make sure every box is checked, then click Continue. The last two boxes are sometimes unchecked by default; without them the connection fails with “Required permissions not granted.”
- Back on the Google Sheets settings page, click Select new sheet(s).
- In the file picker, select the spreadsheets you want to use in recipes. Hold down Shift to select several sheets, or Ctrl (Cmd on a Mac) to pick specific ones.
Only the spreadsheets listed under Linked spreadsheets appear in the actions, and you can link only spreadsheets you have read and write access to. To add more later, click Select new sheet(s) again; to stop using one, click its Remove button.
Uncanny Automator connects to one Google account at a time. If you build recipes and later connect a different account, those recipes may stop working, because their spreadsheets belong to the old account. Until Google Sheets is connected, the recipe builder’s picker hides it while Ready-to-use only is switched on.
Note: If you connected Google Sheets before Uncanny Automator 5.8 (mid-2024) and have not reconnected since, sign in with Google again and reselect your spreadsheets. Google tightened its Google Drive permissions at that time, and older connections no longer work.
Create a row in a Google Sheet
- Open the recipe at Automator > Recipes, or create one from Automator > Add new recipe, and add its trigger; see Creating a recipe.
- Click the + at the end of the flow. In the picker, search for Google Sheets, select it, then select Create a row in a Google Sheet.
- Choose the Spreadsheet and the Worksheet. Together they decide where the row is added and which columns are available. If a spreadsheet is missing from the list, link it on the settings page first.
- The Row table lists the worksheet’s columns under Column. For each column you want to fill, enter a Value. In most recipes the value is a token: click the ∗ button at the end of the field and choose data from the trigger, such as a form field or the user’s email address.
- Click Save.
- Make sure the action and the trigger are On, then switch Recipe on in the top bar.
The action adds values to the worksheet’s existing columns; it cannot add or remove columns. If you add, remove, or reorder columns in Google Sheets later, open the action again and update it.
Update a row in a Google Sheet
This action finds a row by a value in one column, then changes cells in that row. For example, if the worksheet has a Title column and the row to change has “Uncanny Automator” in it, set Column search to Title and Match value to Uncanny Automator.
- Add the action as above, choosing Update a row in a Google Sheet in the picker.
- Choose the Spreadsheet and the Worksheet.
- In Column search, choose the column that identifies the row.
- In Match value, enter the value to look for in that column. It can be a token, such as the email address of the user who triggered the recipe.
- In the Row table, switch on Update? for each column to change, and enter its new Value. No column is updated until you switch it on; you can update one column or all of them, including the search column.
- By default only the first matching row is updated. Select If multiple matches are found, update all matching rows instead of the first matching row only. when every matching row should change.
- Click Save, then make sure the action is On and switch Recipe on.
Tips and troubleshooting
- If you are connected but the spreadsheet or worksheet lists in an action stay empty, it is usually a permissions problem. Disconnect, sign in with Google again, and check every box on the permissions screen.
- Give every column a header. Renaming a header is fine; removing one that a recipe uses is not.
- Avoid changing worksheet or column names after a recipe is on. If you do, open the action, choose the worksheet again, and check the column mapping.
- Start worksheet and file names with at least four letters. Google Sheets has trouble with names that start with fewer: TE12 and AXB123 may fail, while TEIR12 and AXBC1 work.
- Do not use quotation marks in column headers.
- New rows go into the first empty row from the top. A row that holds anything at all, even a single space or comma, counts as used, so the action moves on to the next empty one.
- To review or change what Uncanny Automator may access in your Google account, see Google’s help article on third-party access.
Related: Google Sheets Webhook Addon, Finding integrations in the recipe builder, Managing tokens, Managing actions

Comments (0)