

The LinkedIn Pages integration publishes posts to LinkedIn from activity on your WordPress site: share each new blog post, congratulate users who earn an achievement, or announce new products and courses when they go live. This article covers connecting your LinkedIn account and adding a LinkedIn action to a recipe.
If you have Uncanny Automator Lite, you’ll first need to connect your site to a free Uncanny Automator account, which gives you app credits to use with LinkedIn. On a paid plan, app integrations are included.
Once connected, these actions appear under LinkedIn Pages in the recipe builder:
- Publish a post to a LinkedIn page
- Publish a post with an image to a LinkedIn page
- Schedule a post on a LinkedIn page
Connect your LinkedIn account
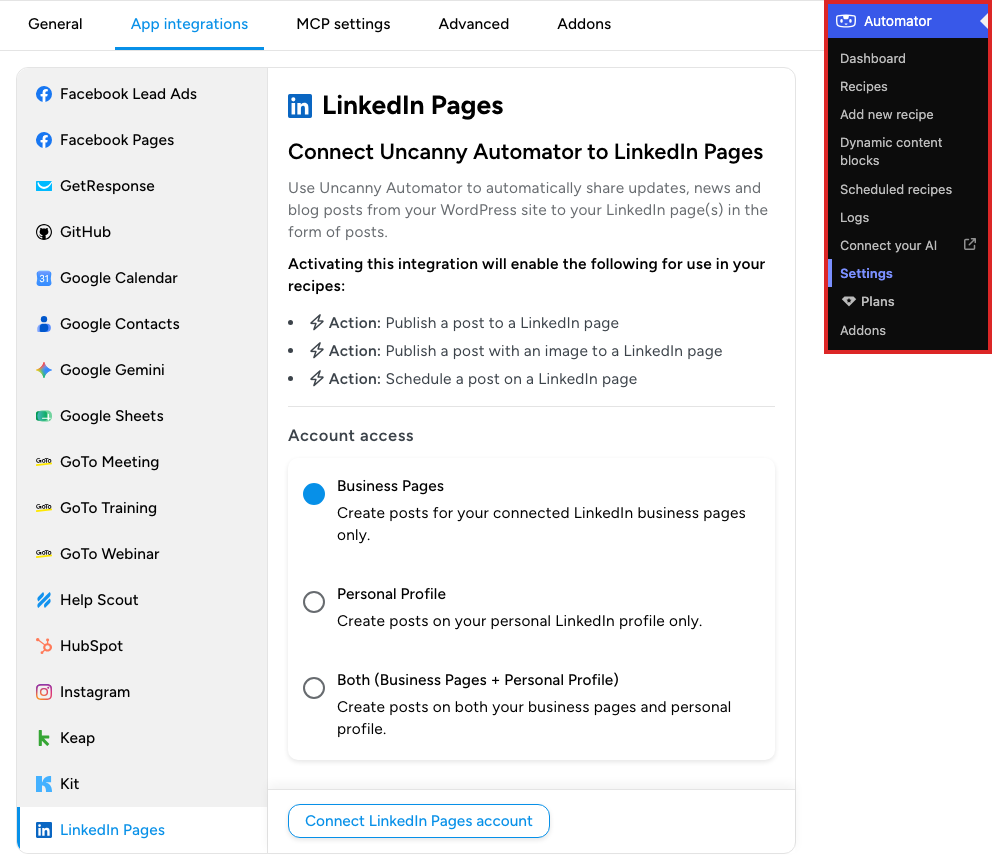
- In your WordPress dashboard, go to Automator > Settings > App integrations and select LinkedIn Pages in the list.
- Under Account access, choose where your recipes can post:
- Business Pages — the LinkedIn pages you manage. This option is selected until you change it.
- Personal Profile — your own LinkedIn profile only.
- Both (Business Pages + Personal Profile) — your pages and your profile.
- Click Connect LinkedIn Pages account.
- Sign in to LinkedIn if asked, then click Allow on the LinkedIn permissions page to let Uncanny Automator post on your behalf.

- LinkedIn returns you to the LinkedIn Pages settings page, which now shows the connected account.
Uncanny Automator connects to one LinkedIn account at a time. If you create recipes and then change the connected account, those recipes may stop working. To change Account access later, select a different option and click Update connection; LinkedIn asks you to authorize Uncanny Automator again.
LinkedIn connections expire. Uncanny Automator shows a “LinkedIn connection expires soon” notice before that happens; click its reauthorize link to keep your LinkedIn actions running.
Until an account is connected, the recipe builder’s picker hides LinkedIn Pages while its Ready-to-use only switch is on; see Finding integrations in the recipe builder.
Publish a post
- Open the recipe at Automator > Recipes, or create one from Automator > Add new recipe, and add its trigger; see Creating a recipe.
- Click the + at the end of the flow. In the picker, search for LinkedIn and select LinkedIn Pages.
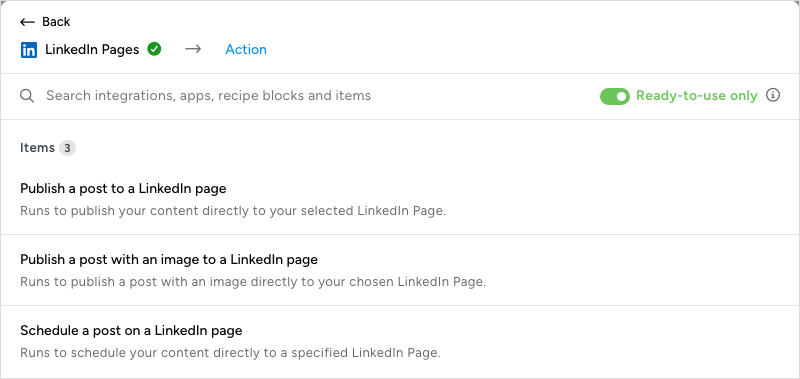
- Choose Publish a post to a LinkedIn page.
- In the Set up step, choose the LinkedIn Page to post to. The list shows the pages you have administrative access to, your personal profile, or both, depending on the Account access you chose. If the field reads “Unable to find any LinkedIn page with administrative access. Please try again later.”, the connected LinkedIn account is not an admin of any page: connect an account that administers the page, or change Account access to include your personal profile.
- Write the post in Message. Insert tokens with the ∗ button at the end of the field (the post title, its URL, the user’s name) so each post carries the data from the event that fired.
- Click Save.
Make sure the action is On, then switch Recipe on in the top bar. The recipe posts to LinkedIn each time its triggers complete.
The other two actions work the same way, with these differences:
- Publish a post with an image to a LinkedIn page — adds Image URL or Media library ID, and the post text goes in Content. The image must be a JPG, JPEG, or PNG file whose name has no spaces; extended JPEG formats such as MPO and JPS are not supported.
- Schedule a post on a LinkedIn page — adds When to publish. Enter a number of days from now (for example,
3), a date and time in the form2026-03-15 09:00, or a Unix timestamp. Dates use your site’s timezone and must be in the future. Your site holds the post and publishes it at that time.
Important: LinkedIn limits posts to 3,000 characters. Make sure the text and tokens you send stay under that limit.
Related: Finding integrations in the recipe builder, Managing actions, Managing tokens


Comments (0)