

Connecting ActiveCampaign to Uncanny Automator lets a recipe add contacts to ActiveCampaign, add them to lists, and tag them when people do things on your WordPress site: submit a form, buy a product, complete a course. This article covers the connection and the ActiveCampaign actions. For starting a recipe from ActiveCampaign, see ActiveCampaign triggers.
If you have Uncanny Automator Lite, you’ll first need to connect your site to a free Uncanny Automator account, which gives you app credits to use with ActiveCampaign. On a paid plan, app integrations are included.
Connecting your ActiveCampaign account
ActiveCampaign connects with an API URL and an API key from your ActiveCampaign account.
- In ActiveCampaign, click Settings in the left navigation, then Developer. The Developer Settings page shows your API URL and API Key; ActiveCampaign’s guide is Getting started with the API.
- In your WordPress dashboard, go to Automator > Settings > App integrations and select ActiveCampaign in the list of apps.
- Paste the two values into API URL and API key, then click Connect ActiveCampaign account.
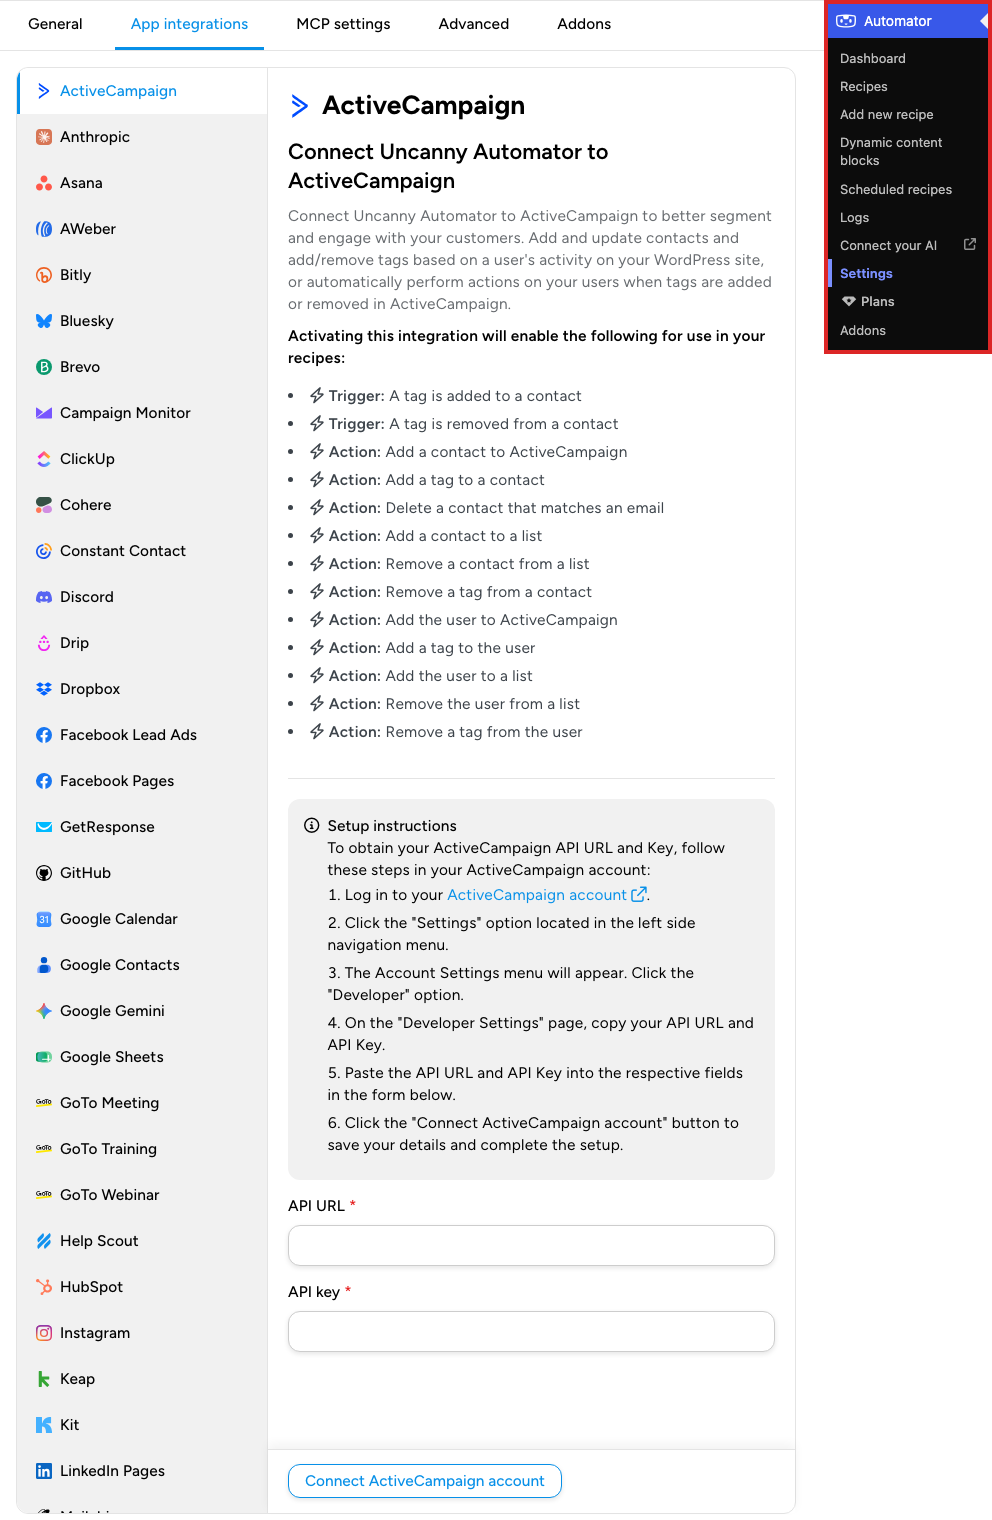
Once connected, the panel shows the ActiveCampaign Data that Uncanny Automator has loaded for your recipes: Tags, Lists, and Custom contact fields, each with its own Refresh button. If you create a new tag, list, or field in ActiveCampaign and it does not appear in an action, click the matching Refresh button to reload that data.
Until ActiveCampaign is connected, the recipe builder’s picker hides it while Ready-to-use only is on. Connect the account first, then build the recipe; see Finding integrations in the recipe builder.
Adding an ActiveCampaign action
- Open the recipe at Automator > Recipes, or create one from Automator > Add new recipe, and add its trigger; see Creating a recipe.
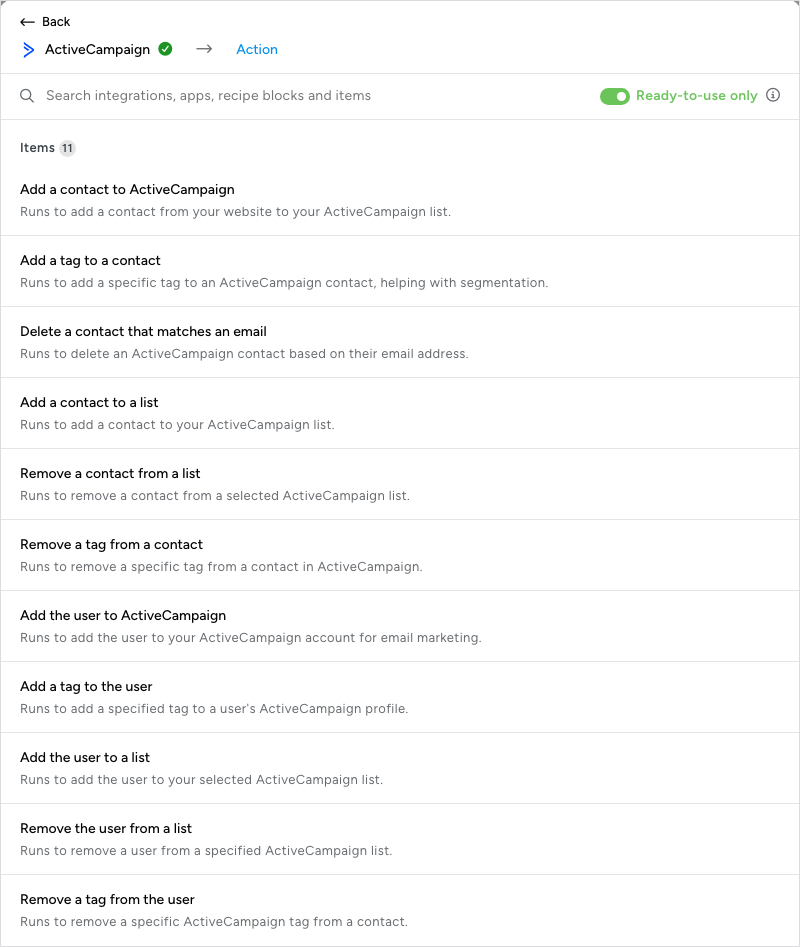
- Click the + at the end of the flow. In the picker, type ActiveCampaign in the search box and select ActiveCampaign, then the action. Most actions come in two forms: one for the user, which acts on the WordPress user the recipe runs for, and one for a contact, which acts on an email address you enter or insert as a token:
- Add the user to ActiveCampaign / Add a contact to ActiveCampaign — creates the contact.
- Add the user to a list / Add a contact to a list, and Remove the user from a list / Remove a contact from a list.
- Add a tag to the user / Add a tag to a contact, and Remove a tag from the user / Remove a tag from a contact.
- Delete a contact that matches an email — deletes the ActiveCampaign contact with the email address you enter. This action has a contact form only.
- In the Set up step, fill in the fields. In Add a tag to a contact, select the tag in Tag, then fill in Email. Lists and tags come from the data loaded on the settings page; if one you just created is missing, click Refresh options next to the field. For a contact action, use the ∗ button at the end of the Email field to insert a token, such as the user’s email or the email address from a form submission.
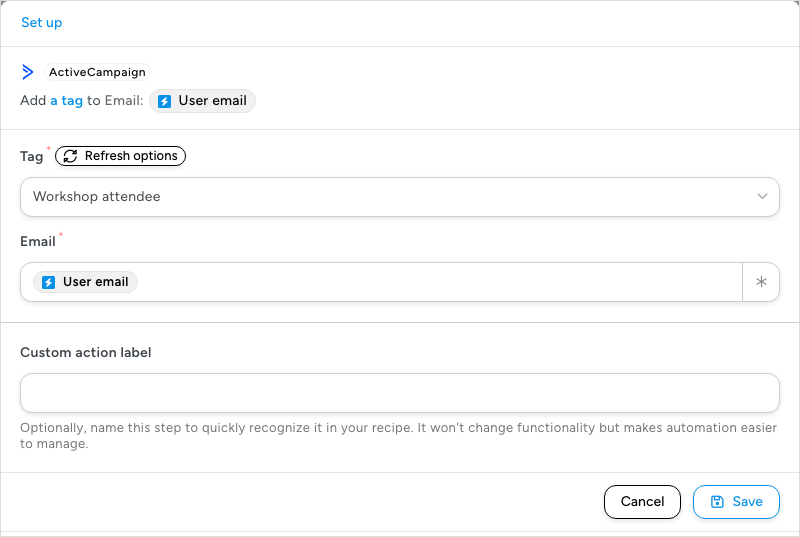
- Click Save.
- Switch Recipe on in the top bar.
Note: A contact must exist in ActiveCampaign before a tag or a list can be applied to it. If you are not sure the contact will already be there when the recipe runs, add Add a contact to ActiveCampaign (or Add the user to ActiveCampaign) as an earlier action in the same recipe.
Related: ActiveCampaign triggers, Finding integrations in the recipe builder, Managing actions


Comments (0)