

The Stripe integration works in both directions: a recipe can start when something happens in your Stripe account (a payment, a refund, a subscription change), and a recipe can create customers, payment links, and invoices in Stripe from activity on your WordPress site. This article covers connecting Stripe and lists what the integration can do.
If you have Uncanny Automator Lite, you’ll first need to connect your site to a free Uncanny Automator account, which gives you app credits to use with Stripe. On a paid plan, app integrations are included.
Connect Stripe
- Install and activate Uncanny Automator on your site.
- In your WordPress dashboard, go to Automator > Settings > App integrations > Stripe.
- To connect a Stripe test account instead of your live account, switch on Enable test mode, beside the Connect Stripe button, before you connect. The switch then reads Disable test mode and the button becomes Connect Stripe in test mode. A test-mode connection shows “(Test mode)” before the account name and the notice “Connected in test mode”.
- Click Connect Stripe (or Connect Stripe in test mode). Stripe walks you through signing in and authorizing Uncanny Automator, then returns you to the settings page with the account connected.
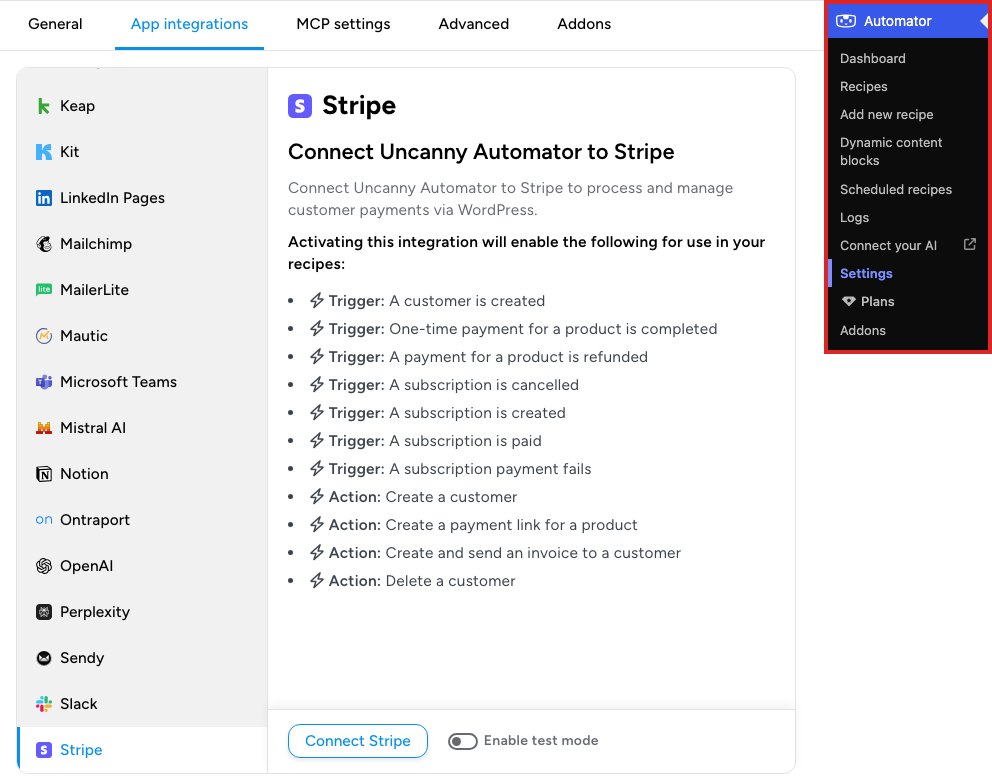
Until an account is connected, the recipe builder’s picker hides Stripe while its Ready-to-use only switch is on.
Triggers
These events in your Stripe account can start a recipe:
- A customer is created
- One-time payment for a product is completed
- A payment for a product is refunded
- A subscription is cancelled
- A subscription is created
- A subscription is paid
- A subscription payment fails
Stripe events are not tied to a logged-in WordPress user, so these triggers work only in a recipe for Everyone. In a recipe for logged-in users, the picker disables them with the note “This trigger runs for everyone and cannot be used in a recipe for logged-in users.” See Recipes for Everyone for how such a recipe picks the user its actions run for.
Actions
A recipe can do these things in Stripe:
- Create a customer
- Create a payment link for a product
- Create and send an invoice to a customer
- Delete a customer
To add one, click the + at the end of the recipe’s flow, search for Stripe in the picker, select the action, fill in its fields in the Set up step, and click Save.
Example recipes
- When a payment is completed in Stripe, add a tag to the customer in your CRM.
- When a subscription is cancelled in Stripe, unenroll the user from a course or remove them from a membership level.
- When a user registers on your site or submits a form, create a Stripe customer and a payment link.
- When a subscription payment fails, post a notification in Slack or add a row to Google Sheets or Airtable.
- When a customer is created in Stripe, create a matching WordPress user and send them an email.
Related: Recipes for Everyone, Creating a recipe, Finding integrations in the recipe builder

Comments (0)