These post-course automations turn LearnDash course completions into a growth stream—for your learners and your…
Auto Post From WordPress to Social Media: Facebook, Instagram, X, and More
Promoting your newly published blog posts on social networking sites like Facebook, LinkedIn and X/Twitter can bring a lot of traffic to your website. That’s why almost all bloggers do it.
However, with so many social media platforms out there, it can be a time-consuming task to share every blog post manually.
That’s why you’ve probably been asking yourself, “Is there a way to automate the process of sharing content to different social platforms?” The answer, in case you haven’t guessed it yet, is “Yes! You can automatically push your new WordPress content out to social media with the Uncanny Automator plugin.”
In this article, we’ll share the step-by-step process of automatically sharing new WordPress posts to Facebook, X/Twitter, Instagram and more. Whether it’s blog posts, products, courses or pages; if you can publish it on WordPress, we’ll show you how to share it on social media.
Towards the end of this post, we’ll show you some pro tips and tricks for using Automator to boost your social media engagement and grow your audience. Did someone ask for AI-optimized hashtags and tweets?! But that’s enough of a tease for now.
Let’s get started.
7 Very Compelling Reasons Why You Should Automatically Post From WordPress to Social Media
Sharing your WordPress blog posts on social media platforms like Facebook, Instagram, LinkedIn, and X/Twitter is essential for maximizing your reach and engagement. Automating this process not only saves you time but also ensures consistency and efficiency in your social media strategy.
Here are some key benefits of automatically sharing your blog posts on social media:
1. Increase Reach and Engagement
Nearly 63% of the world’s population uses social media. And, on average, they spend more than two hours each day on various platforms. That’s a lot of potentially very attentive eyeballs. While not every one of those eyeballs falls into your market, you can bet that, with the ubiquity of social media, your key demo is there. By automatically sharing your blog posts on social media, you can tap into that wider market.
This increased visibility can lead to higher engagement rates, with more likes, shares, and comments on your posts.
2. Save Time and Effort
Manually sharing your blog posts across multiple social media platforms can be time-consuming and repetitive. Automation eliminates this hassle, allowing you to focus on creating high-quality content while Uncanny Automator takes care of the distribution. With just a few clicks, you can create recipes to schedule and share your posts without lifting a finger.
3. Maintain Consistency
Posting consistently is key to building a strong online presence. By automating your social media sharing, you can ensure that your posts go out at optimal times and regular intervals across various platforms. A regular posting will help you build trust and legitimacy with your followers and keep them engaged.
4. Optimize for Each Platform
Different social media platforms have unique requirements and best practices for content. With Uncanny Automator, you can customize your posts for each platform, ensuring that your content is optimized for maximum impact. Tailor your messages, hashtags, and images to suit the preferences of each platform’s audience.
5. Track Performance and Insights
Automated sharing allows you to easily track the performance of your social media posts. By integrating your blog with analytics tools, you can monitor engagement metrics, such as likes, shares, comments, and clicks. These insights help you understand what resonates with your audience and refine your content strategy accordingly.
6. Enhance SEO
Social media shares can indirectly boost your search engine optimization (SEO) efforts. When your blog posts are shared widely on social media, they generate more traffic and backlinks to your website, which can positively impact your search engine rankings. The more your content is shared, the higher its chances of appearing in search results.
7. Drive More Traffic to Your Website
Each social media post that links back to your blog can drive significant traffic to your website. By consistently sharing your content on multiple platforms, you create multiple entry points for users to discover your site, explore your content, and engage with your brand.
In conclusion, automating the sharing of your WordPress blog posts on social media is a powerful strategy to amplify your reach, save time, and maintain a consistent online presence. Uncanny Automator makes this process seamless, allowing you to focus on what you do best; creating compelling content.
Why Use Automator to Post to Social
Uncanny Automator is the #1 automation and integration tool for WordPress websites. And, with some key features that we’ll show you later on, it can also be the best tool for sharing your WordPress content on social media.

Using simple combinations of triggers and actions called recipes, you can easily connect your favorite apps and plugins. For example, the trigger A user publishes a post can set off an action to Post a tweet to X/Twitter. That’s just the tip of the iceberg though.
Automator features like tokens, delays and filters allow you to customize your content and take control of your posting scheduling.
Connecting your social media accounts to your WordPress website is easy with Uncanny Automator as we’ll show you in the following sections of this walkthrough.
Want to try Automator for FREE? Download the free version here and register your account to receive a limited number of complimentary app credits.
Once you’re convinced that Automator is the best social media manager you could ask for, grab an Automator Pro license and post as much as you want>>>.
Now that you have some app credits or an Automator Pro license, let’s take a look at sharing our latest content across our various social media platforms.
How to Share WordPress Blog Posts to Facebook
If your primary market spends most of their online time on Facebook, you’ll love how easy this recipe makes it to share your latest content with them.
Follow these steps to recreate the recipe pictured above and make it your own.
(Note: You will need a Meta Business Suite account and an existing Business Page to complete this integration.)
Step 1: Create a New Recipe
From your WordPress Admin Dashboard, navigate to Automator > Add new recipe. In the pop-up window that appears, select Logged-in users.

Step 2: Name Your Recipe
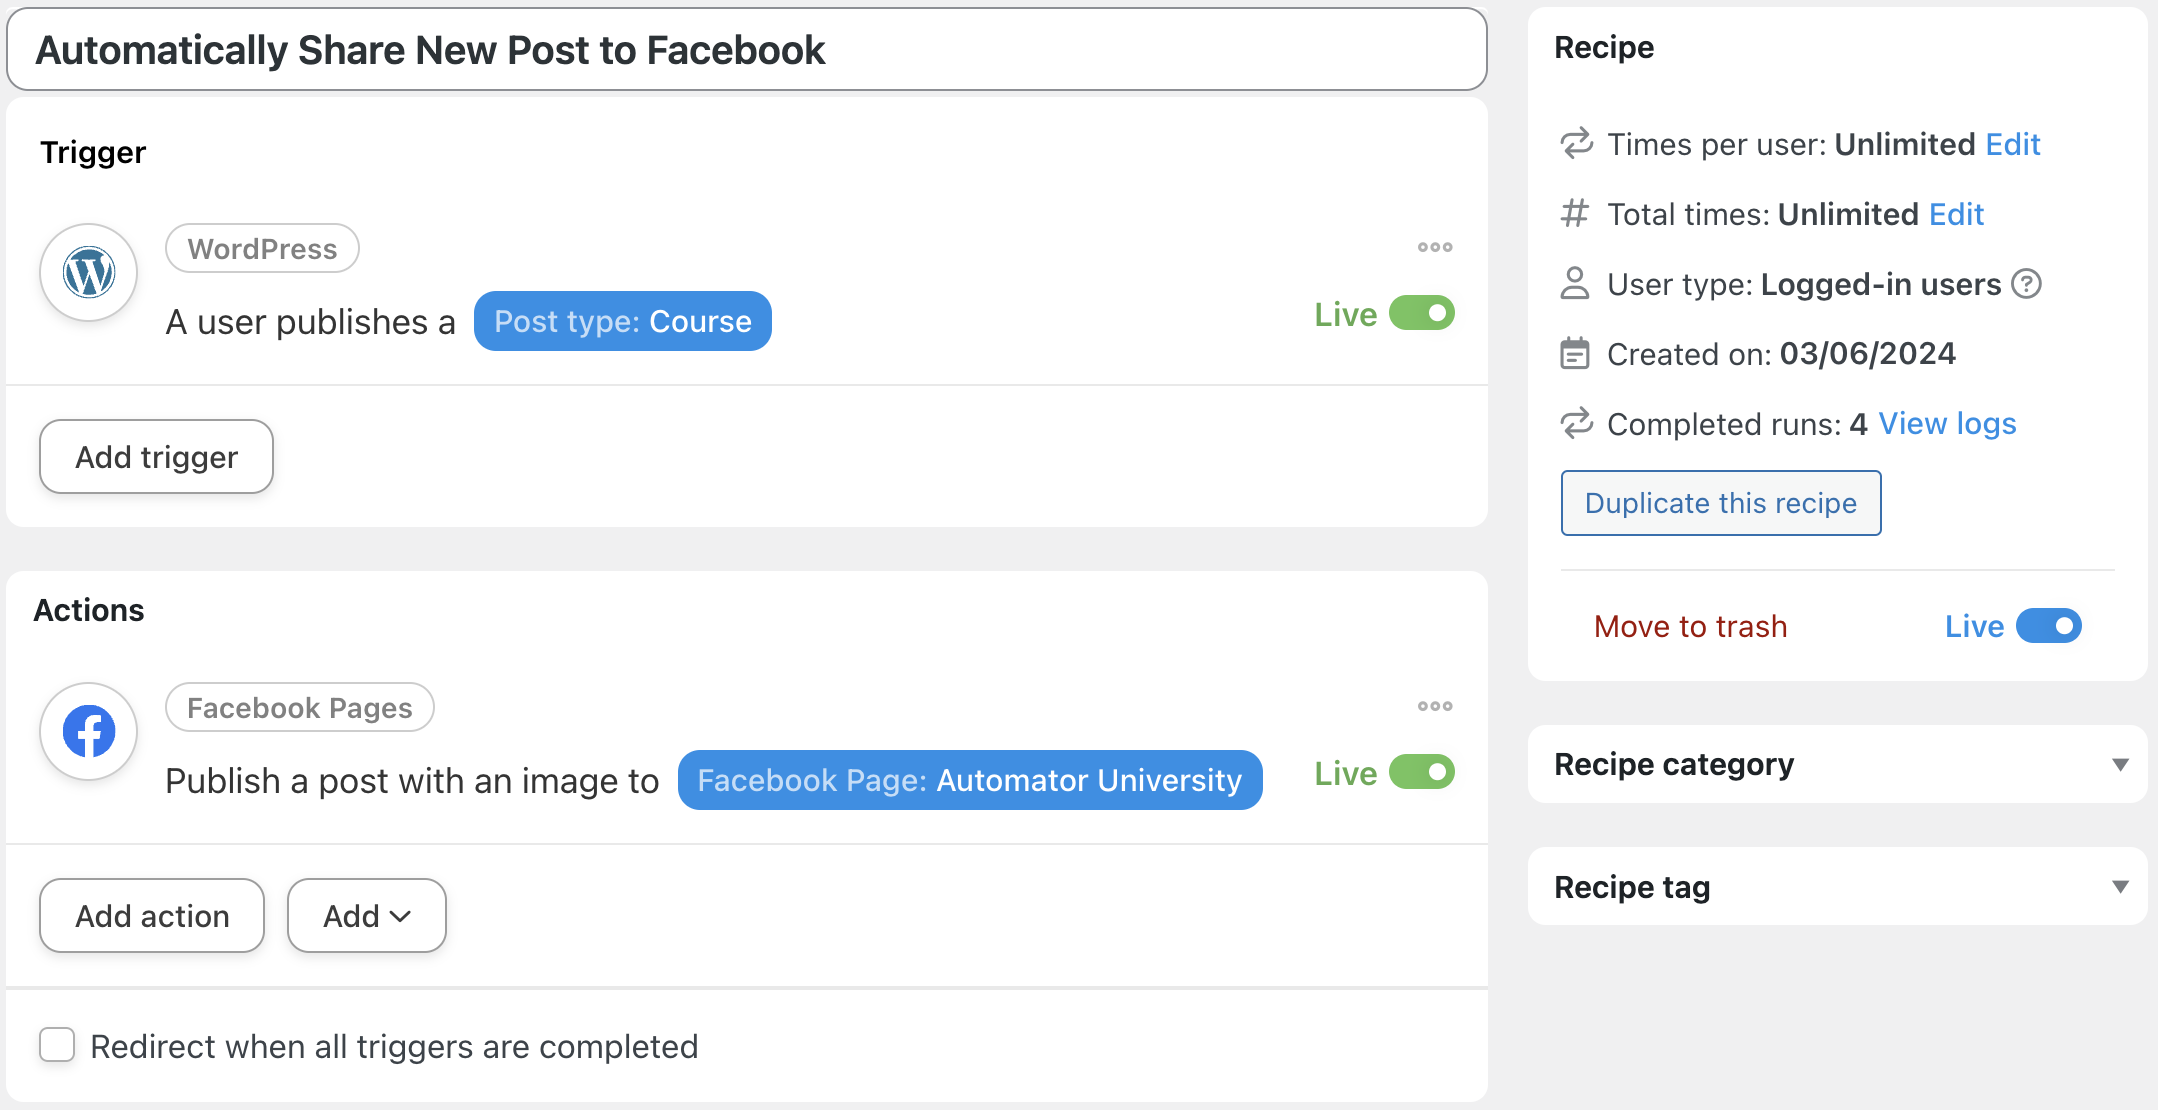
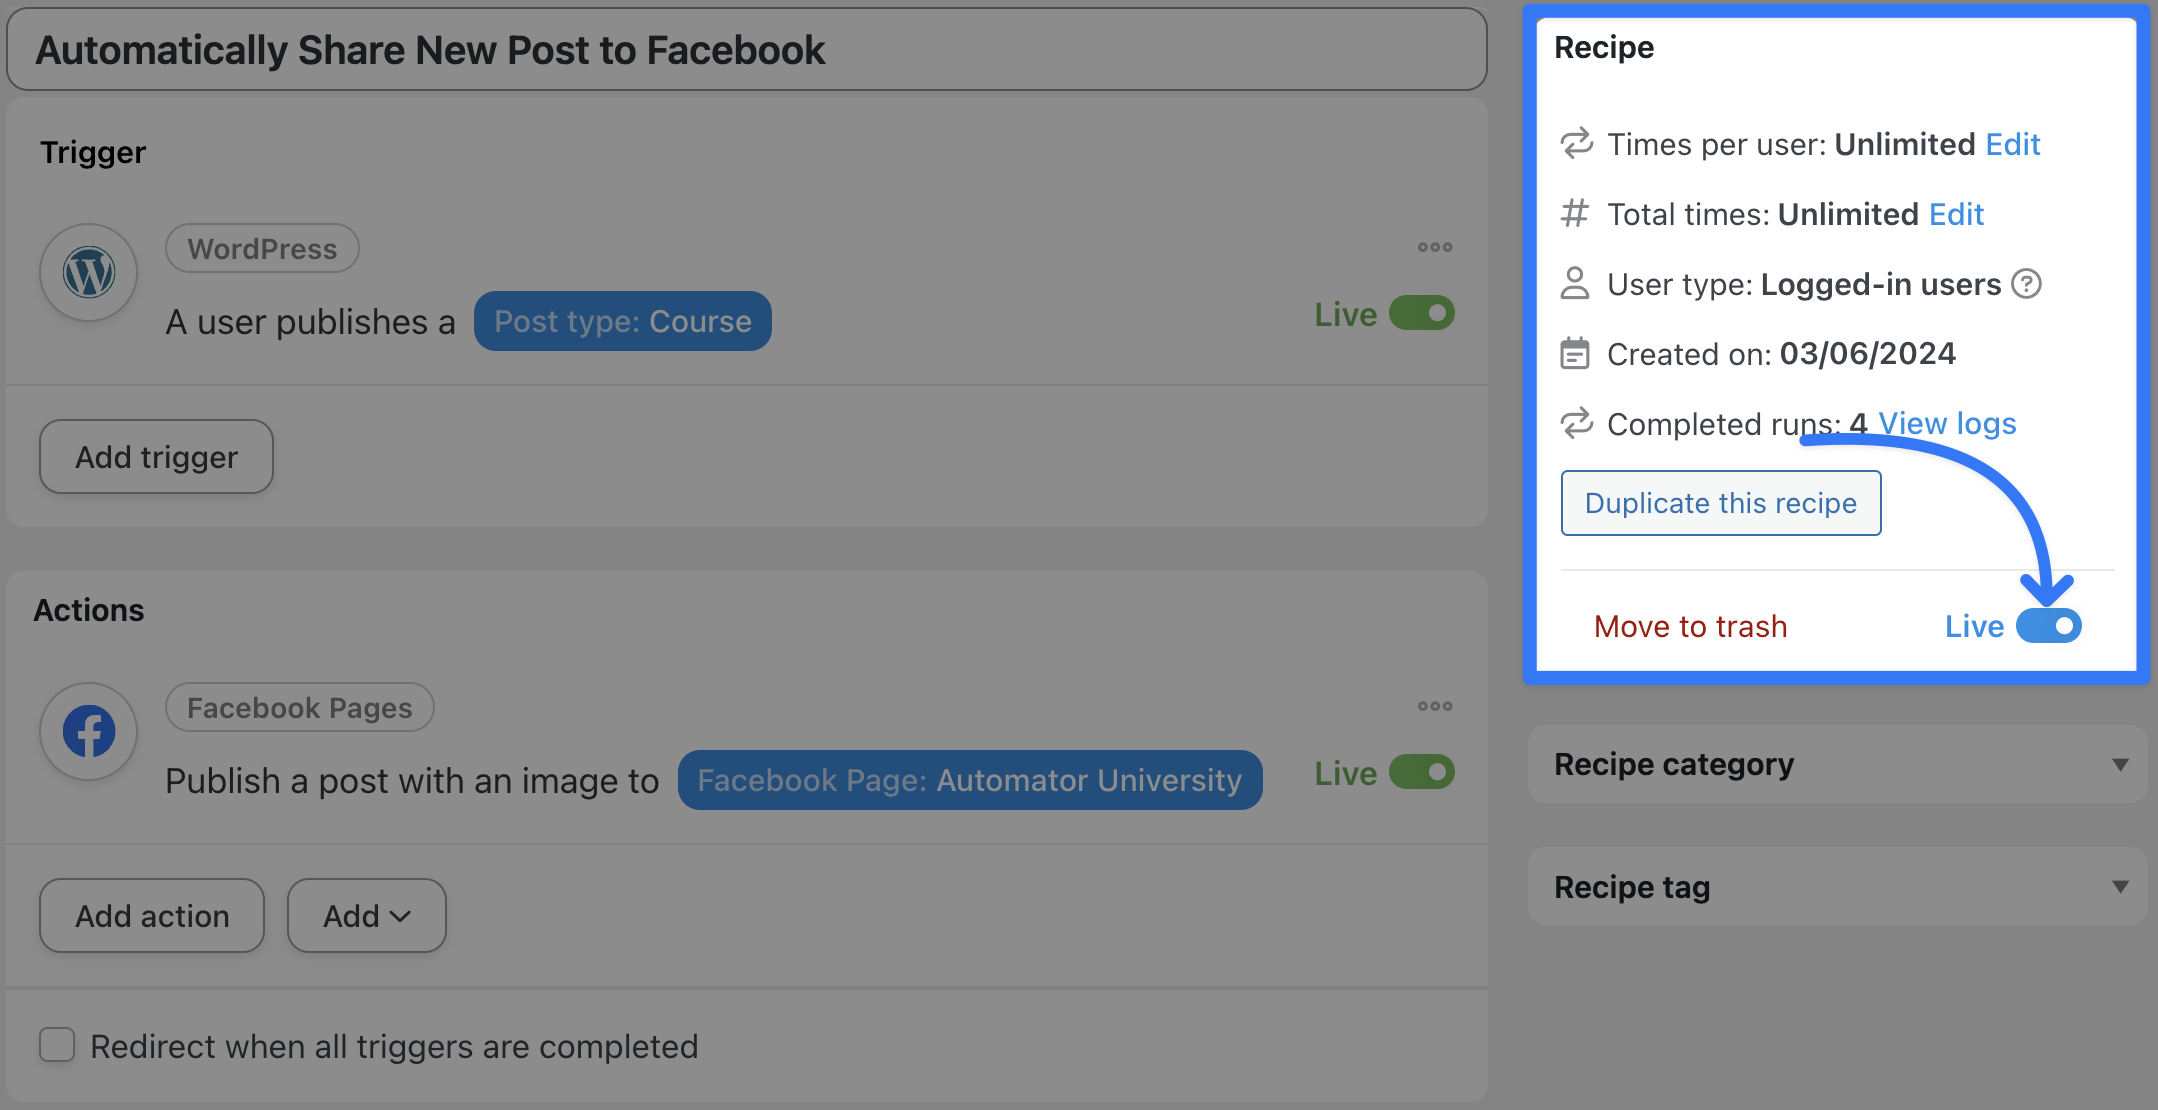
Give your recipe a name that makes it easy to recognize at a glance. For example, we’ve named this recipe “Automatically Share New Post to Facebook”.
Step 3: Configure Your Trigger(s)
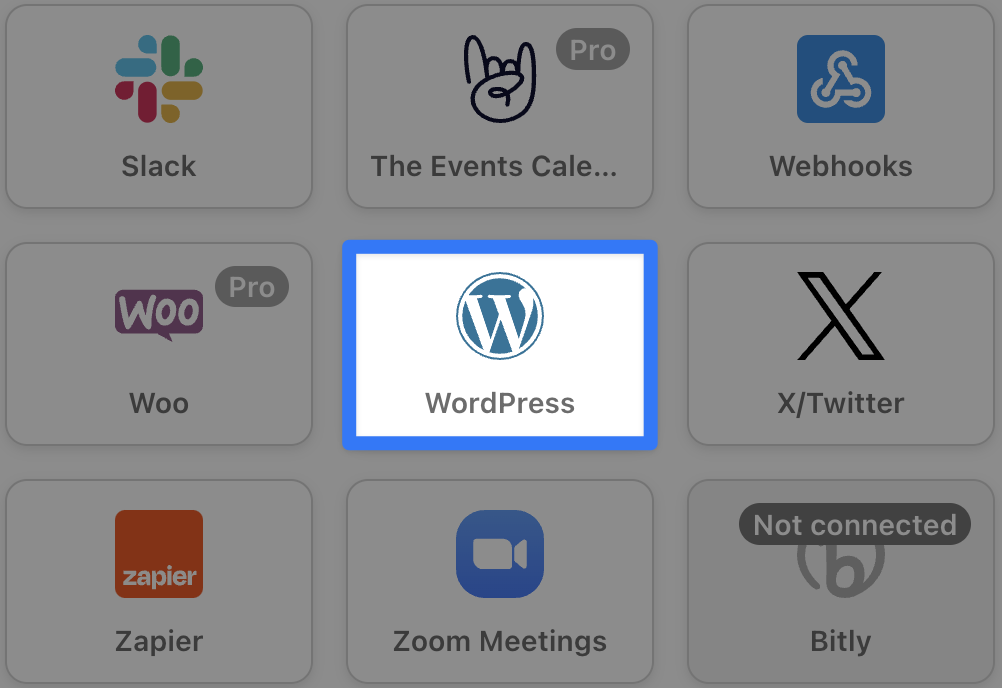
In the Trigger panel, from the menu of available integrations, select WordPress.
From the dropdown list that appears, select A user publishes a post.

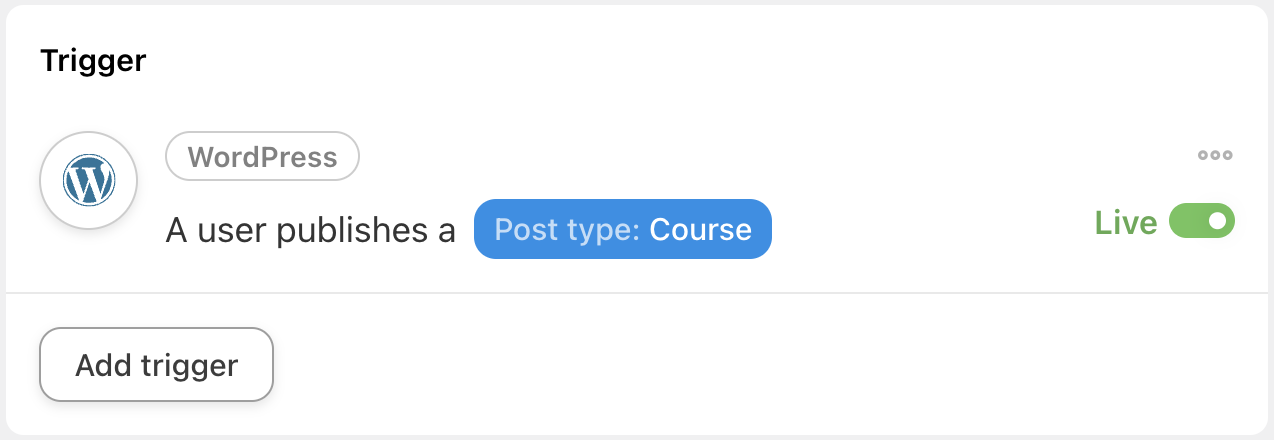
Automator will then prompt you to select the Post type. This could be anything from Post (for most bloggers) to Course (for elearning websites) and more. Once you’ve selected the Post type, click Save.
Your completed trigger should look something like this:
Step 4: Configure Your Action(s)
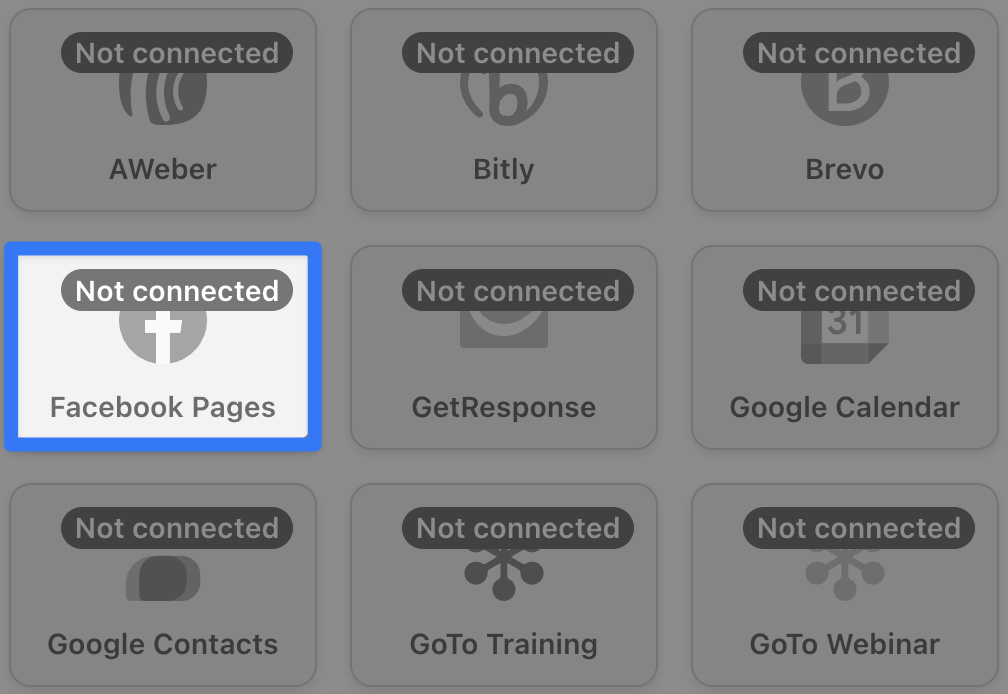
In the Actions panel, click Add action and select Facebook Pages.
If you haven’t already connected your Facebook account, you can do so now. Simply click Connect account in the modal that appears and follow the prompts.
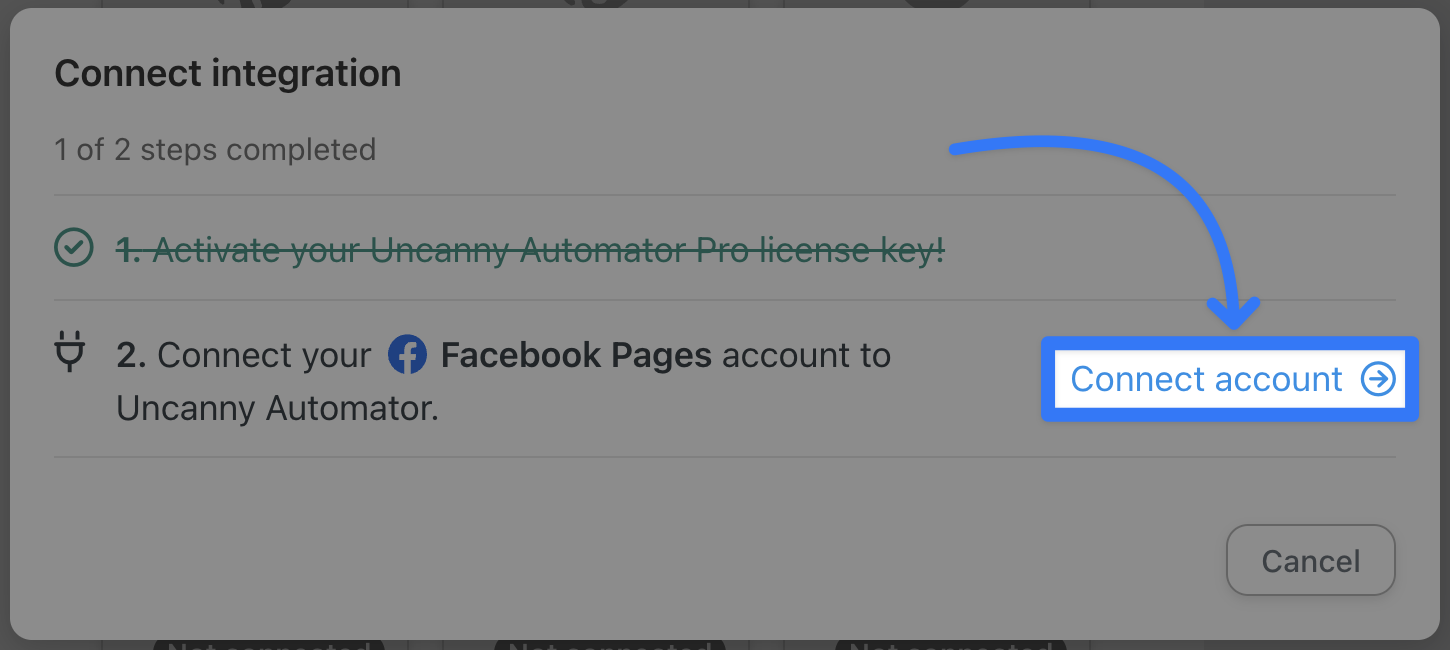
(Note: Automator will guide you through connecting your Facebook account to WordPress and it shouldn’t take more than 30 seconds. However, if you would like a detailed guide, click here.)
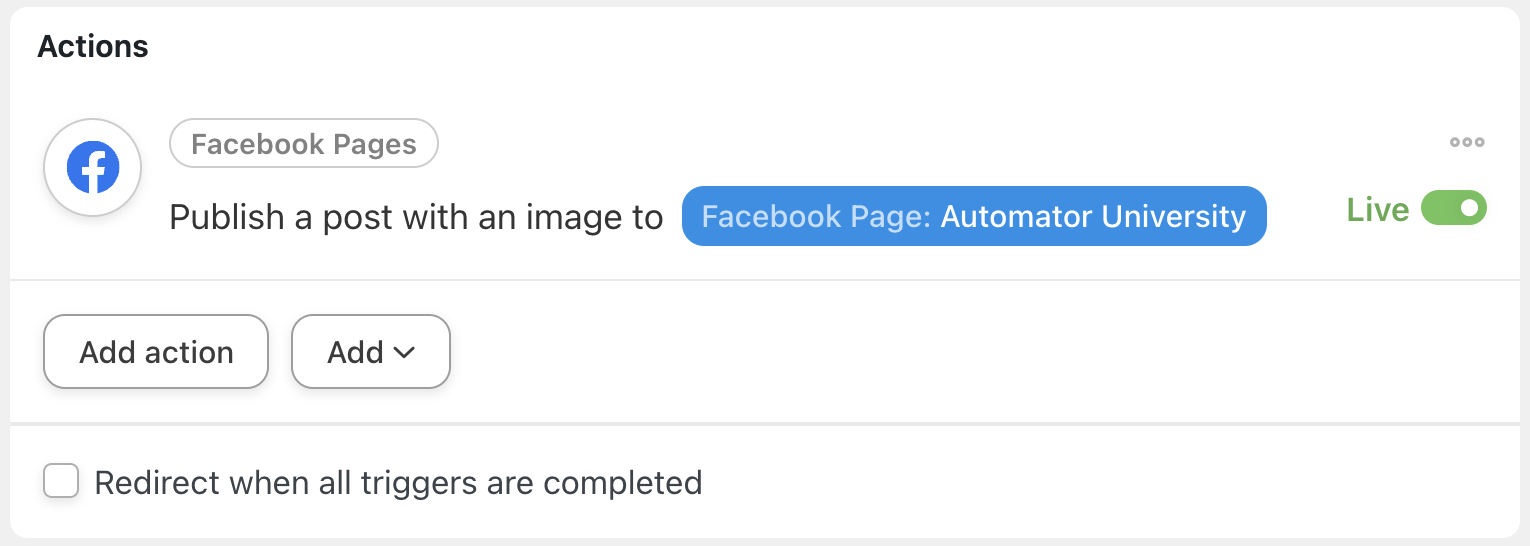
Once you’ve connected your account, return to the recipe editor and select Publish a post with an image to a Facebook page.
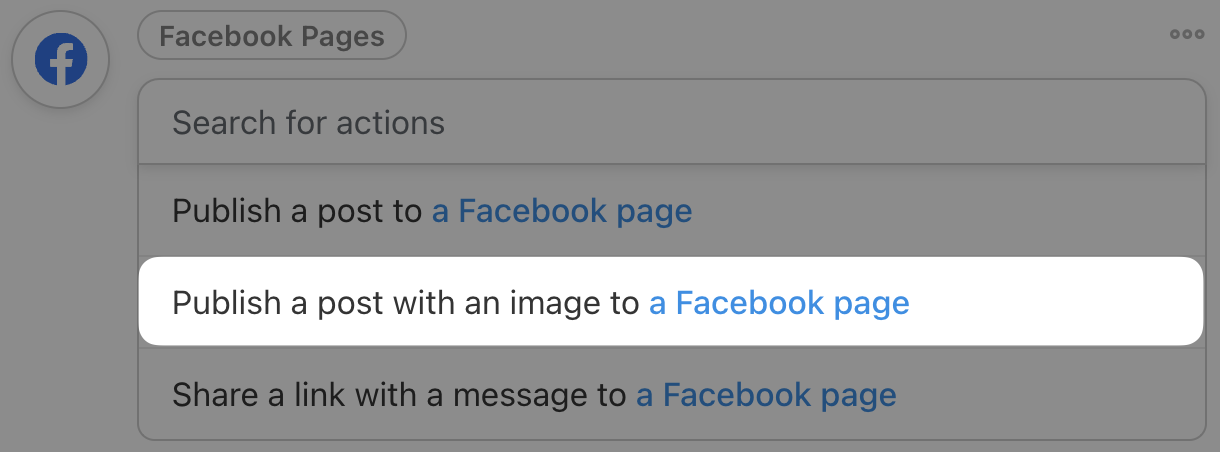
(Note: The other actions will not display an image on the Facebook page you select, even if the post has a featured image.)
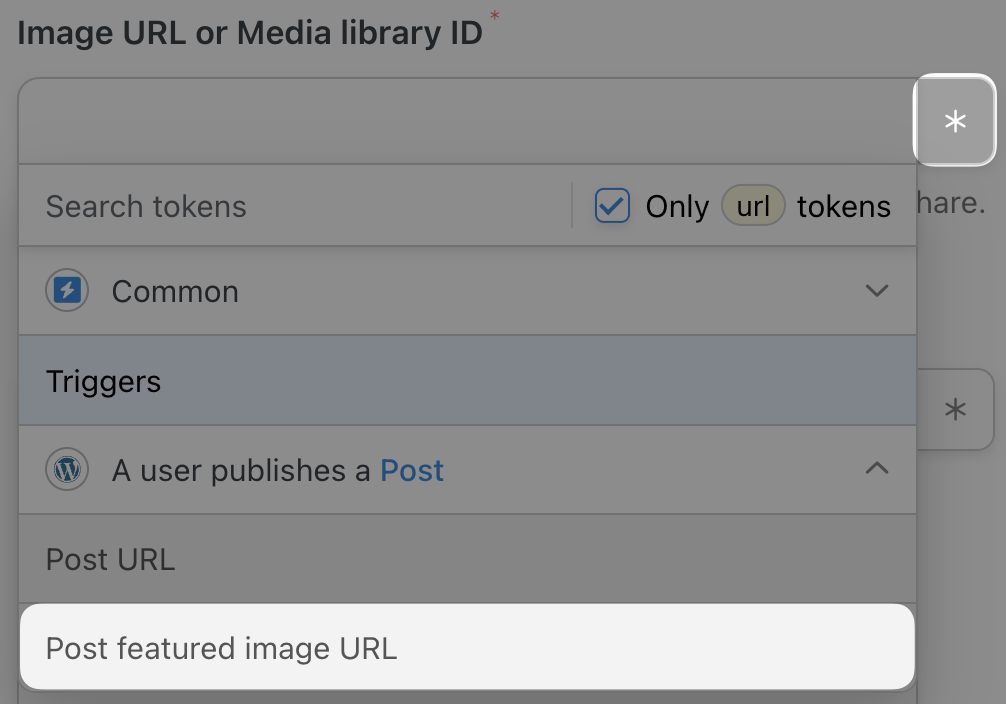
Automator will present you with a form to draft the post for Facebook. We are going to use tokens (i.e., dynamic data from your WordPress website and from within recipes) to customize the post and optimize it for our Facebook audience.
To populate a field with a token, click the Asterisk and select the appropriate token(s). For example, we have selected the Post featured image URL token for the Image URL or Media library ID field.
You can now draft your message for Facebook using a combination of static text and tokens.
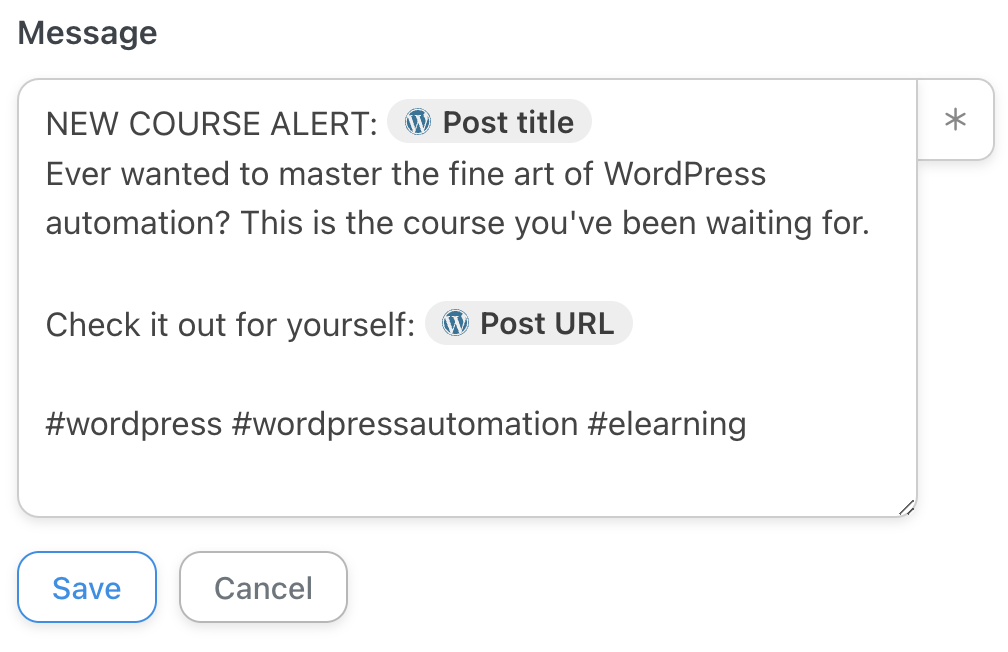
Once you’re satisfied with your draft message, click Save. Your completed action should look something like this:
Step 5: Go Live!
You’re just about ready to automatically share your WordPress content on Facebook. All you need to do now is toggle the recipe from Draft to Live.
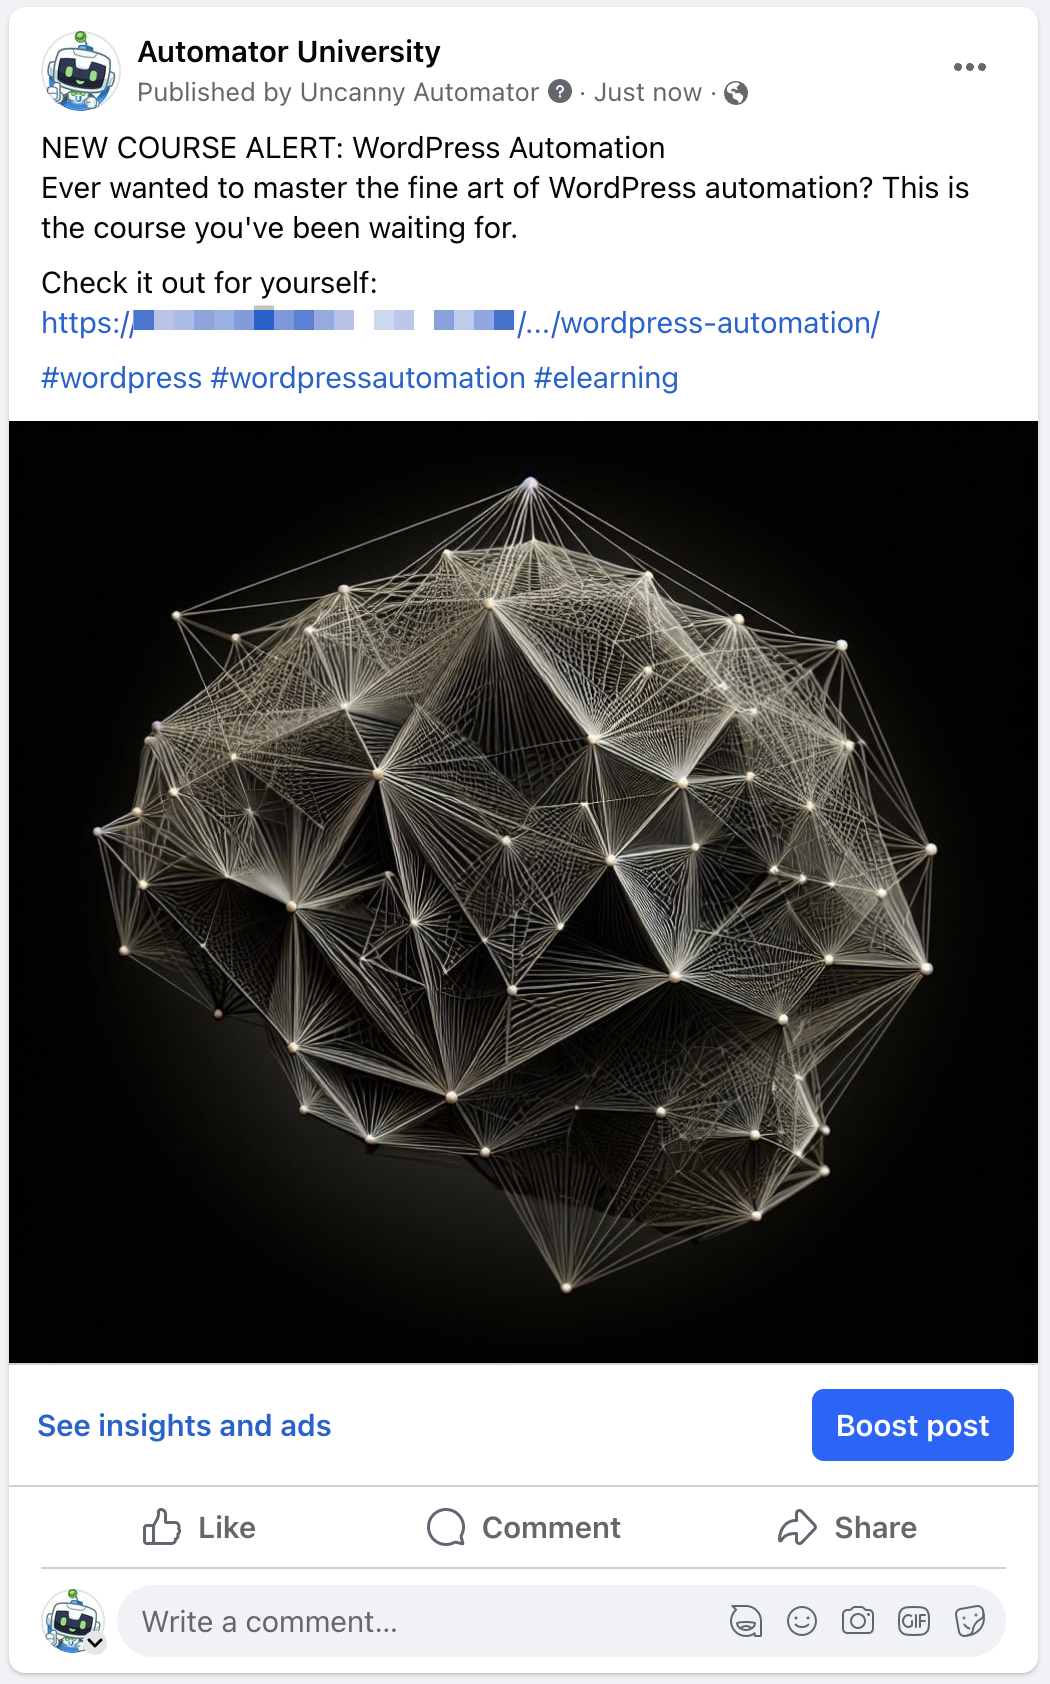
Want to see how our post looks on Facebook Pages? Here it is, complete with hashtags and all!
Ready to start sharing your WordPress posts on Facebook? Get your Automator Pro license now>>>.
How to Share WordPress Posts on Instagram
When it comes to sharing your WordPress website’s media, few platforms offer as visually striking an interface as Instagram.
Want to recreate the recipe pictured above? Follow the simple steps outlined below.
(Note: If you’ve already connected your Facebook Pages account to your Instagram Business account, then you’re ahead of the game. Automator recognizes accounts linked through Meta Accounts Center.)
Step 1: Create a New Recipe
From your WordPress Admin Dashboard, navigate to Automator > Add new recipe. In the pop-up window that appears, select Logged-in users.
Step 2: Name Your Recipe
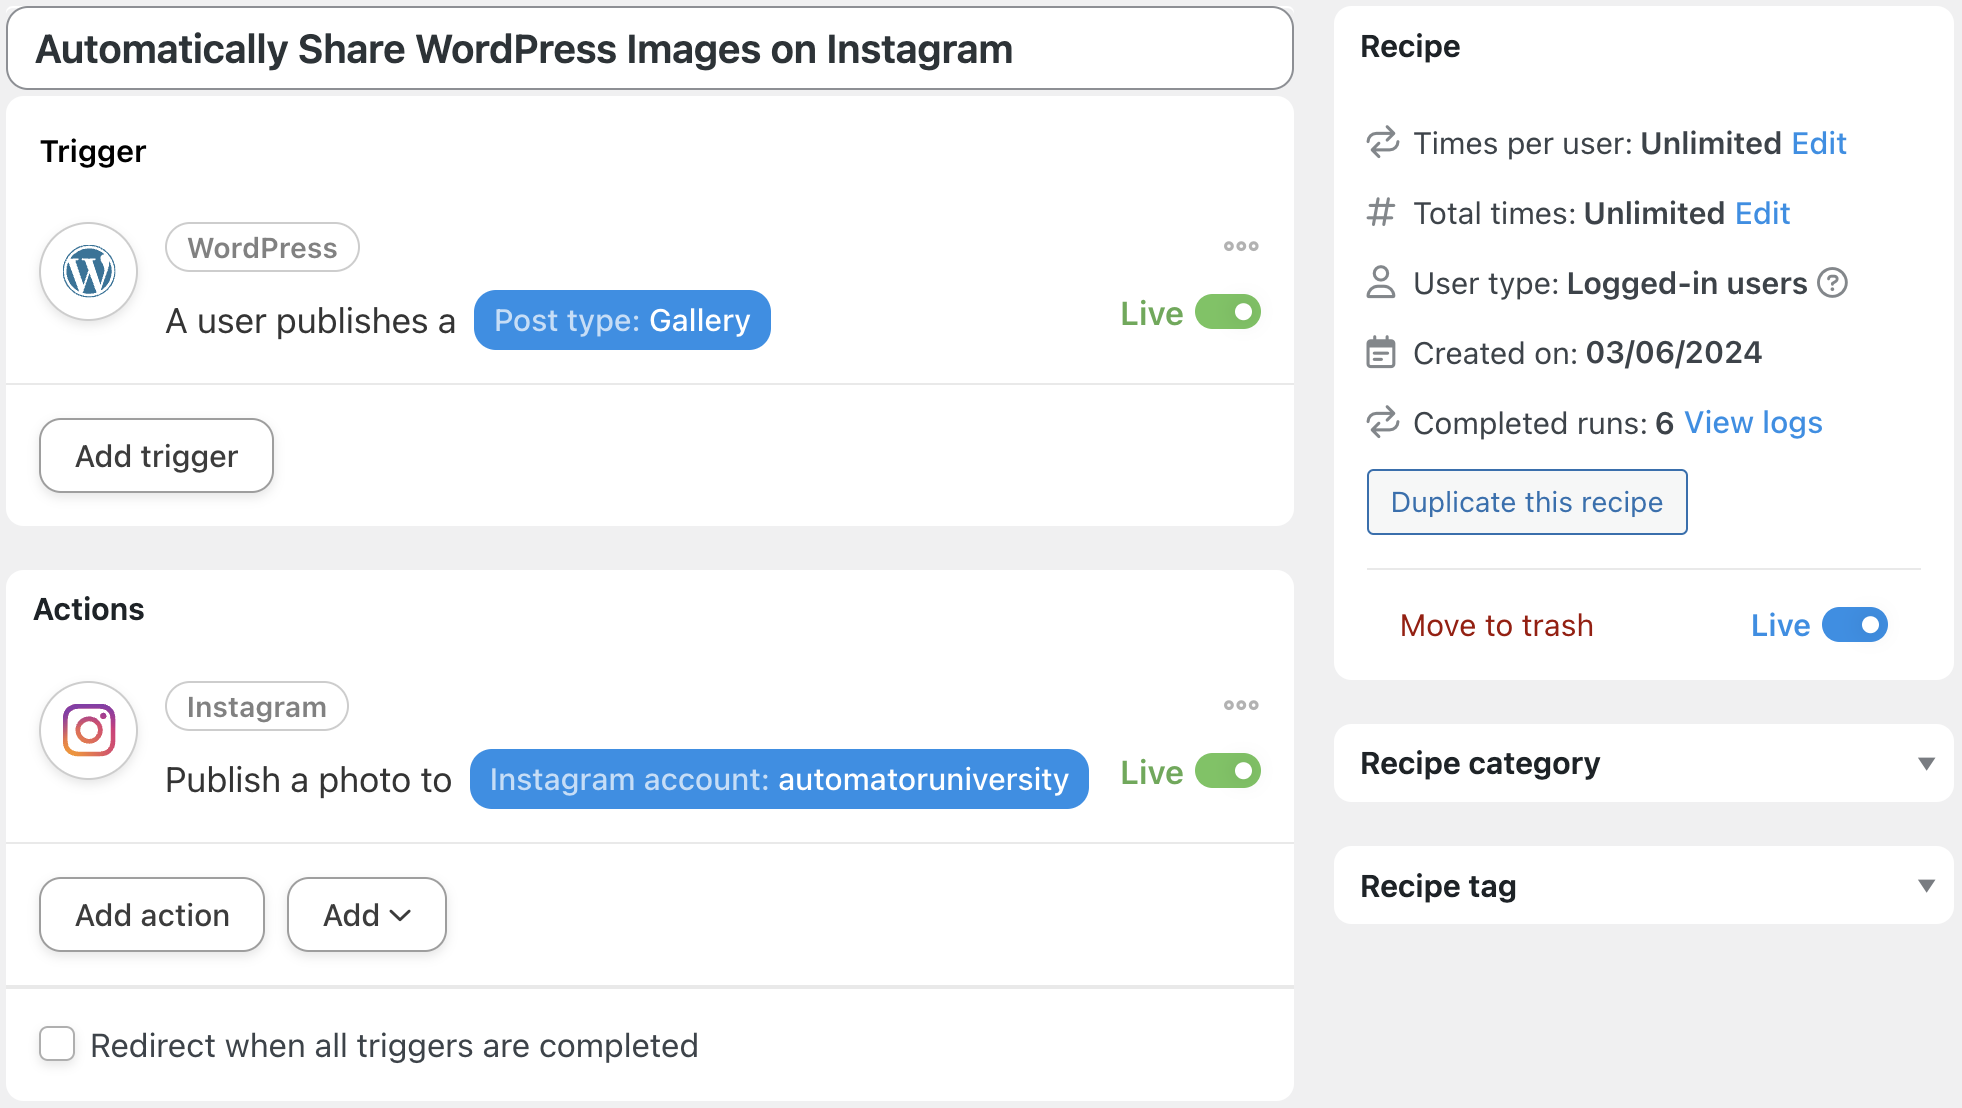
Give your recipe a name that makes it easy to recognize at a glance. We named this recipe “Automatically Share WordPress Images on Instagram”.
Step 3: Configure Your Trigger(s)
In the Trigger panel, from the menu of available integrations, select WordPress. From the dropdown list, select A user publishes a post.
Automator will prompt you to select a Post type. Once you’re finished, click Save.
(Note: We created a custom post type with the Advanced Custom Fields plugin.)
Step 4: Configure Your Action(s)
In the Actions panel, click Add action and select Instagram.
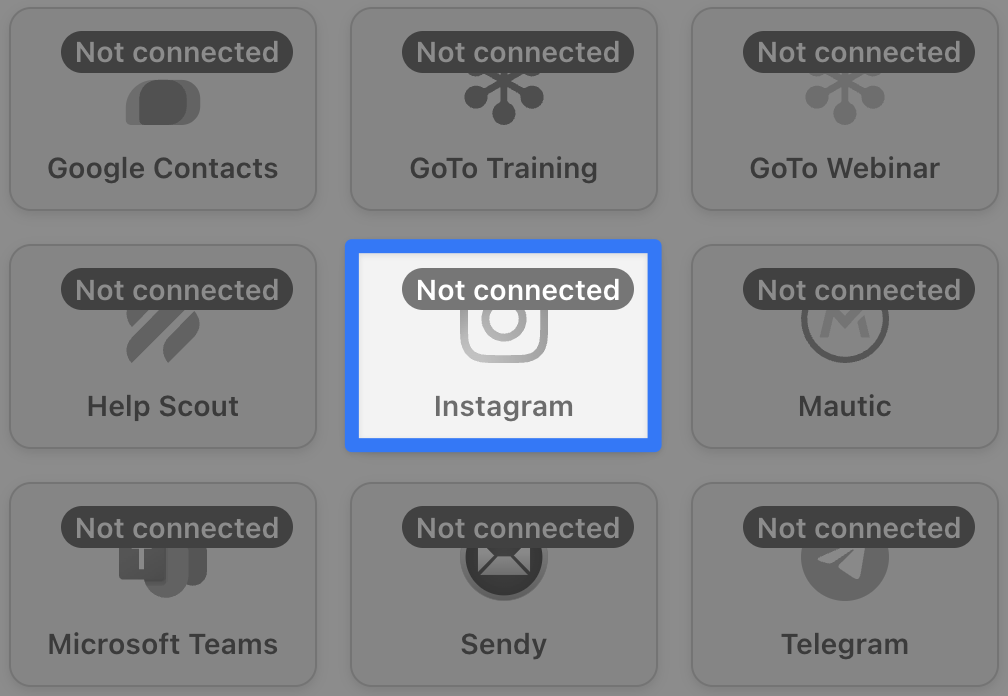
If you haven’t already connected your Facebook Pages or Instagram account, you can do so now. Simply click Connect account in the modal that appears and follow the prompts.
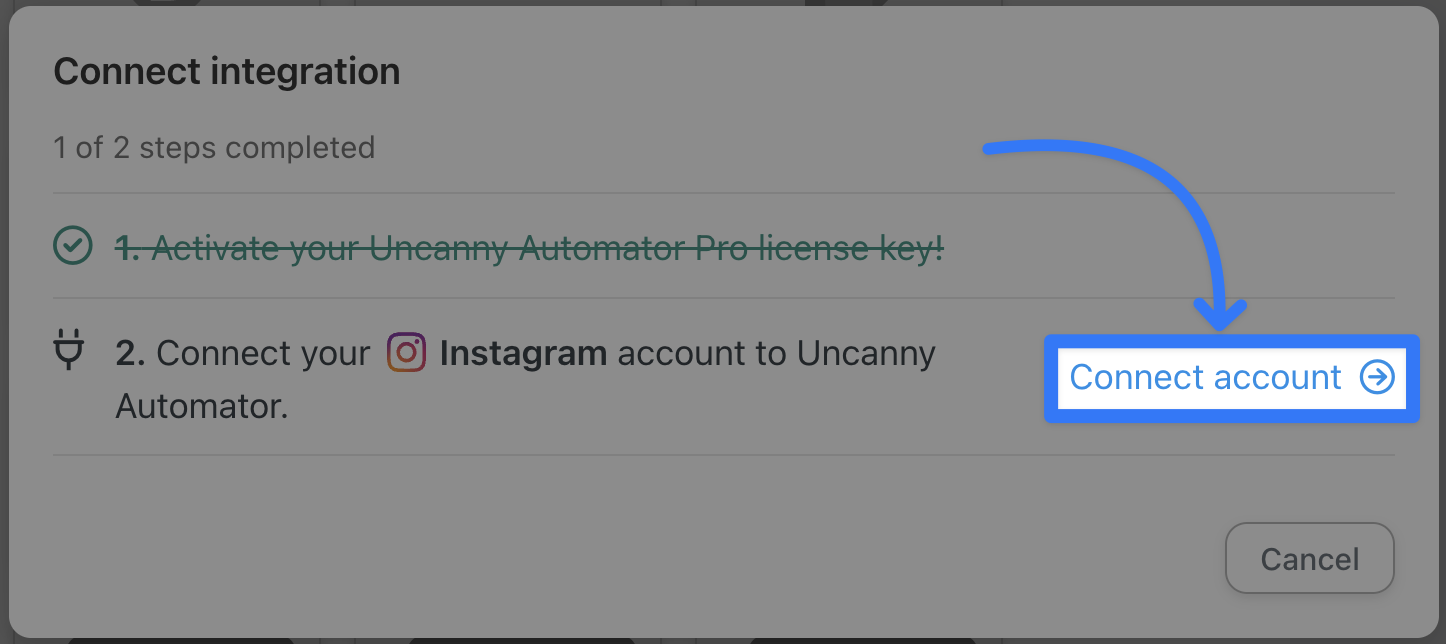
(Note: Automator will guide you through connecting your Instagram account to WordPress and it shouldn’t take more than 30 seconds. However, if you would like a detailed guide, click here.)
Once you’ve connected your account, return to the recipe editor and select Publish a photo to an Instagram Business account.
Select the image and draft your post using a combination of tokens and static text. Once you’re finished, click Save.
Step 5: Make It Insta-Worthy
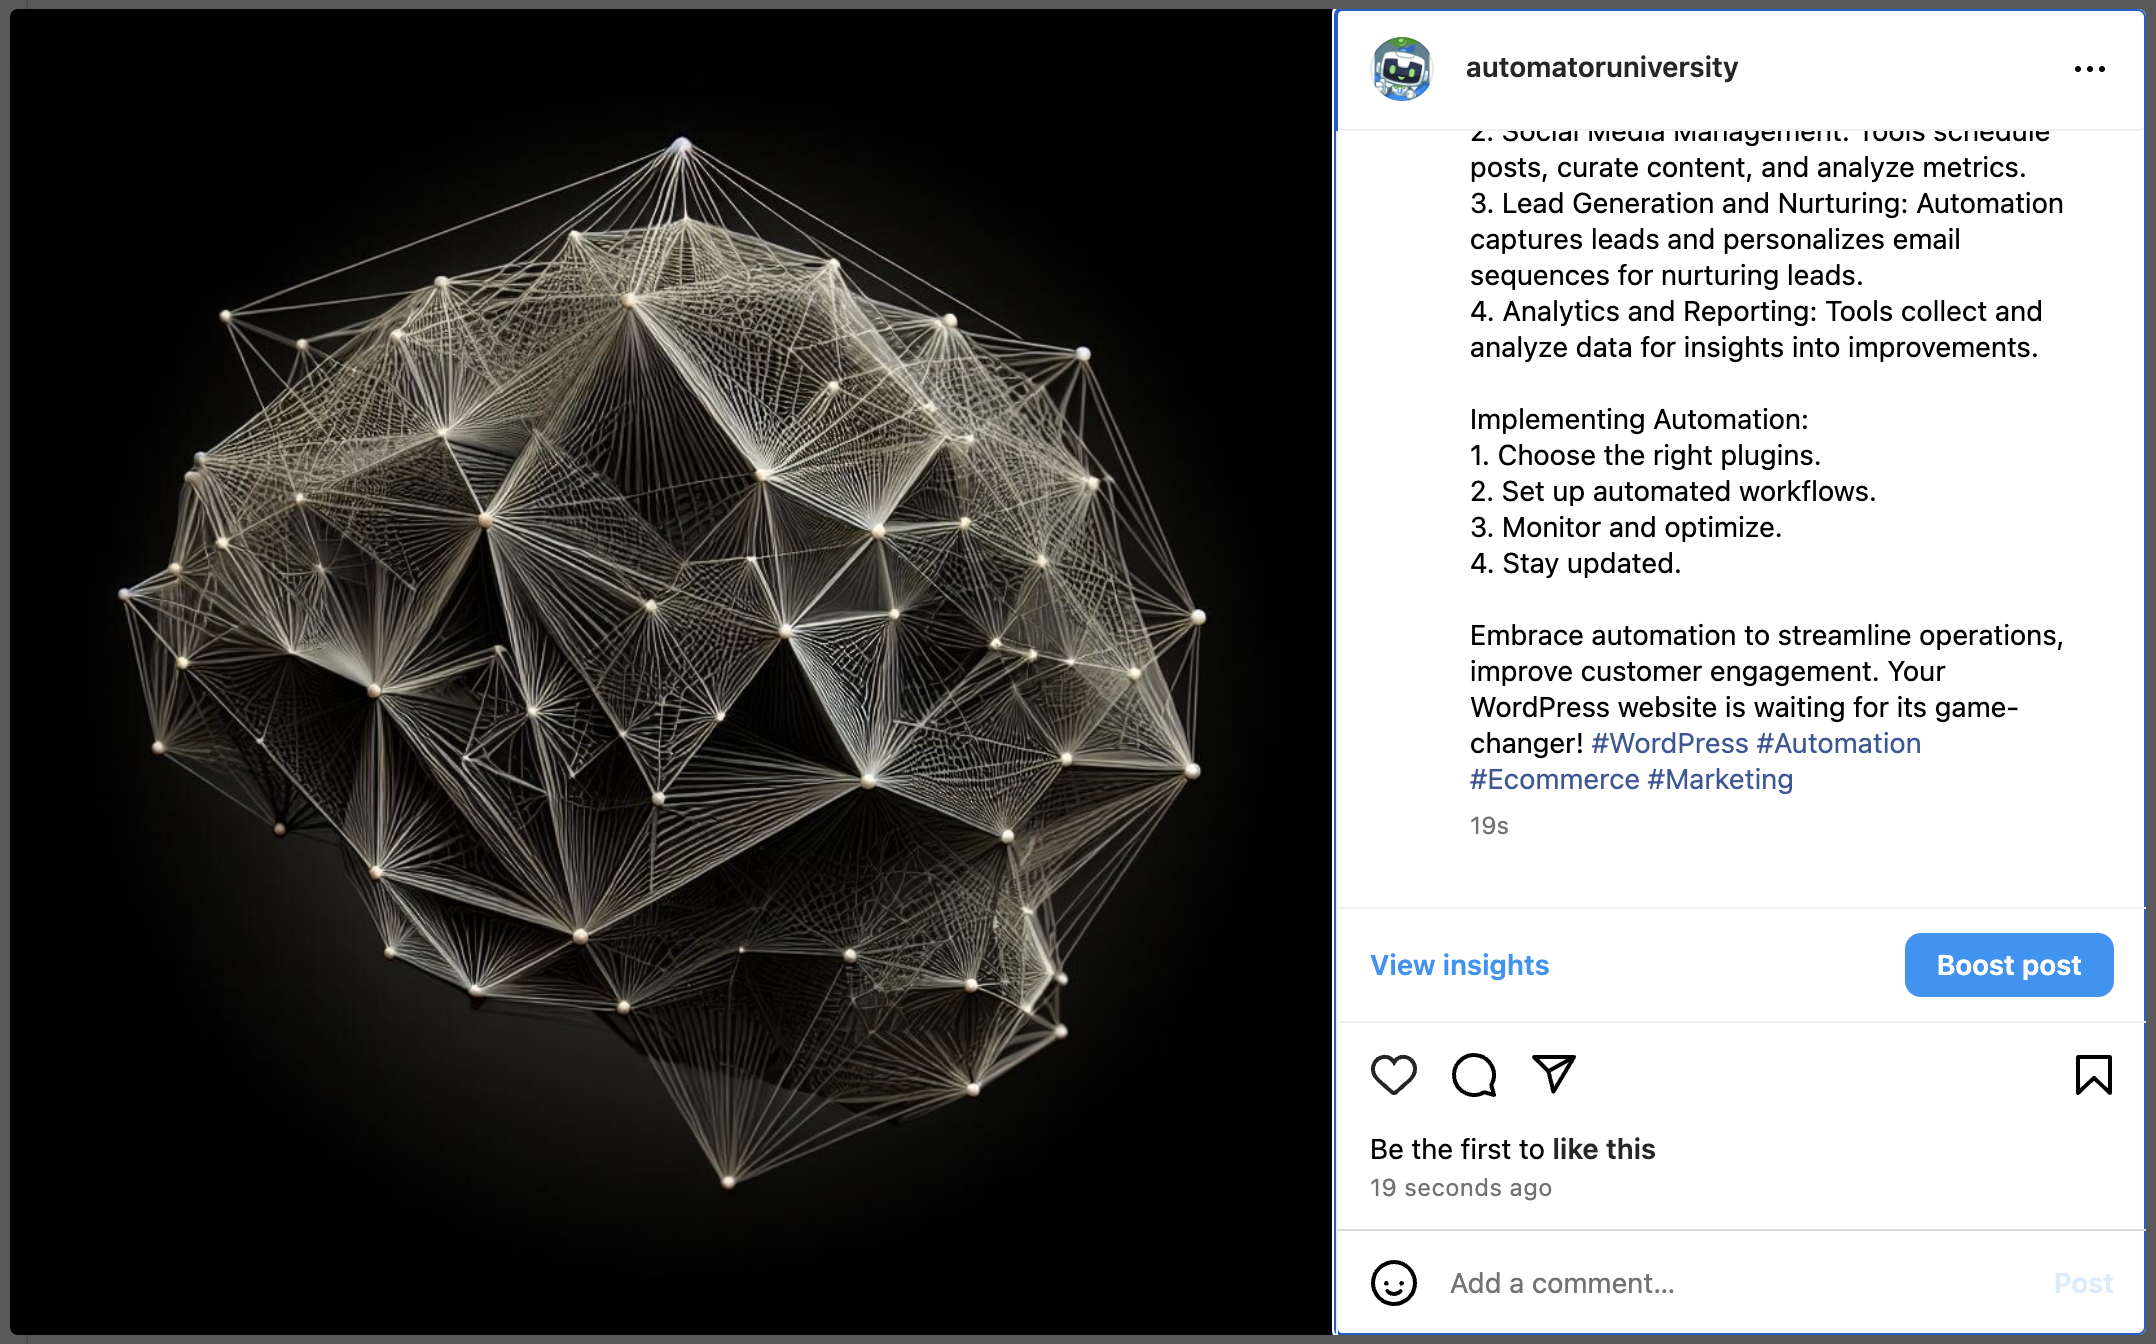
You’re just about ready to automatically share your WordPress images to Instagram. All that’s left for you to do is to toggle the recipe from Draft to Live.
Here’s how our post turned out.

Ready to share your WordPress media on Instagram? Get your Automator Pro license now>>>.
How to Share WordPress Blog Posts to LinkedIn
According to OptinMonster, LinkedIn is the most “effective” social media platform for boosting your audience engagement. That’s why we created the recipe pictured below.
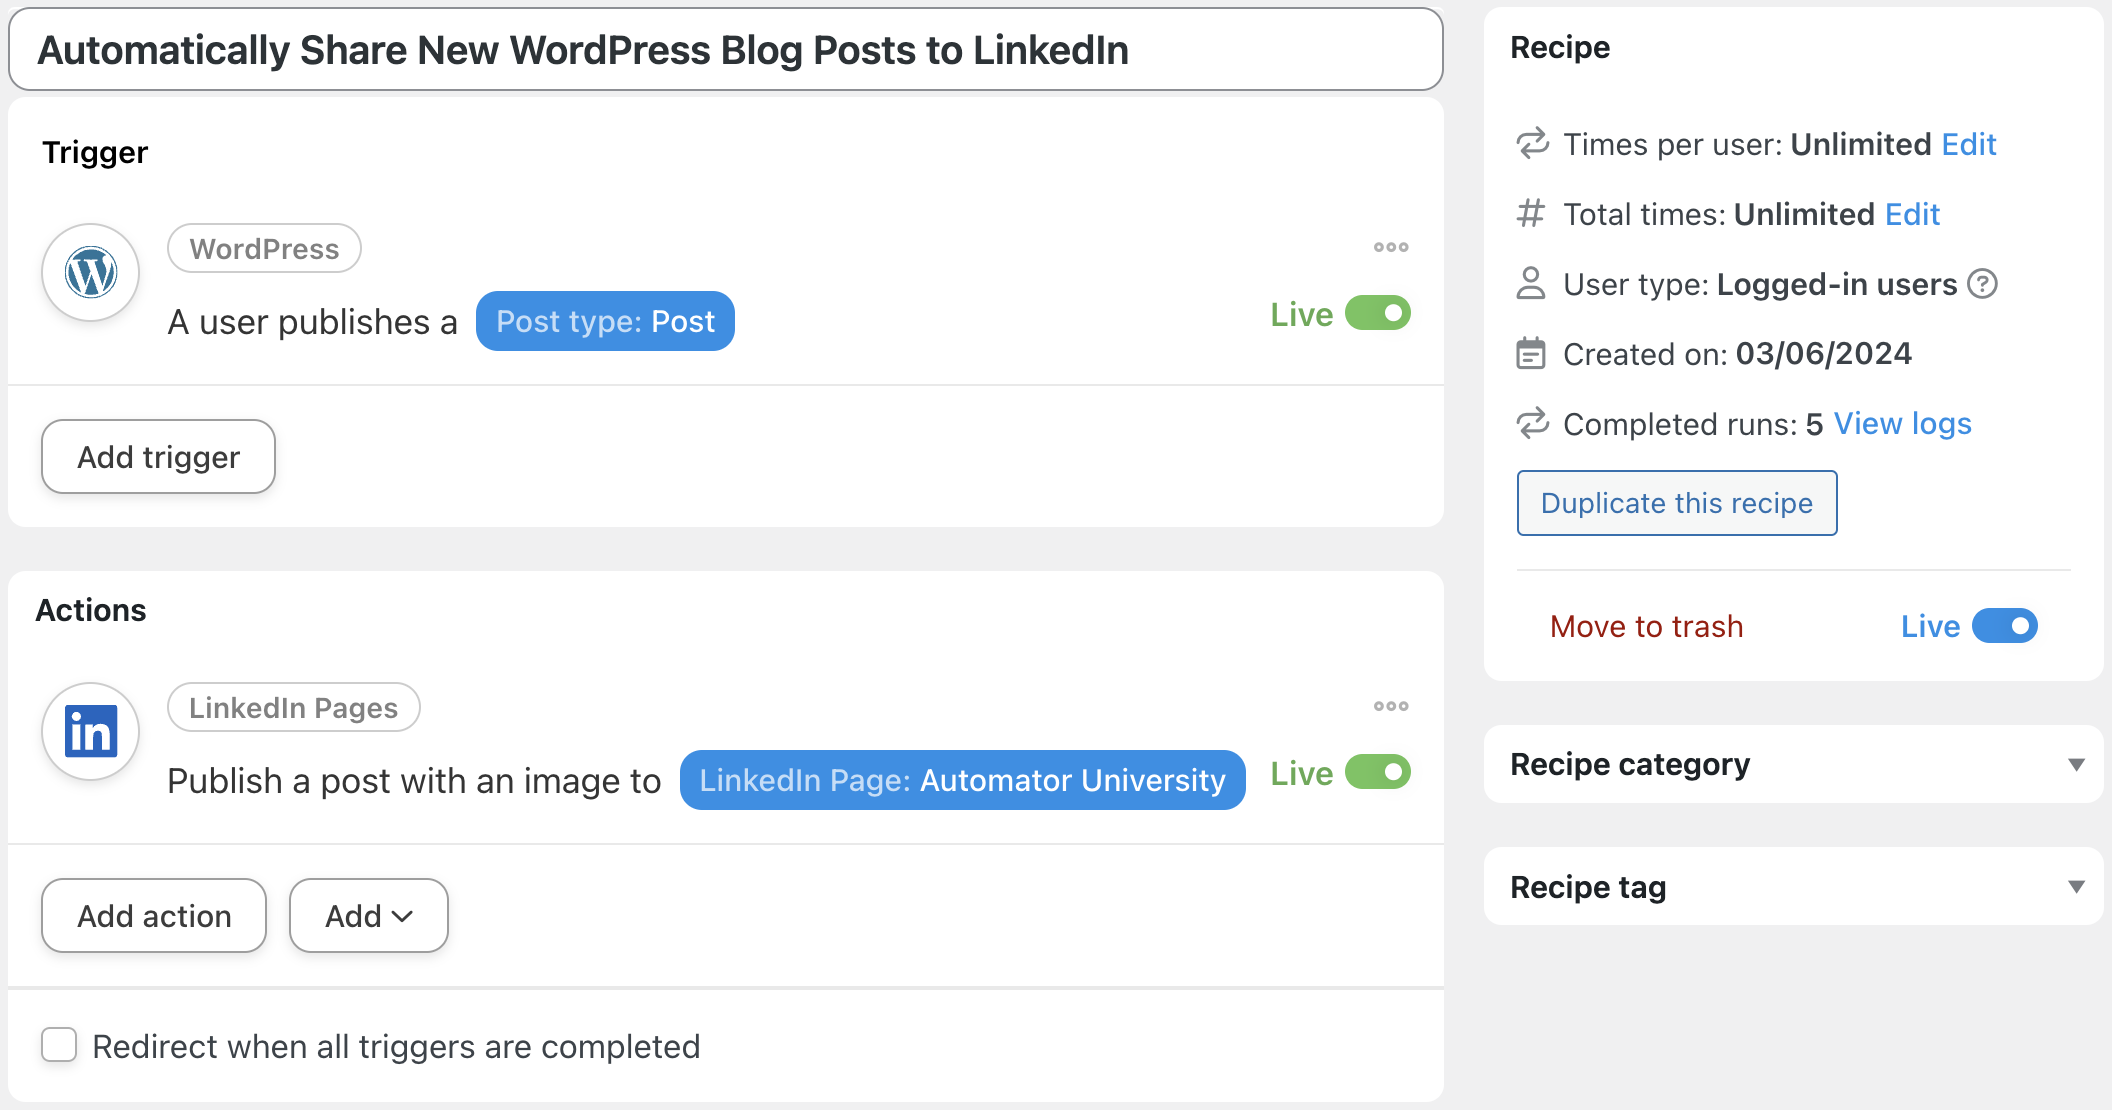
If you created the previous recipes with us, then you’ll be able to breeze through this one even faster.
Step 1: Create a New Recipe
From your WordPress Admin Dashboard, navigate to Automator > Add new recipe. In the pop-up window that appears, select Logged-in users.
Step 2: Name Your Recipe
Give your recipe a name that makes it easy to recognize at a glance. We named this recipe “Share New WordPress Blog Posts to LinkedIn”.
Step 3: Configure Your Trigger(s)
In the Trigger panel, from the menu of available integrations, select WordPress. From the dropdown list, select A user publishes a post.
Automator will prompt you to select a Post type. Once you’re finished, click Save.
Step 4: Configure Your Action(s)
In the Actions panel, click Add action and select LinkedIn.
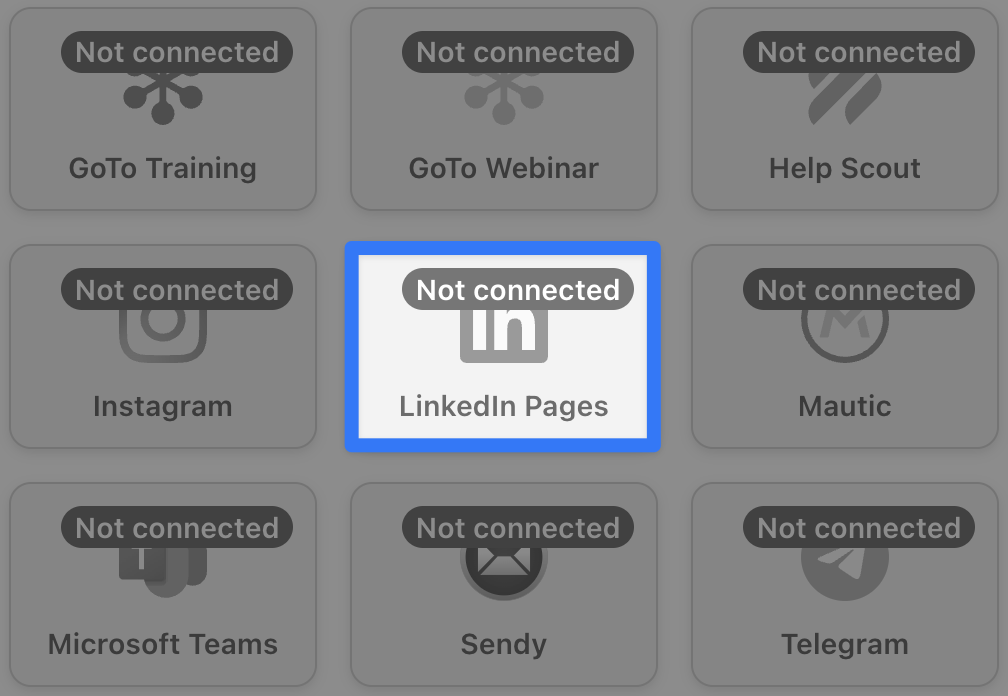
If you haven’t already connected your LinkedIn account, you can do so now. Simply click Connect account in the modal that appears and follow the prompts.
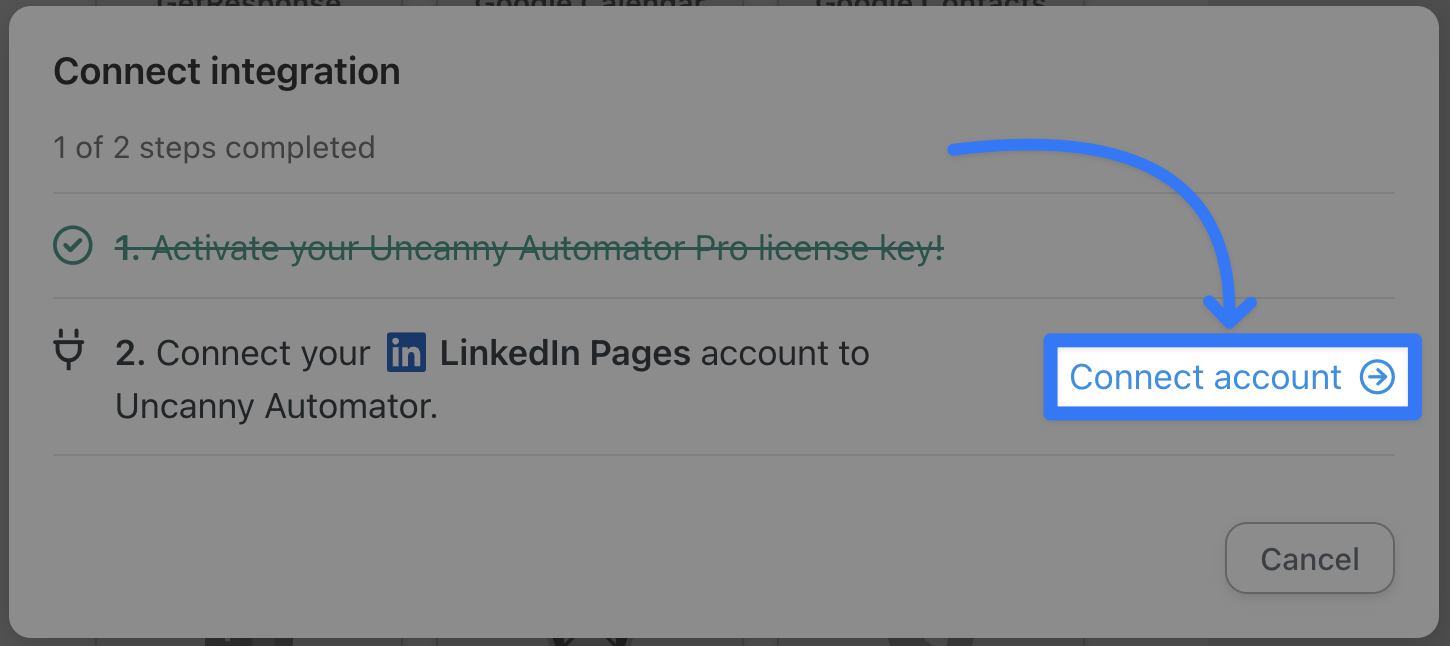
(Note: Automator will guide you through connecting your LinkedIn account to WordPress and it shouldn’t take more than 30 seconds. However, if you would like a detailed guide, click here.)
Once you’ve connected your account, return to the recipe editor and select Publish a post with an image to a LinkedIn page.
Select the image and draft your post using a combination of tokens and static text. Once you’re finished, click Save.
Step 5: Get LinkedIn!
You’re just about ready to automatically share your WordPress blog posts to LinkedIn. All that’s left for you to do is to toggle the recipe from Draft to Live.
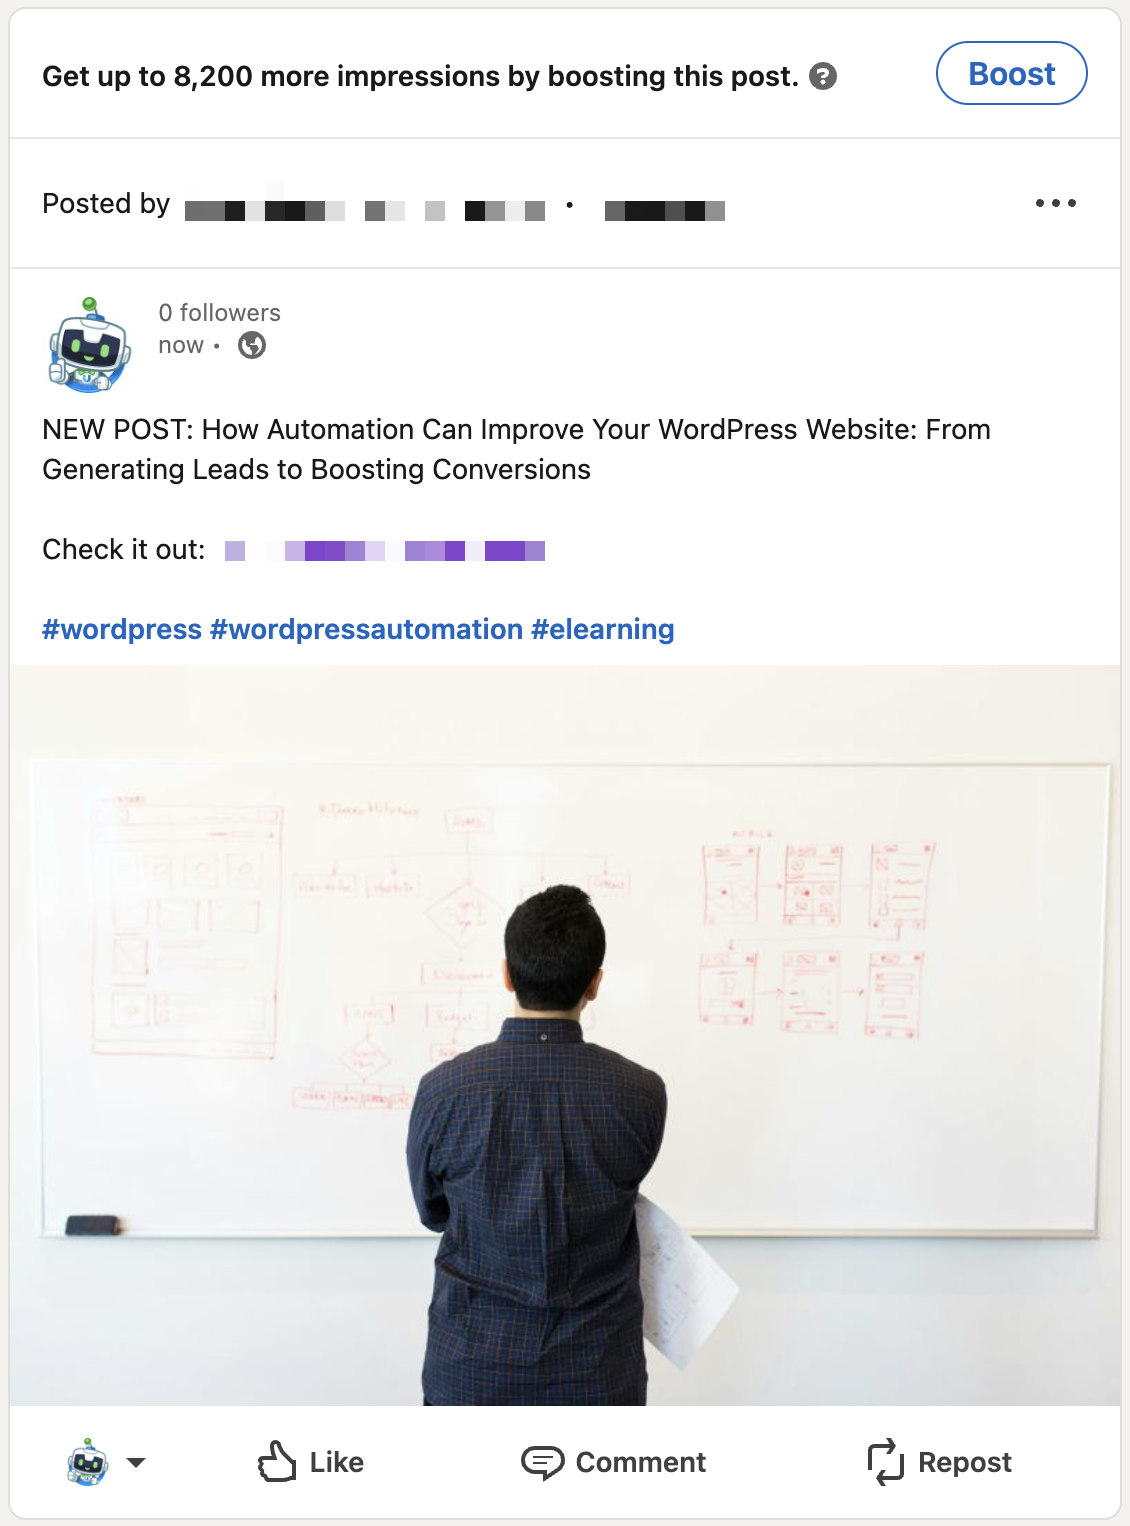
Here’s how our post turned out.
Ready to start sharing your WordPress posts on LinkedIn? Get your Automator Pro license now>>>.
How to Share WordPress Blog Posts to X/Twitter and More
As a text-based social media platform, X/Twitter can be a natural outgrowth of your blog. It doesn’t matter if you have a food blog, thrifting blog, blog for your pets or whatever else inspires you, you likely have an important audience on X.
And, thanks to Automator, pushing your latest content out to one of the most popular social media platforms can happen instantaneously and effortlessly.
Step 1: Create a New Recipe
From your WordPress Admin Dashboard, navigate to Automator > Add new recipe. In the pop-up window that appears, select Logged-in users.
Step 2: Name Your Recipe
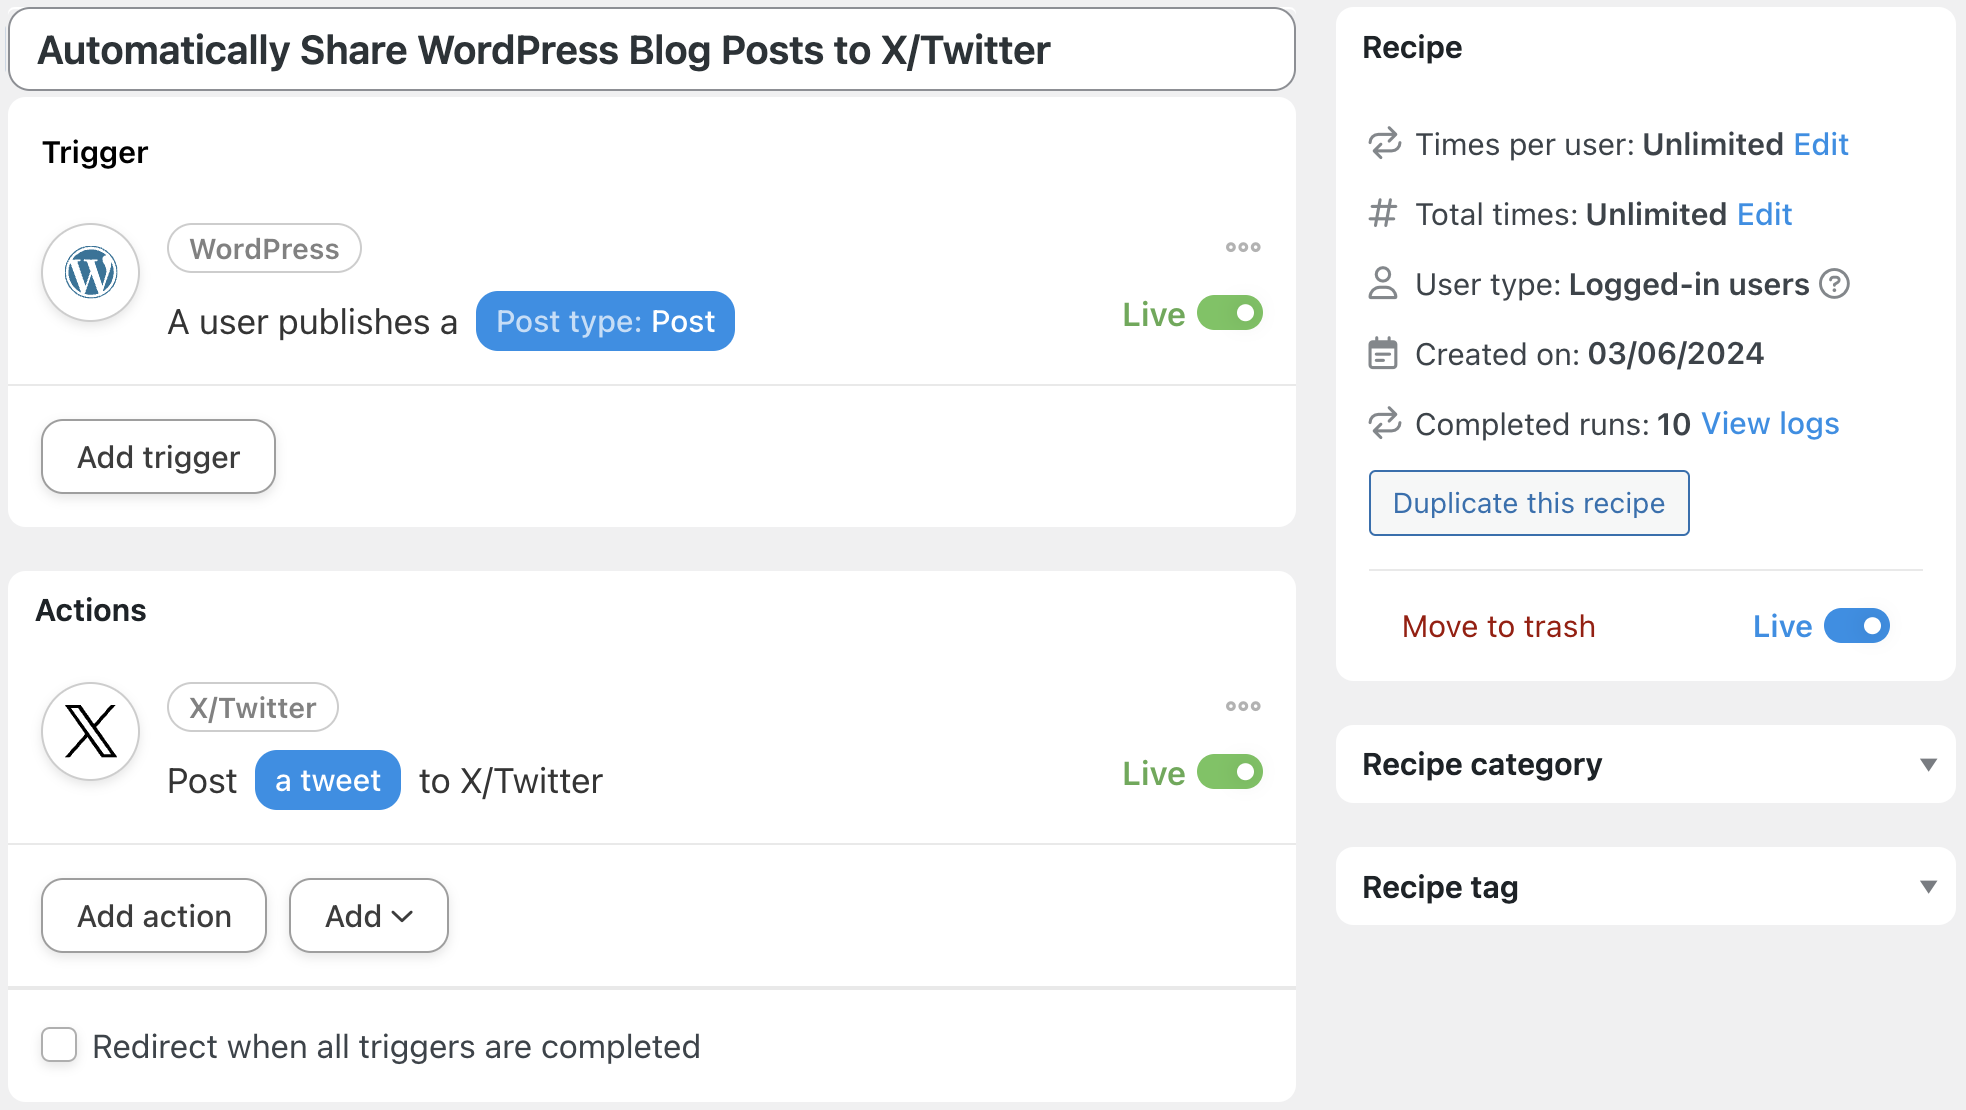
Give your recipe a name that makes it easy to recognize at a glance. We named this recipe “Automatically Share WordPress Blog Posts to X/Twitter”.
Step 3: Configure Your Trigger(s)
In the Trigger panel, from the menu of available integrations, select WordPress. From the dropdown list, select A user publishes a post.
Automator will prompt you to select a Post type. Once you’re finished, click Save.
Step 4: Configure Your Action(s)
In the Actions panel, click Add action and select X/Twitter.
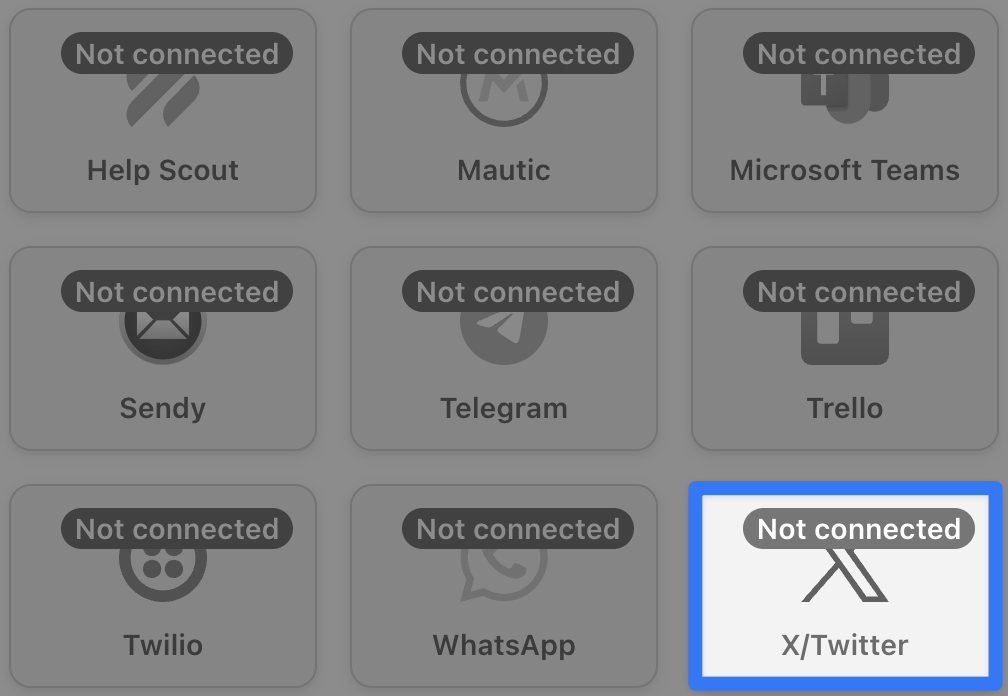
If you haven’t already connected your X/Twitter account, you can do so now. Simply click Connect account in the modal that appears and follow the prompts.
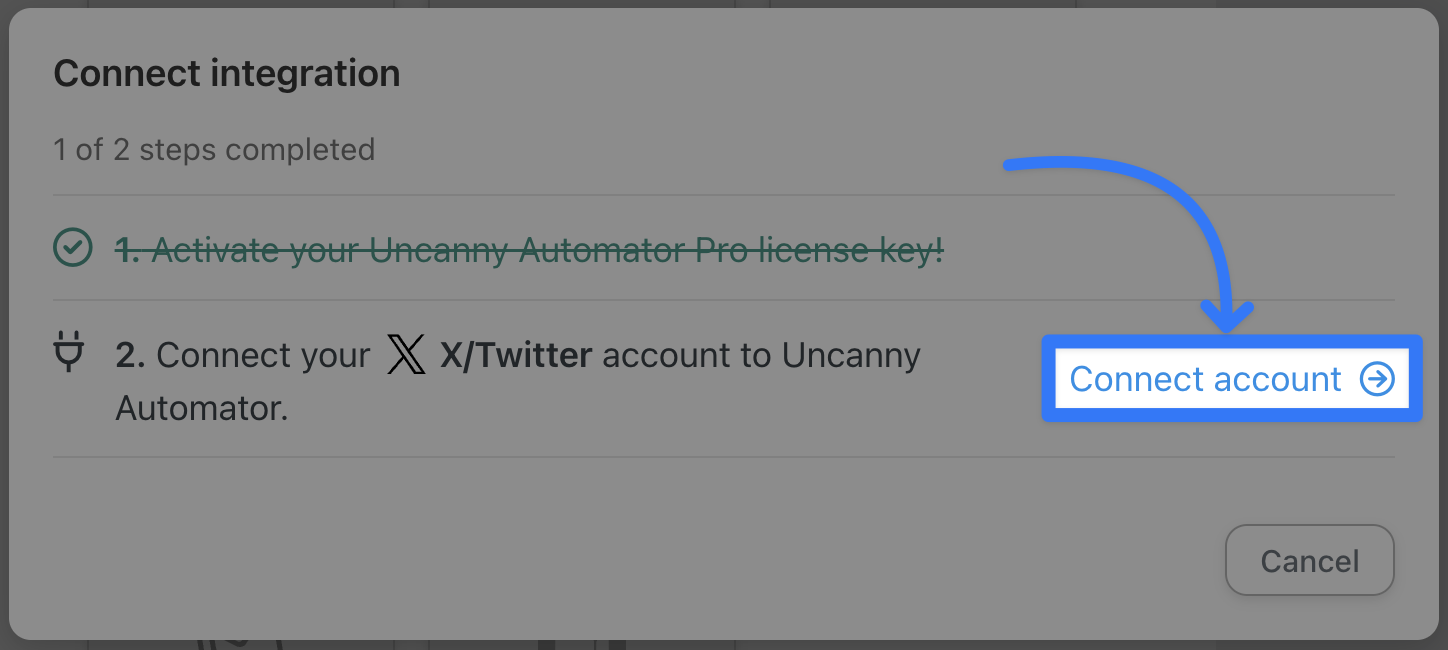
(Note: Automator will guide you through connecting your X/Twitter account to WordPress and it shouldn’t take more than 30 seconds. However, if you would like a detailed guide, click here.)
Once you’ve connected your account, return to the recipe editor and select Post a tweet to X/Twitter.
Draft your Status using a combination of tokens and static text. Optionally, you can choose to add an image. Once you’re finished, click Save.
Step 5: Enter the X/Twitterverse
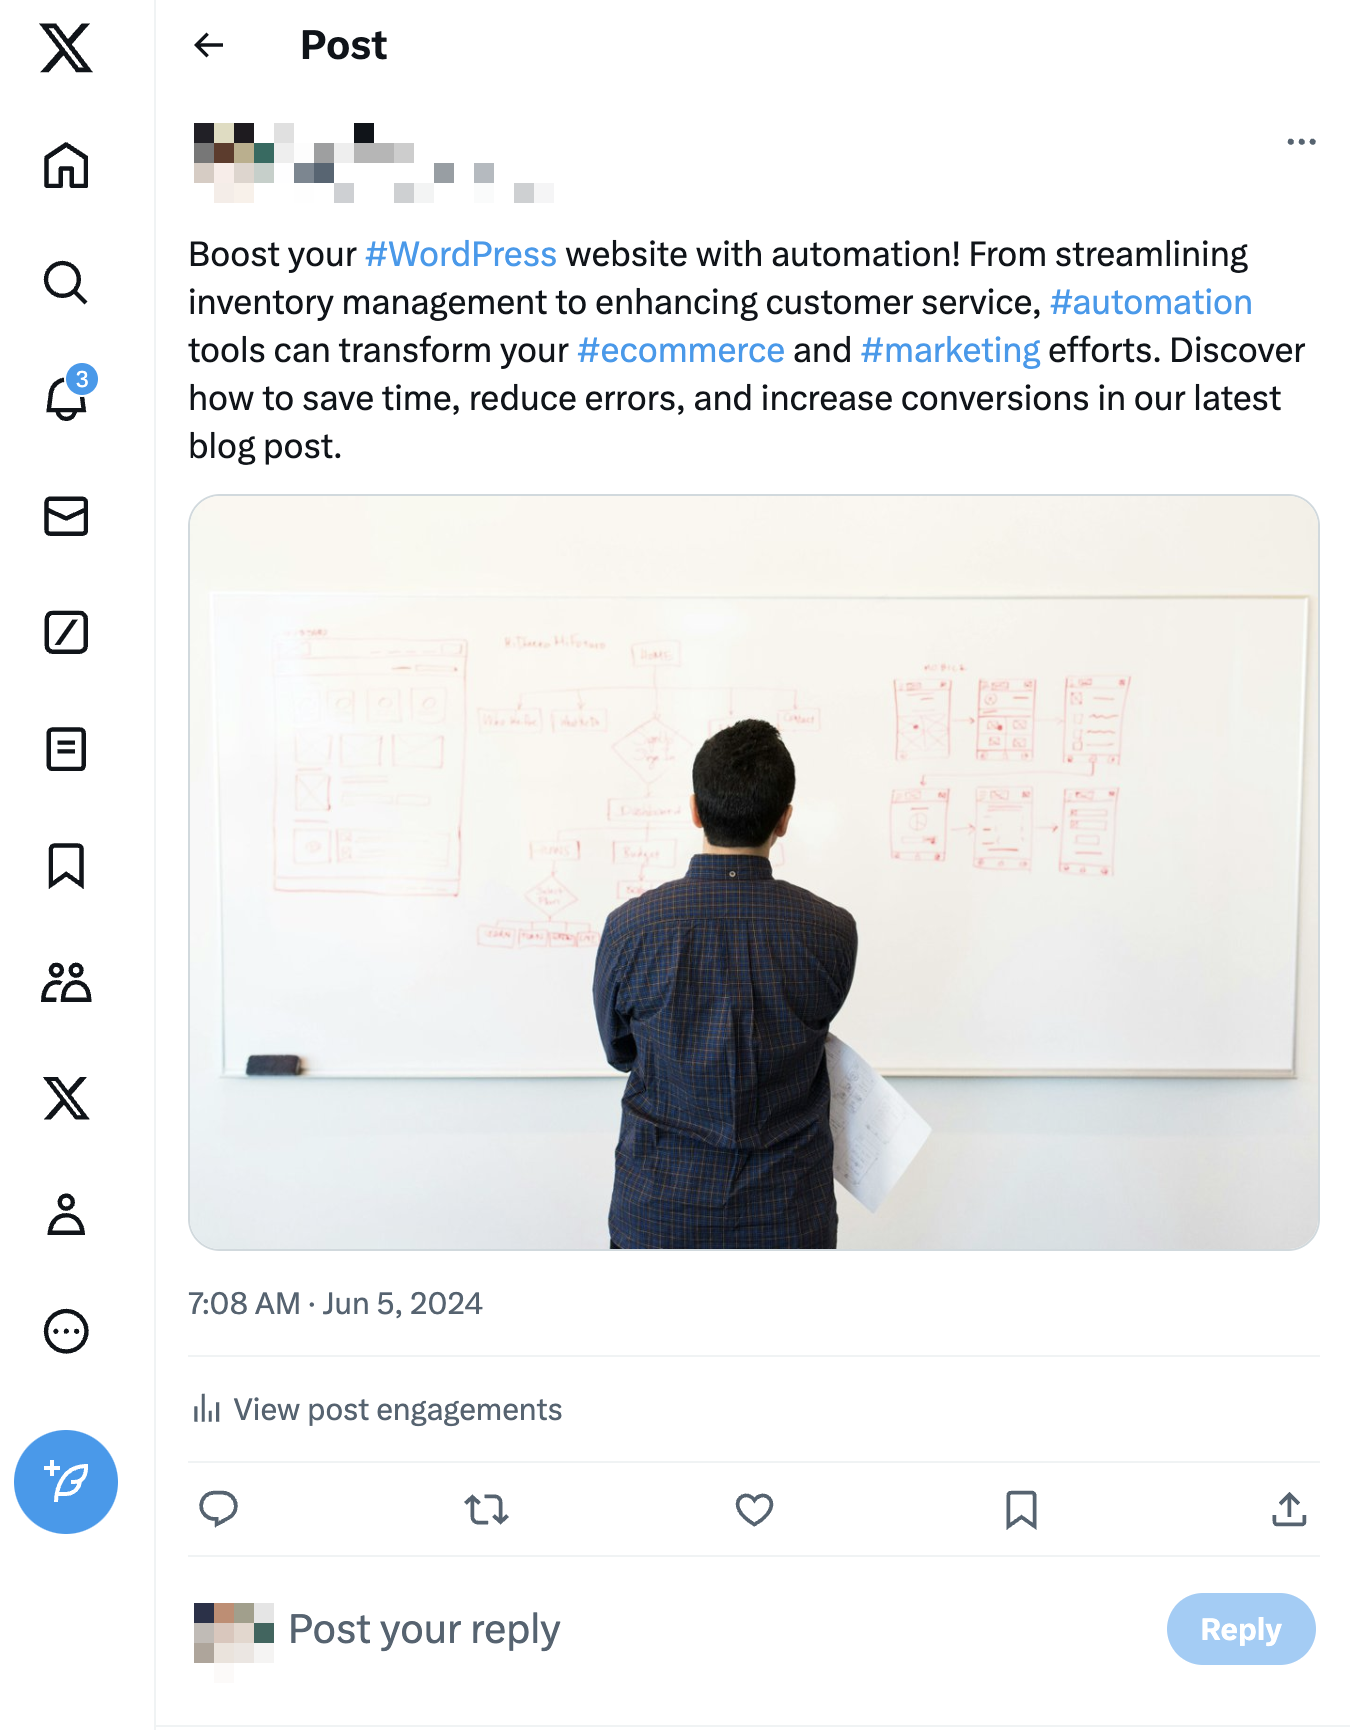
You’re just about ready to automatically share your latest WordPress blog posts on X/Twitter. All that’s left for you to do is to toggle the recipe from Draft to Live.
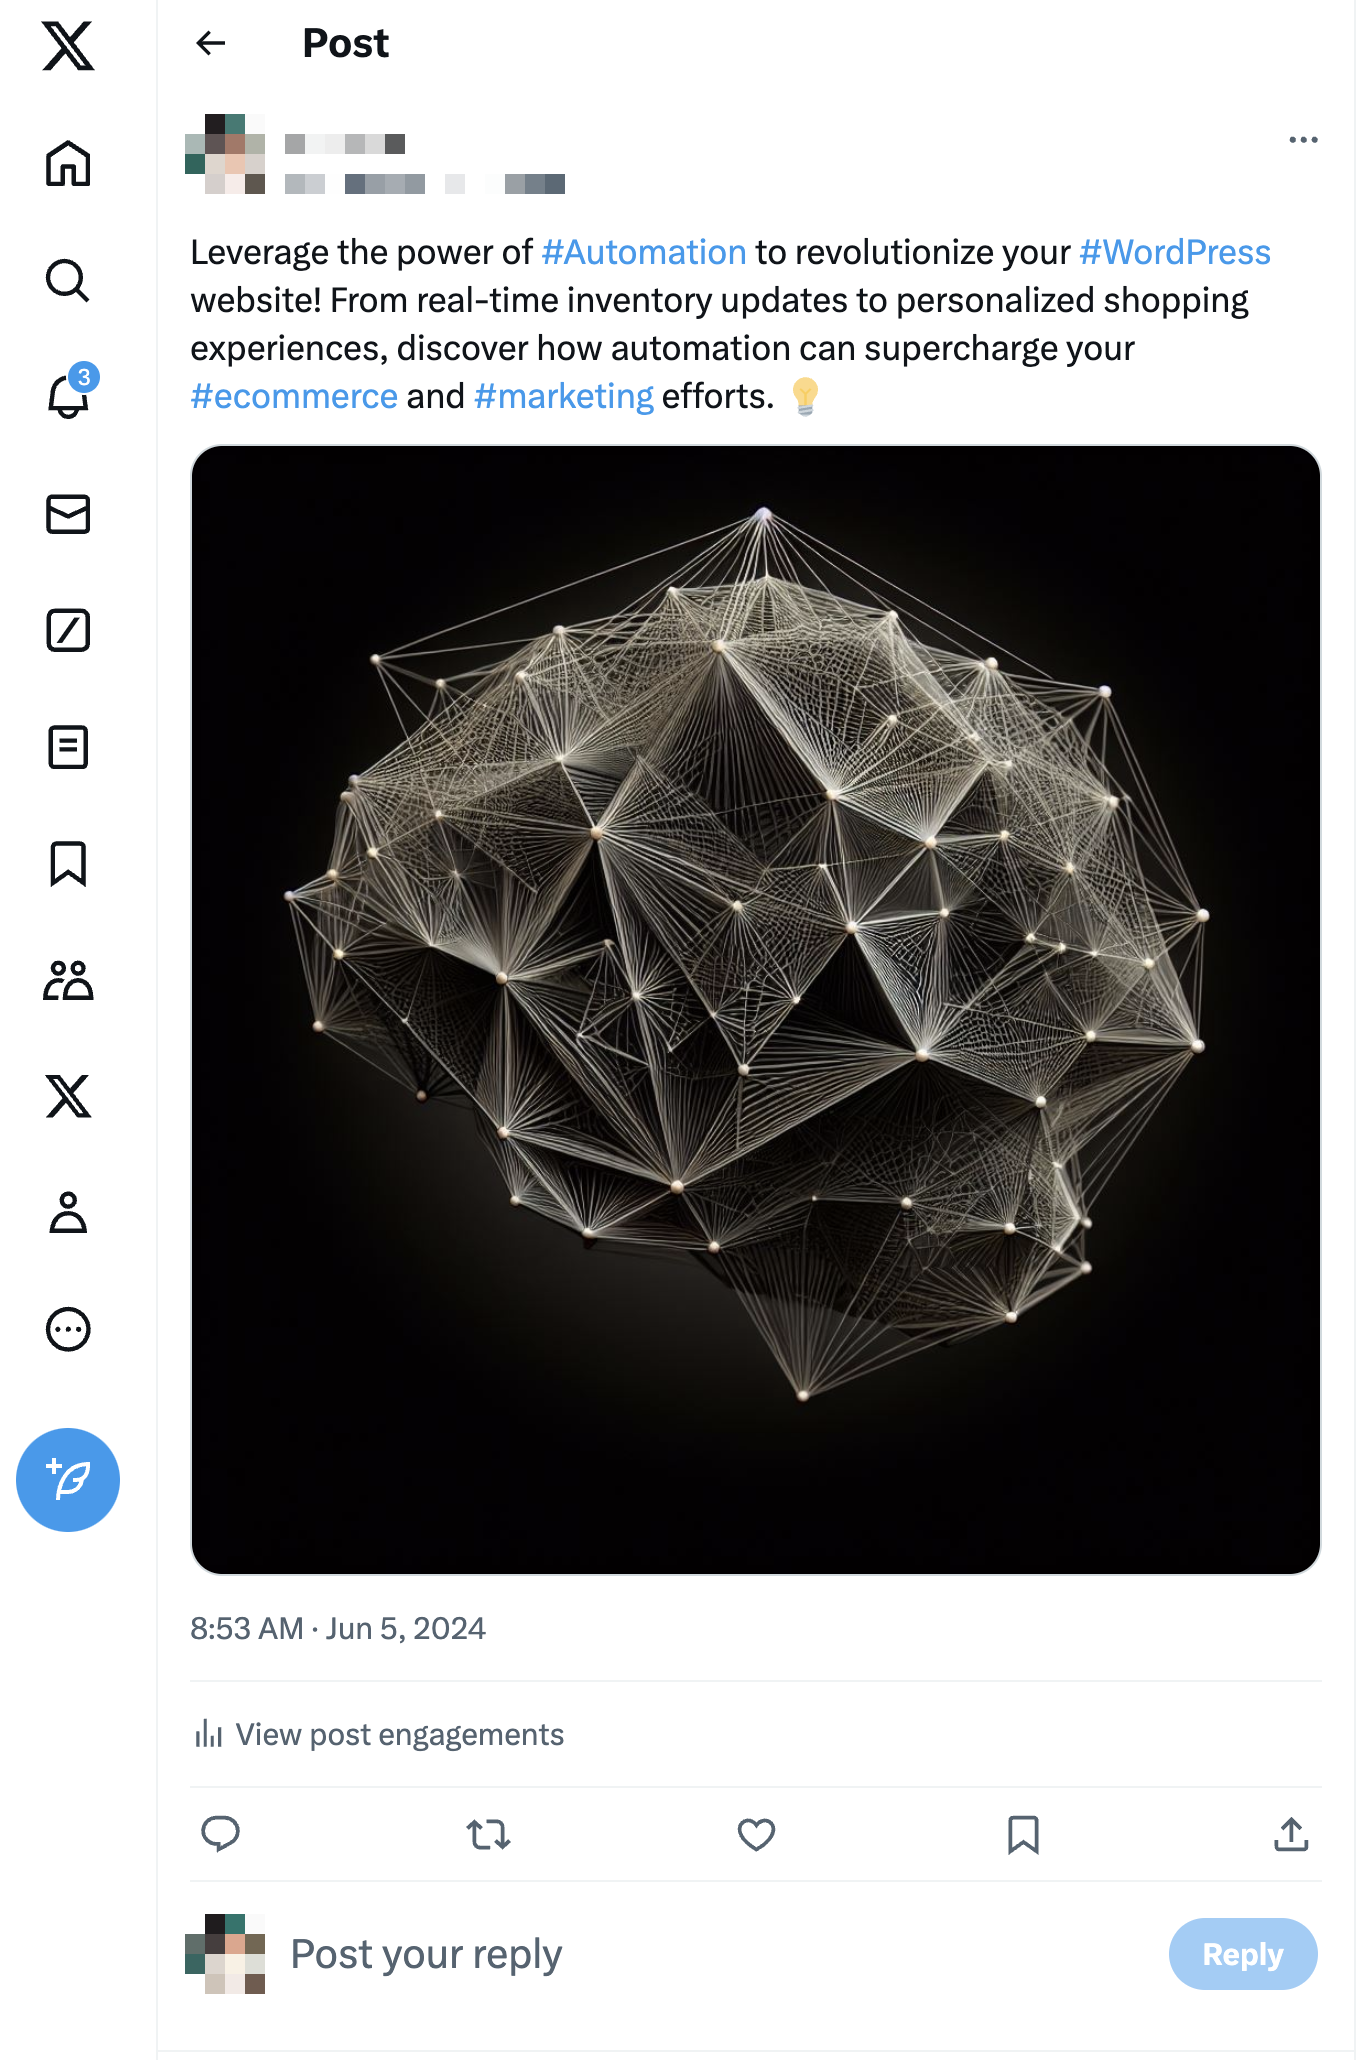
Here’s how our post turned out.
Ready to start sharing your WordPress posts on X/Twitter? Get your Automator Pro license now>>>.
If you prefer another text-based social media platform such as WhatsApp or Telegram, Automator has you covered. Simply follow the same steps that we’ve taken here with your favorite social media integration.
Not sure if Automator can connect your social media account to WordPress? Check out our list of 238 integrations.Don’t see the one you want? Reach out to our support team—we’re probably building the integration as we speak!
Pro Tips for Growing Your Social Media Following with Automator
So far, we’ve just scratched the surface of connecting your social media platforms to your WordPress website. But we couldn’t end this post without first giving you some pro tips and tricks for upping your social media game with some of Automator’s most powerful features.
Check out these strategies for boosting engagement with Automator.
OpenAI-Generated Hashtags and Excerpts
In all of our examples throughout this article, we’ve been using largely static hashtags and excerpts. That is to say, because we typed them into the drafts of our social media posts, they’ll remain largely unchanged each time our recipe runs.
Now, of course, that’s not a good strategy for optimizing your social media reach and engagement. Moreover, most social media platforms like X/Twitter and Instagram don’t necessarily appreciate users sharing links to external sites.
However, with Automator, you can easily use AI to repurpose your WordPress content specifically for social media so that it can exist in its own ecosystem. At the same time, you’ll get AI-generated hashtags that are dynamic and optimized for reach.
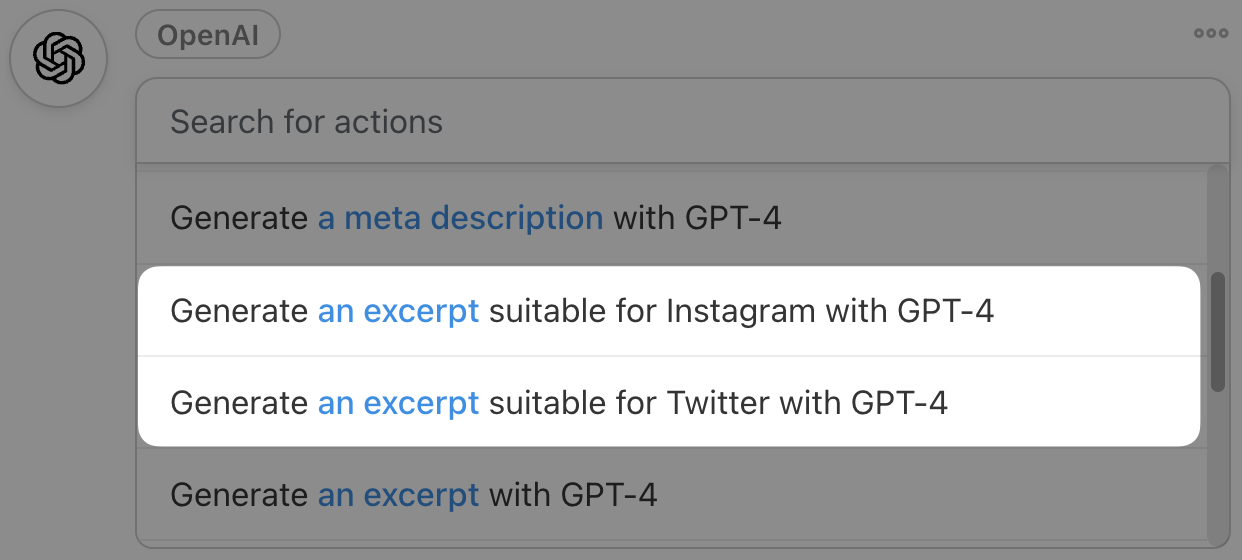
We made some simple changes to the recipes that we created together to repurpose our content.

And, we have to say, we’re pretty impressed with the results:
Schedule Your Social Media Posts for Optimal Engagement
When it comes to maximizing your social media engagement, timing is everything. (Checkout this post from HubSpot to learn the best times to post on various social media platforms.)
Thankfully, Automator can help you time your posts to perfection.
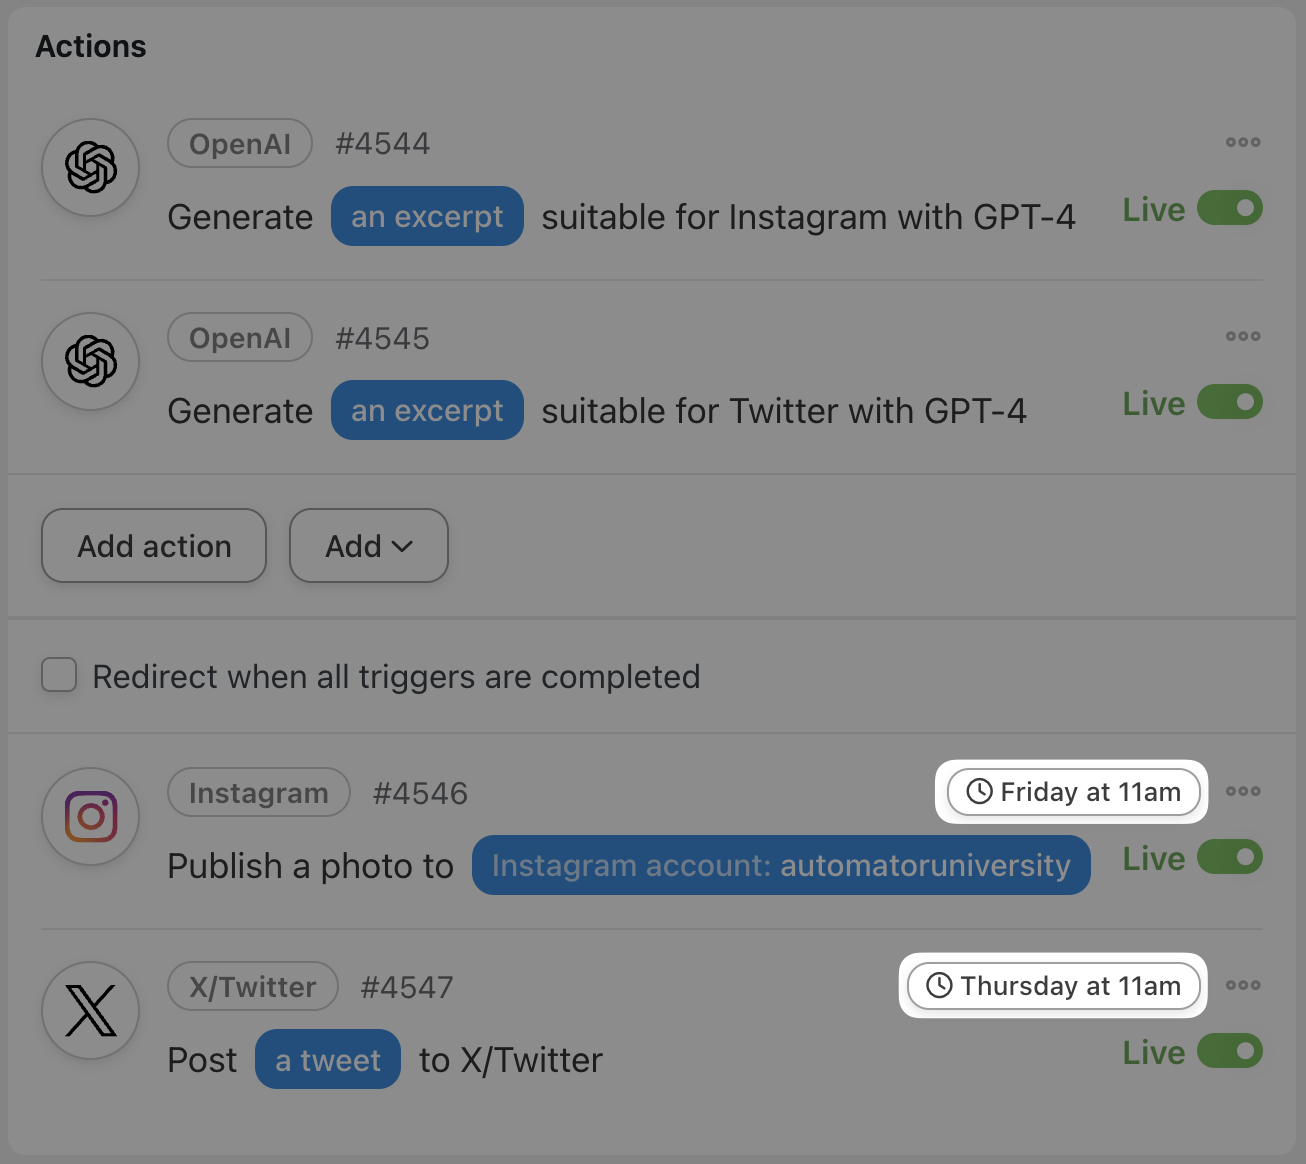
With the delays that we’ve set for our actions, Automator will post our latest blog content on the Thursday and Friday following the publication date on our WordPress website when we know our followers are most likely to be active.
Delaying and scheduling actions with Automator is pretty straightforward. However, there are some cool tricks you can learn by reading our Knowledge Base article on custom scheduling.
Want to schedule your social media posts with Automator? Get your Automator Pro license now>>>.
Frequently Asked Questions
Conclusion
In this post, we showed you how easy it is to automatically share your WordPress posts to Facebook, Instagram, X/Twitter and more.
We got you started with the FREE version of Automator and showed you what makes Automator the best post-to-social plugin for WordPres websites. In the end, we gave some pro tips and tricks for upping your social media game with an Automator Pro license.
With these automation skills at your disposal, you’ll be able to spend more time creating content and less time managing it.
Have any other questions or comments? Want to see support for more features or social platforms? Drop us a line in the comments section below.
Until next time, happy automating!

Related Posts


Thanks for this guide. Is it possible to achieve this on Google’s blogger platform?
Hi Joseph, we don’t currently have a native Blogger integration, but we can add this as a feature request for a future release.