Looking for the best Zapier alternatives? We compare 8 top automation tools on pricing, integrations…
How to Connect BuddyBoss to LearnDash (Step By Step)
Create a community for your e-learners with a seamless BuddyBoss and LearnDash integration by Uncanny Automator!

Are you planning to connect BuddyBoss to LearnDash? This article can help!
With the Uncanny Automator plugin, you can integrate BuddyBoss and LearnDash to build an e-learning campus community like no other.
Want to enroll students in LearnDash courses based on their BuddyBoss group membership, or vice versa? How about celebrating quiz and course completions in a sitewide activity stream or personalized private message?
You can do it all with Automator!
But that’s enough of a preamble. Let’s get into the good stuff.
Introduction
In this step-by-step guide, we’ll show you how to easily connect BuddyBoss to LearnDash with the Uncanny Automator plugin. You’ll learn how to automate time-consuming tasks on your e-learning site and even create new, engagement boosting workflows.
Let’s dive in.
Why Connect BuddyBoss to LearnDash with Uncanny Automator
LearnDash is a popular LMS that makes creating and selling courses on your e-learning website a breeze. Easily create quizzes, award certificates, and add multiple features with the help of addons.
On the other hand, BuddyBoss is a social plugin for WordPress websites with which you can build online communities and sell memberships with related materials.
If you’ve been thinking that BuddyBoss is the perfect plugin to turn your e-learning website into a virtual campus, then your head is in the right place. In fact, the BuddyBoss theme already has a great addon for LearnDash users who prioritize community.
But, if you want to create a totally seamless integration and a fully engaged student community, then you’ll want Uncanny Automator.

As the #1 automation and integration plugin for WordPress websites, Automator can be your favorite e-learning administrator and student coordinator, all in one!
Don’t believe us? We’ll walk you through setting up your very first Automator recipes so you can test out this integration for yourself.
Just grab your Automator license so you can follow along.>>>
Send a BuddyBoss Message for LearnDash Course Completion
In creating your first Automator recipe, we’ll start with a simple example; sending a congratulatory private message to a user for completing a course.
Here’s the step-by-step guide for how we did it.
Step 1: Create a New Recipe
From your WordPress Admin Dashboard, navigate to Automator > Add new recipe. In the pop-up window that appears, select Logged-in users.

Step 2: Name Your Recipe
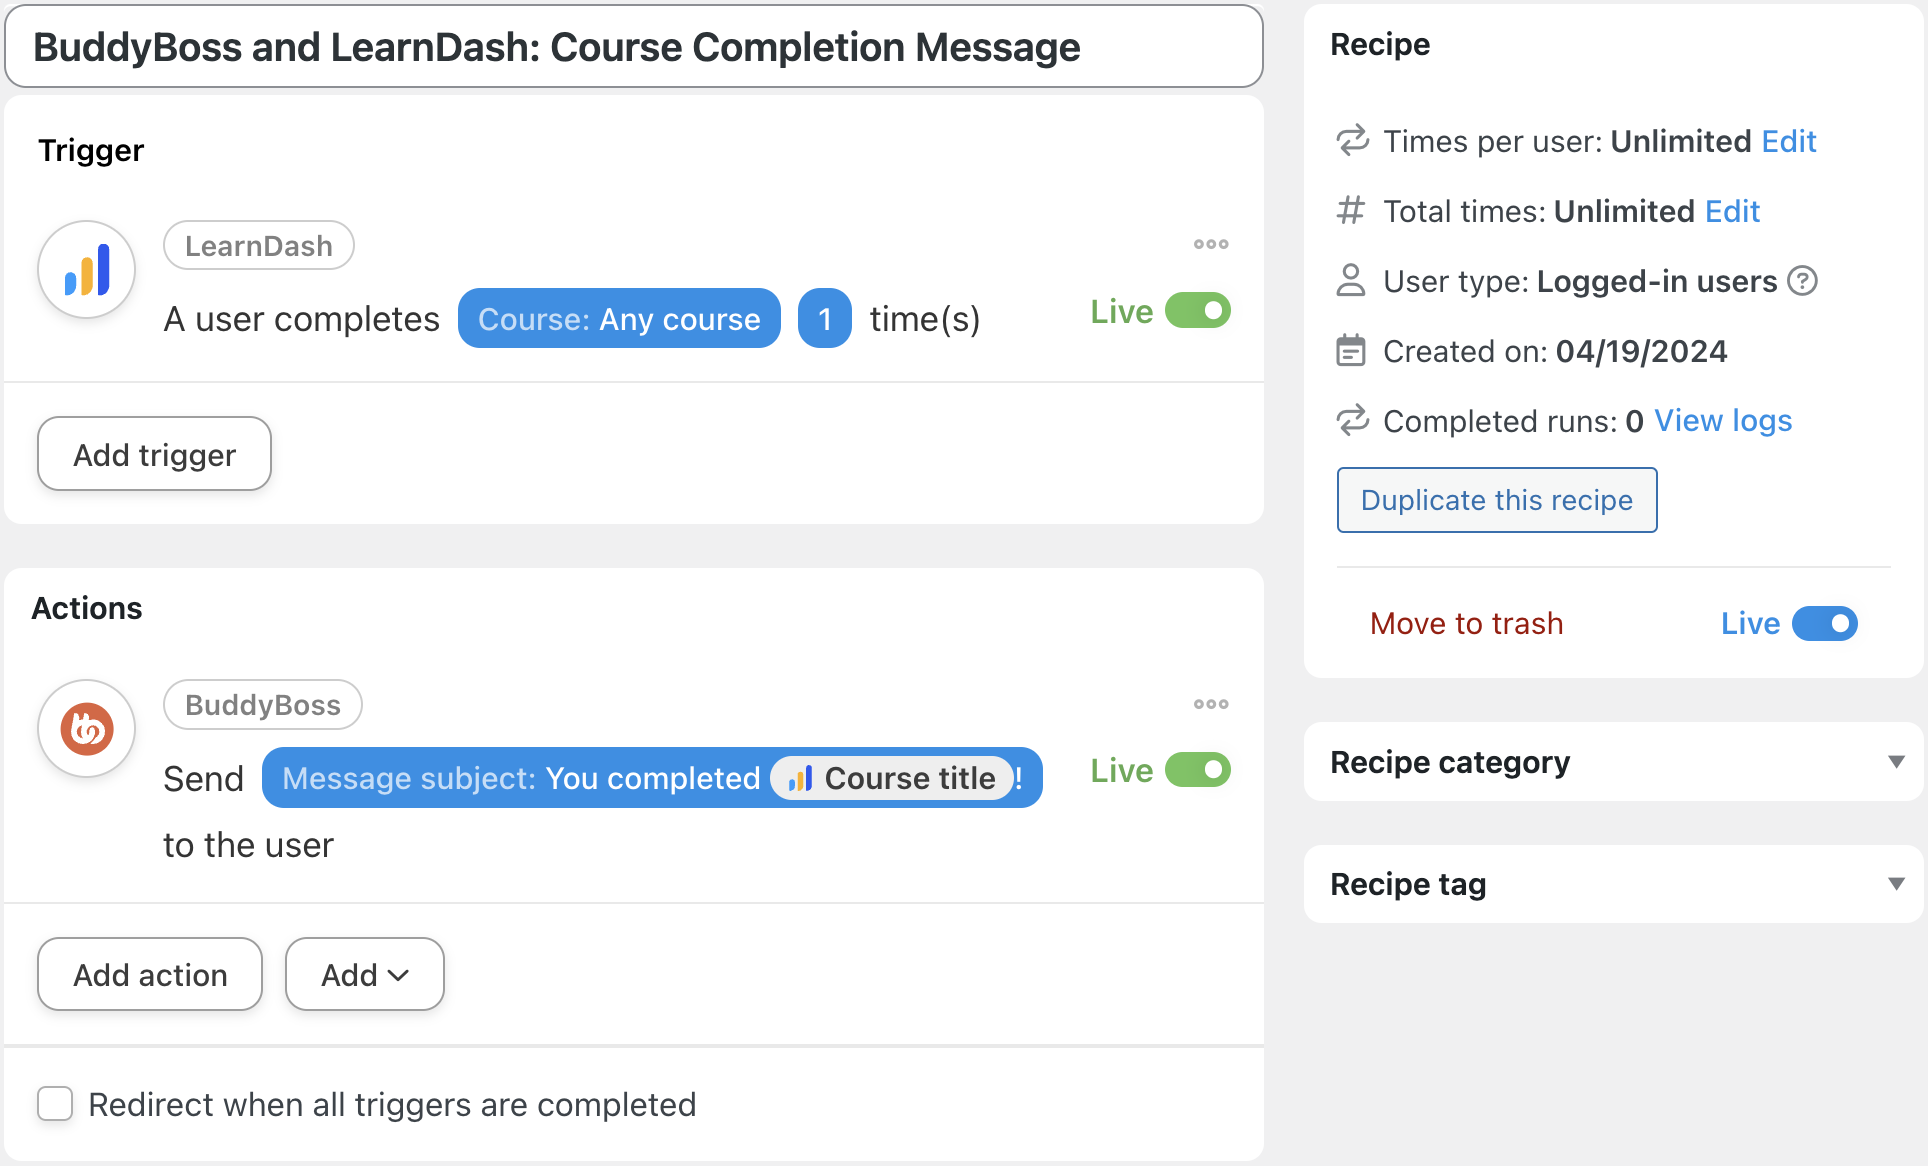
Give your recipe a name that makes it easy to recognize at a glance. For example, we’ve named this recipe “BuddyBoss and LearnDash: Course Completion Message”.
Step 3: Configure Your Trigger(s)
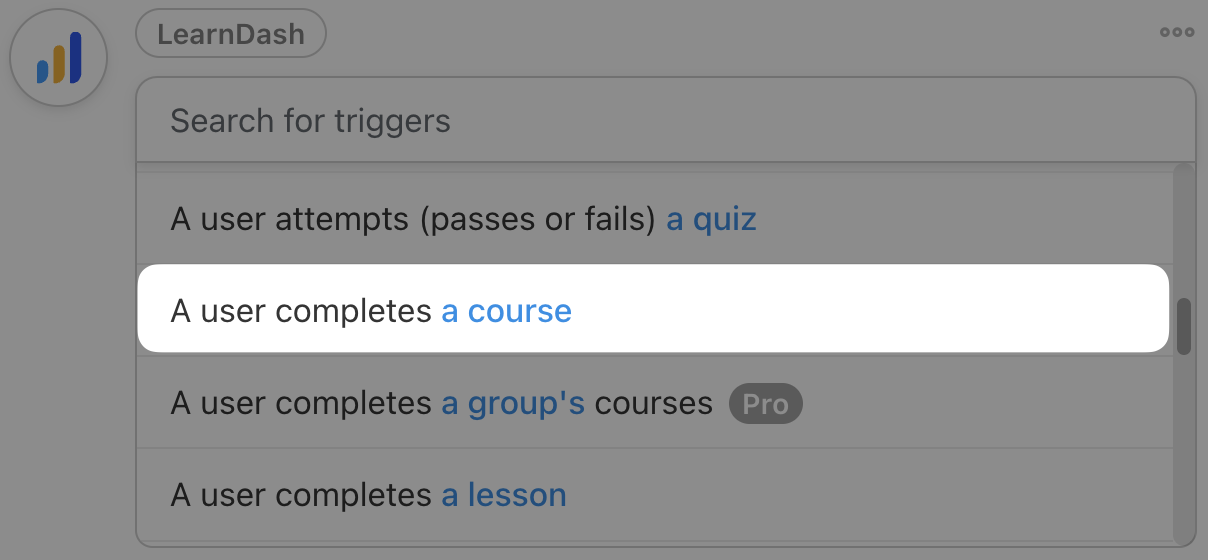
In the Trigger panel, from the menu of available integrations, select LearnDash.

From the dropdown list that appears, select A user completes a course.
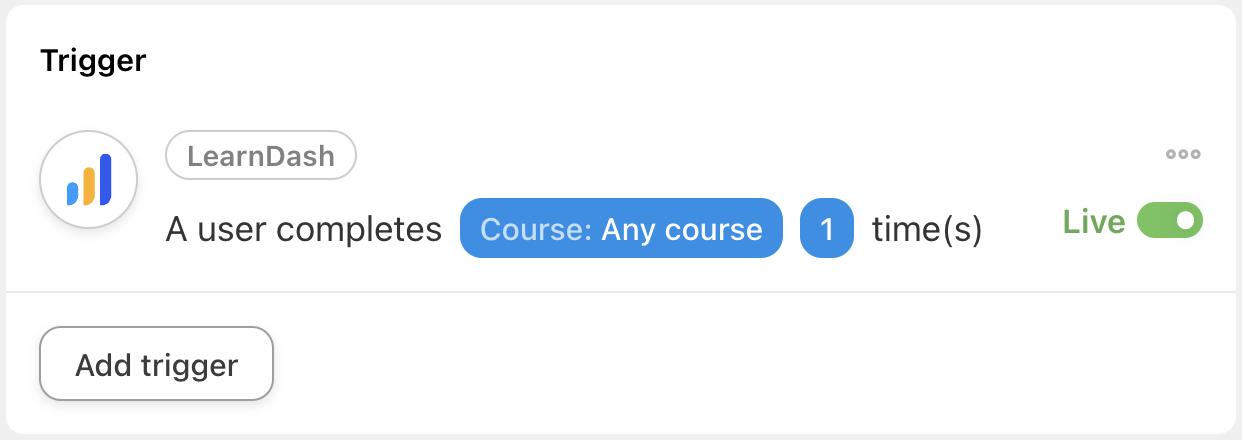
Automator will prompt you to select a course. By default, Any course will be selected but you can choose a specific course.
Once you’re finished, your completed trigger should look something like this:
Step 4: Configure Your Action(s)
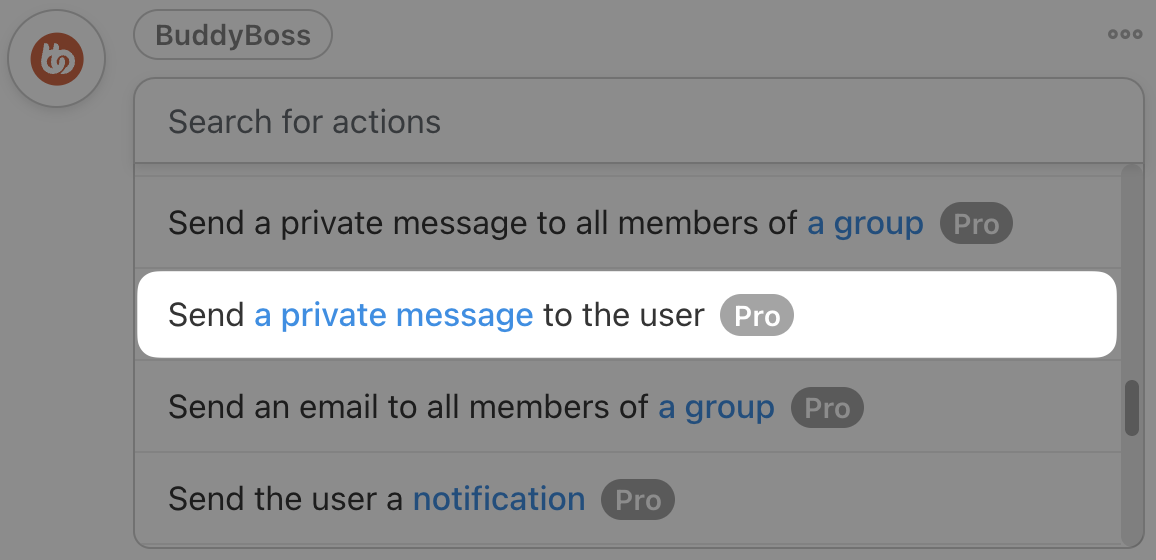
In the Actions panel, click Add action. From the menu of available integrations, select BuddyBoss.

From the dropdown list appears, select Send a private message to the user.
Automator will prompt you to draft the message. You can personalize the message using tokens (i.e., dynamic data pulled from your WordPress website and from within recipes). To select a token, simply click the Asterisk in any field.
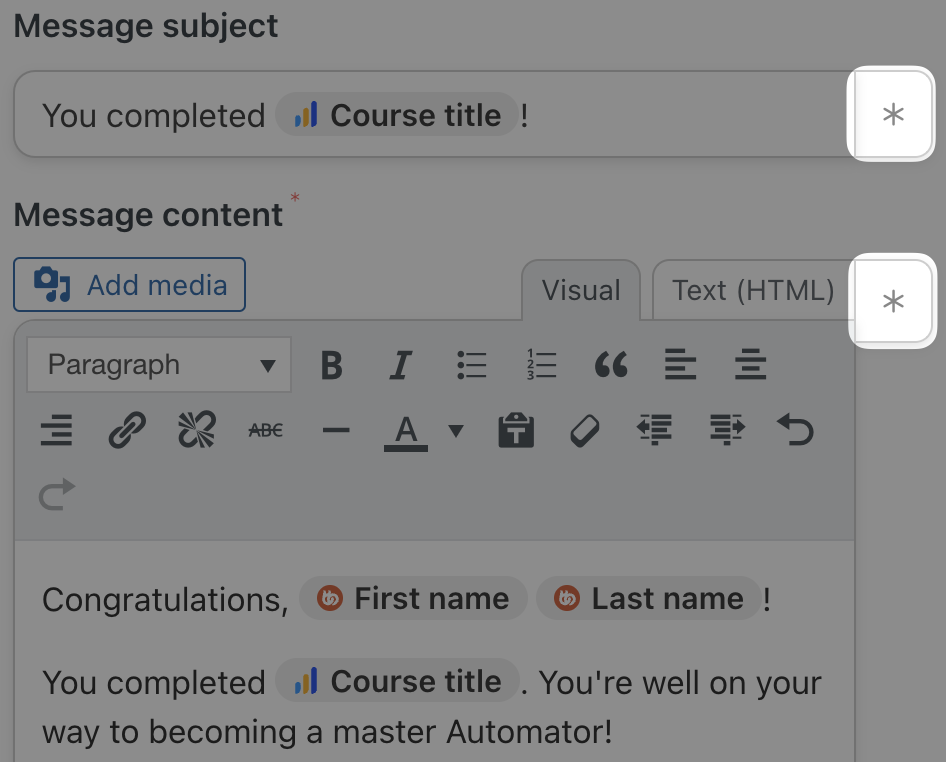
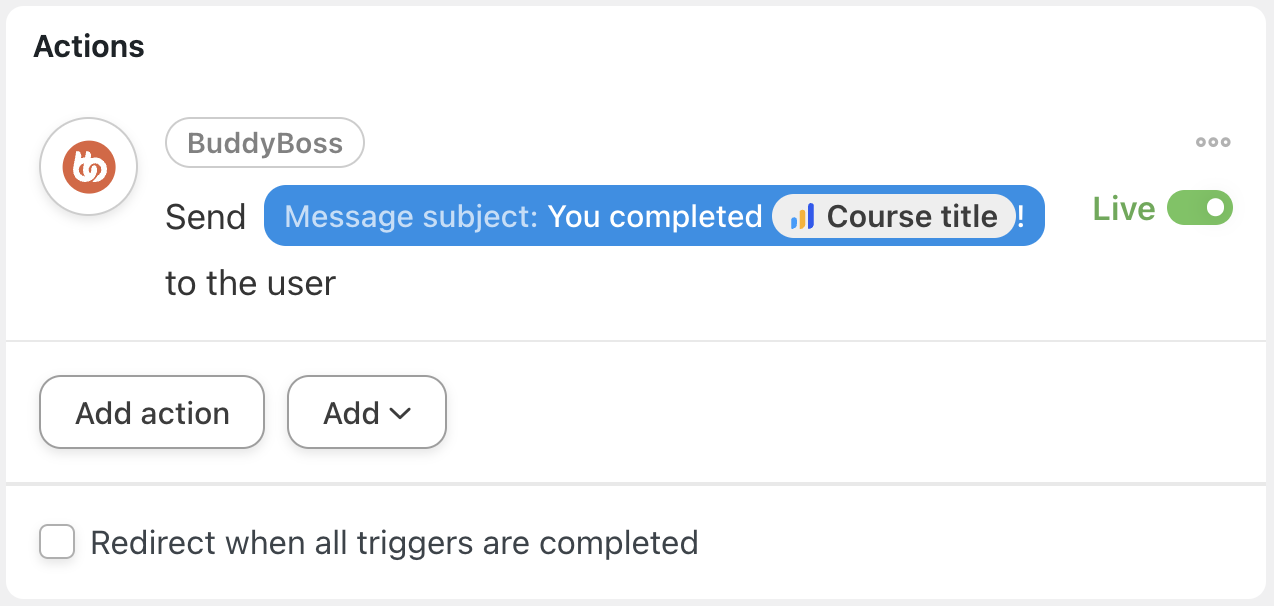
Once you’ve drafted your message, click Save. Your completed action should look something like this:
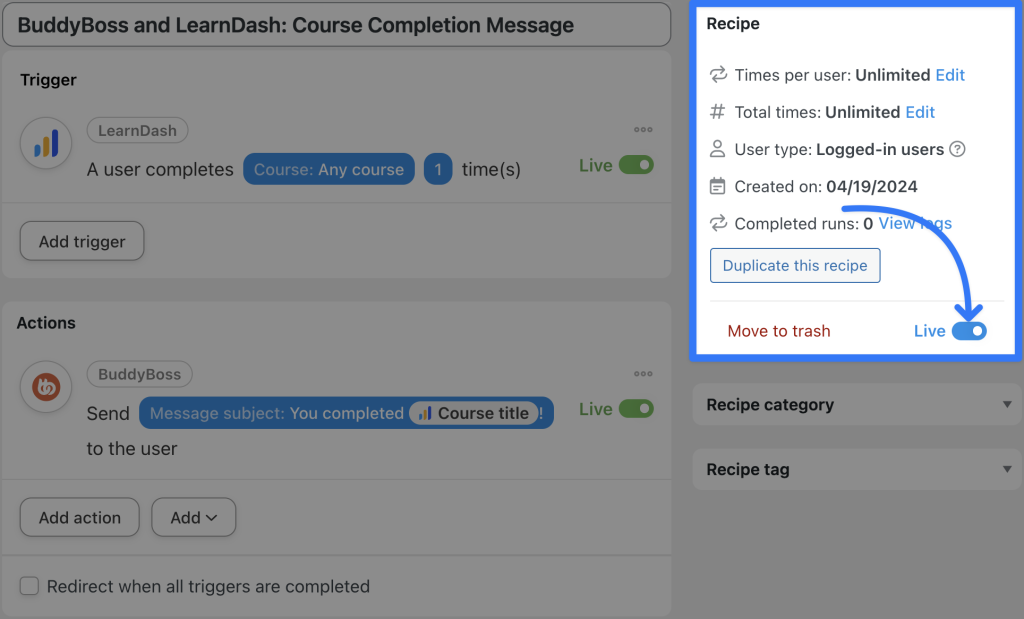
Step 5: Go Live!
You’re almost done with your first BuddyBoss and LearnDash integration. All you need to do now is toggle the recipe from Draft to Live.
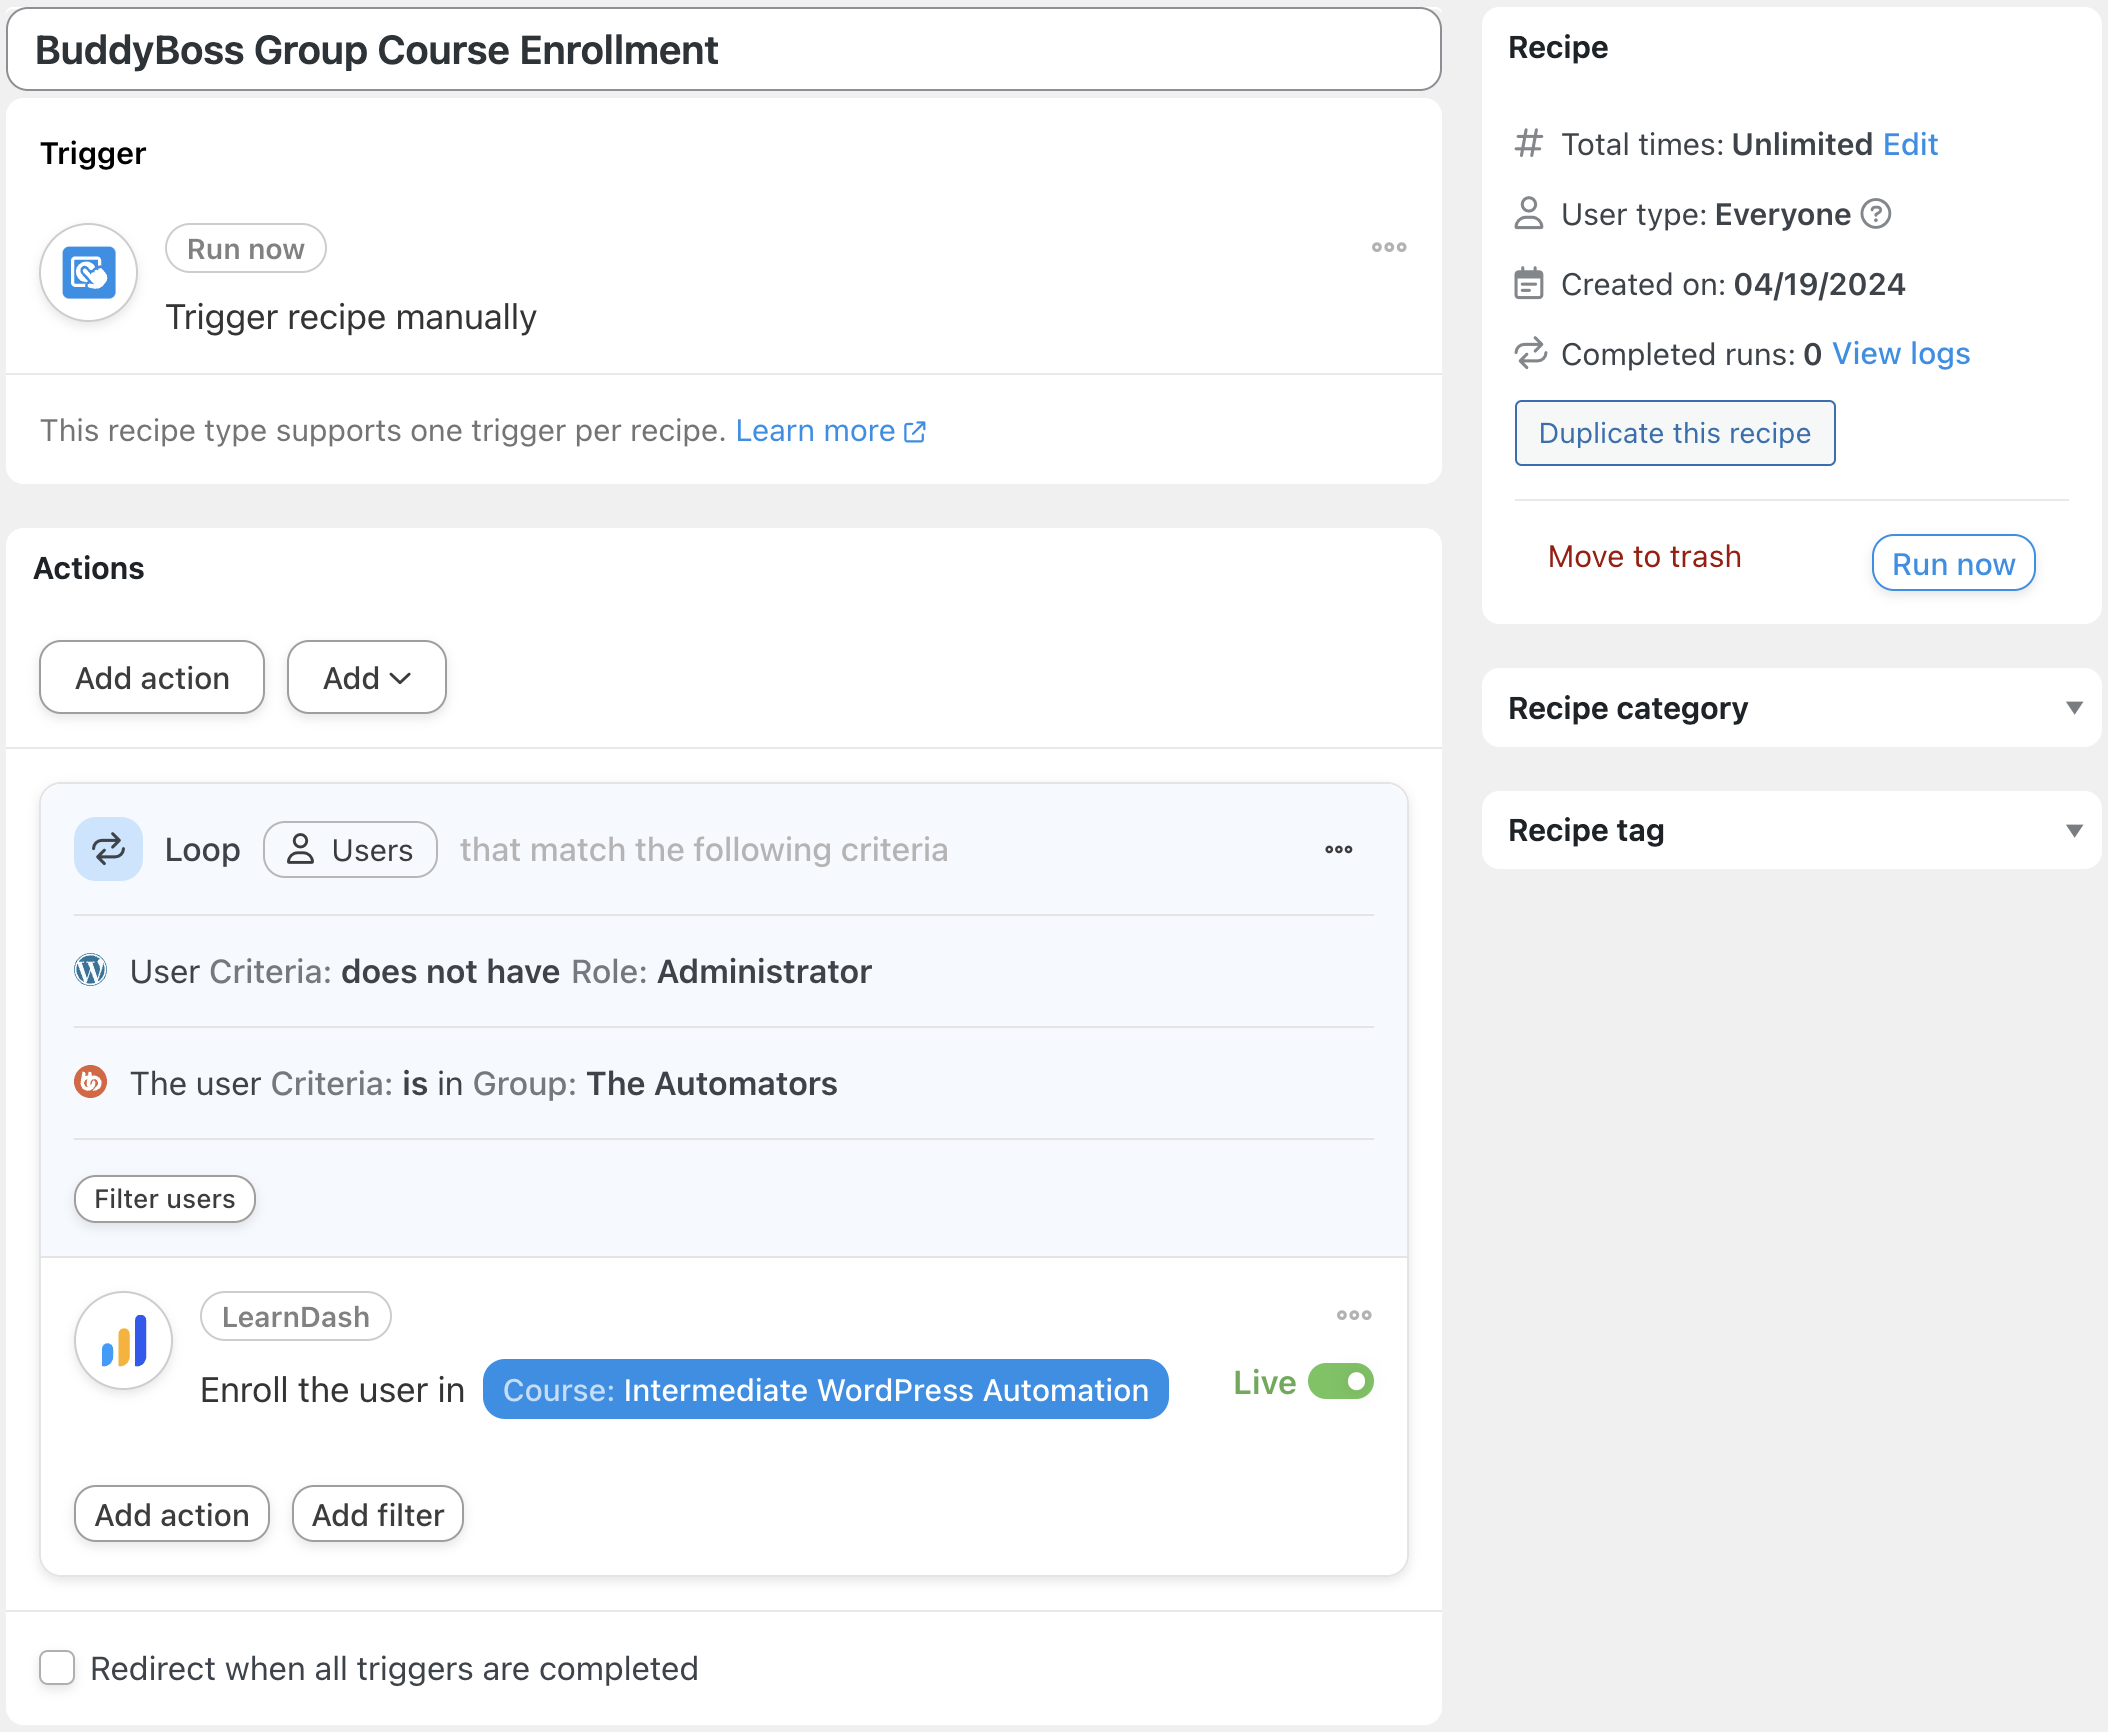
Why stop there? Did you know that you can add multiple triggers and actions to your Automator recipes? You can also run Loops; i.e., larger automations that perform actions on users or posts in bulk!
Like in the recipe pictured below, for example, where we’re able to enroll all members of a BuddyBoss group in a LearnDash course with the click of a button!
With recipes like these, you’re well on your way to creating a virtual campus with a vibrant sense of community.
More BuddyBoss and LearnDash Integrations
Now that you’ve gotten the hang of creating Automator recipes, you can start coming up with BuddyBoss and LearnDash integrations of your own.
Automator has 238 integrations, with more on the way all of the time, so connecting BuddyBoss to LearnDash is just the beginning.
Automator’s R.I.C.H framework can help you identify more opportunities to create an engagement-rich and vibrant elearning environment.
Tasks that are ripe for automation are:
- Repetitive: Tasks, particularly unavoidable ones, that you perform over and over again.
- Iterative: Tasks that you can and/or do perform across any measurable number of customers, products, posts, pages, etc. or a subset thereof.
- Costly: Tasks that consume significant resources, namely time and money.
- Hard: Tasks that are complex and prone to human error.
If a task satisfies one or more of these criteria, it’s a strong candidate for automation. Remember, when it comes to automation, think RICH!
Frequently Asked Questions
Conclusion
In this step-by-step guide, we showed you how easy it is to connect BuddyBoss to LearnDash with Uncanny Automator.
Hopefully, we’ve given you some ideas for powerful automations that you can create on your own. Nevertheless, if you have any questions, drop us a line in the comments sections below and we’ll get back to you!
Until next time, happy automating!

Related Posts


Comments (0)