

The Test step lets you try a trigger or action from inside the recipe builder before you switch the recipe on. This article covers which items have a Test step, how an action test and a trigger test work, what happens when you save without testing, and how test data relates to tokens.
Which items have a Test step
Every trigger and action opens in a modal with a Set up step. The Test step appears only for items that come with a test. On Uncanny Automator 8.0 those are:
- Emails > Send an email — sends a test email to an address you enter.
- Webhooks > Send data to a webhook — previews the payload the action will send, then sends a real request to the webhook URL. The same two tests appear on every webhook-based app action: Zapier, IFTTT, Make, Integromat, Integrately, Airtable, KonnectzIT, and Pabbly.
- Incoming webhook triggers — listen for a webhook and capture a sample of its data. This covers the incoming webhook trigger of Webhooks, Zapier, Make, Integromat, Integrately, IFTTT, KonnectzIT, Typeform, ThriveCart, OptinMonster, and Google Sheets. Requires Uncanny Automator Pro.
- Plugin Actions > Create a custom trigger on a plugin action hook — listens for the hook and captures its arguments. Requires Uncanny Automator Pro.
An item with a test shows Cancel, Test and Save in its Set up step. An item without a test shows Cancel and Save and has nothing to test: save it, and switch the recipe on when the recipe is ready. Other integrations may add tests in later releases.
Testing an action
- Click the action on the canvas to open it, or add a new one from the picker.
- Fill in the fields in the Set up step.
- Click Test. The builder checks the fields first, so a required field that is still empty keeps you on Set up until you fill it.
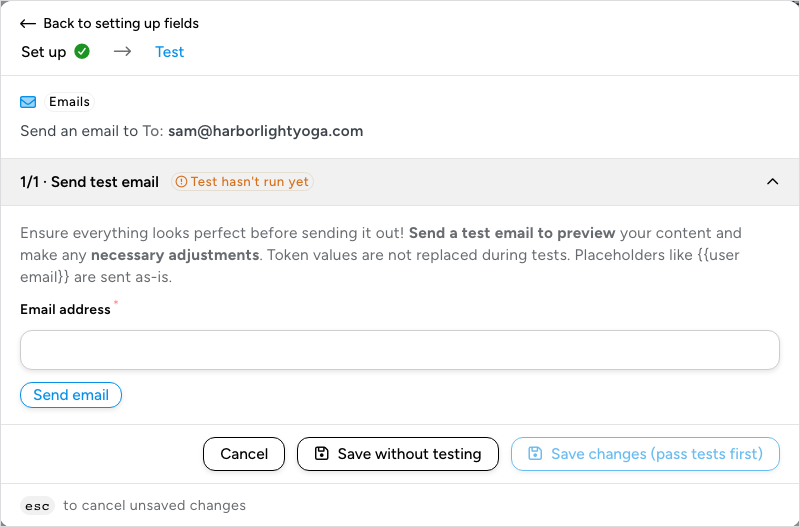
The Test step lists the item’s tests, numbered 1/1, 1/2, and so on, each with a status chip. A test that has not run yet shows Test hasn’t run yet. Each test explains what it does and may ask for a value it needs only for the test: the email test asks for an Email address to send the preview to, so nothing goes to the recipient you entered in Set up.
- Enter any value the test asks for, then click the test’s button: Send email for the email action, Validate data format or Send webhook for the webhook action.
- Read the result. The chip changes to Test passed or Test failed, with how long ago the test ran beside it, and a message below explains the outcome, for example “Test email sent successfully! Check your inbox to review the preview.” or “The test email could not be sent. Ensure that your email server settings, such as SMTP configuration, are accurate.”
- Click Save changes. Until every required test has passed, the button reads Save changes (pass tests first) and is disabled. A test marked Optional, such as the webhook action’s Validate data format, does not hold up saving.
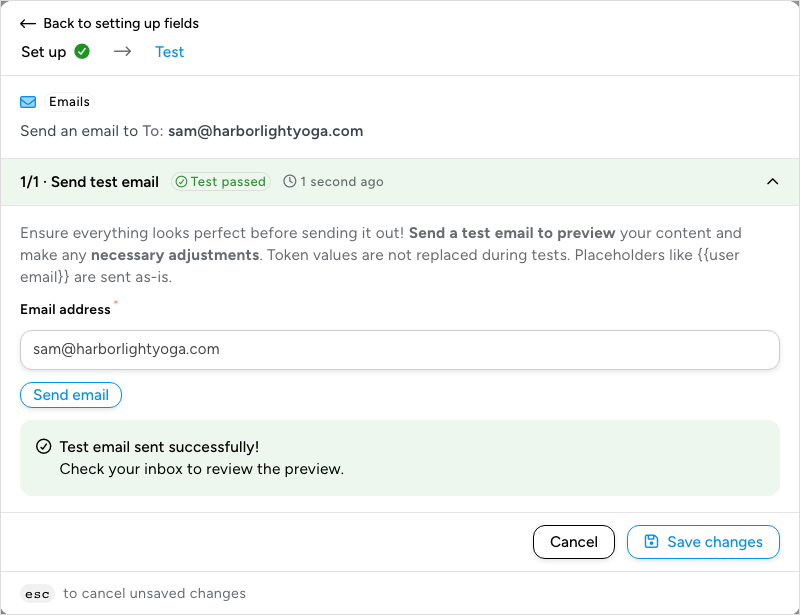
To change a field, click Back to setting up fields at the top of the modal. Until every required test has passed, the Test step also shows Save without testing, so you can keep an item with a failed or unfinished test and come back to it later.
Note: An action test does the real thing. The email test sends an email to the address you enter, and the webhook test sends a request to the webhook URL in the action. If the receiving service creates records when it gets a request, expect a test record.
Testing a trigger
A trigger test listens for the real event instead of running something. It is available on the incoming webhook triggers and the Plugin Actions trigger, both in Uncanny Automator Pro, and it replaces two buttons from the 7.x builder: Get samples on webhook triggers and Capture hook data on the Plugin Actions trigger.
- Open the trigger and complete the Set up step. For an incoming webhook trigger, Fields can stay empty when you click Test, but the trigger cannot be saved until the table has at least one Key. Only the keys in Fields become separate tokens; you can type them yourself or fill the table from the test’s sample with Use these fields. For the Plugin Actions trigger, the test listens for the saved hook, so Test saves the trigger before it opens the Test step.
- Click Test.
- Click Listen for webhook or Listen for hook. The test’s chip reads Running, the button changes to Stop listening, and a countdown beside it shows the time remaining before the test stops listening. The test listens for 60 seconds.
- Make the event happen: send a request from the other service to the webhook URL shown on the trigger’s Set up step, or do whatever fires the hook on your site.
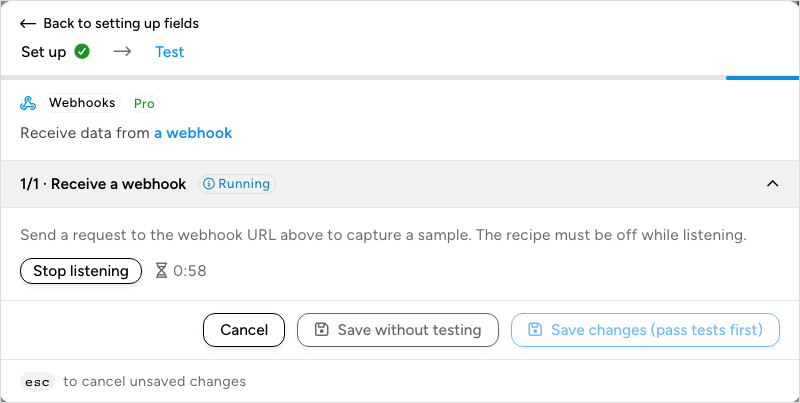
When the event arrives, the test passes with “A webhook was received!” or “The hook fired!” and shows the captured data as a table. If nothing arrives in time, the test fails with “No webhook was received within the time limit.” or “The hook did not fire within the time limit.” and any earlier result is kept. Click Stop listening to end the test early. When the test has passed, click Save changes.
A passed webhook test also shows Use these fields. Click it, then confirm with Use these fields in the box that says “This will remove your current fields and use the ones in the table above instead.” The builder returns to the Set up step with one row in Fields for each key of the sample, its type and the received value as the sample value. Check the rows and click Save. If you click Save changes while Fields is still empty, the builder goes back to the Set up step and marks the empty Key with “Please fill out this field.”
Important: The webhook test only listens while the recipe is switched off (Recipe off in the top bar), as the Test step says: “The recipe must be off while listening.” If the recipe was on, switch it back on after the test. If you listen while the recipe and the trigger are both on, the test fails with “This test needs the recipe to be off. Switch the recipe off, then listen for test data again.”
Saving without testing
Save on the Set up step saves the item with its values and skips the Test step; Save without testing on the Test step does the same. The item runs normally when the recipe is on: test results are not checked when you switch the recipe on or when it runs. The builder does not mark untested items on the canvas, so if you want to be sure an action works, test it before you switch the recipe on.
The builder keeps the result of the last test with the item. Changing a field value afterwards clears that result, so Save changes reads Save changes (pass tests first) again until you rerun the test. Changing the item’s custom label does not clear the result.
When to test and when to skip
- Test an email action when the recipe is new or you changed the template. The test shows you the layout and the sender details as the recipient will see them.
- Test a webhook action when you are connecting a service for the first time or changed the data format. Validate data format shows the exact payload without sending it; Send webhook confirms the URL answers.
- Test an incoming webhook or Plugin Actions trigger whenever you need to see the data it receives. For Plugin Actions the capture defines the tokens; for a webhook it shows you the keys the service sends and can copy them into Fields (see the next section).
- Skip testing when the item has no test, when the real request would be unwanted, or when you are duplicating a working item and will test the copy after editing it.
Test data and tokens
Tokens are not replaced during an action test. As the Test step puts it, “Token values are not replaced during tests”: a placeholder such as {{user email}} is sent exactly as written. No trigger has fired, so there is no user, post, or form entry to take values from. Judge the layout and the delivery from a test, and check the personalised values in the recipe’s logs after a real run.
A trigger test works the other way round. The arguments of a captured hook become the Plugin Actions trigger’s tokens, as Capture hook data did before. A captured webhook sample is kept as the Webhook sample data token, and Use these fields copies its keys into Fields, as Get samples did. Only the keys listed in Fields become separate tokens. See Webhook triggers and Create a custom trigger on a plugin action hook for the fields each trigger exposes.
On Webhooks > Send data to a webhook, a Send webhook test that reaches the URL also saves the fields of the response with the action, as the 7.x Send test button did. Later actions can use them as tokens named Response – followed by the field name, along with Response – Body (raw) and Response – Status code.
Test runs do not appear in Automator > Logs.
Related: Managing triggers, Managing actions, Webhook triggers, Send data to a webhook, Moving to the new recipe builder


Comments (0)