

The Setup wizard walks you through the first things to do after installing Uncanny Automator: activate your Pro license or link a free account, connect your AI to the site, and decide whether to turn on Uncanny Page Builder. The Dashboard is the home page of the Automator menu afterwards. This article covers every step of the wizard, what the Dashboard shows, and where the old Status and Tools pages went in Uncanny Automator 8.0.
The wizard assumes Uncanny Automator is installed and active. If it isn’t yet, start with Installing Uncanny Automator.
Open the Setup wizard
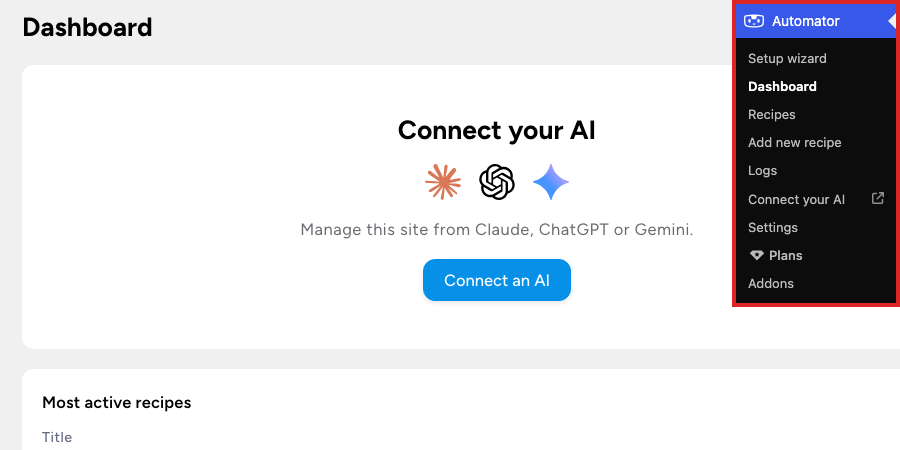
In your WordPress dashboard, go to Automator > Setup wizard. The entry is listed while the site has no connected free account (Lite) or no active Pro license; once the license is active or the account is connected, it leaves the menu and the wizard carries on to its next step. When you activate Uncanny Automator on its own from the Plugins page, WordPress opens the Setup wizard if the site has no license key or connected account yet, and the Dashboard otherwise.
The wizard is one card with four steps across the top: Activate license (or Create account when Uncanny Automator Pro is not installed), Connect your AI, Page Builder, and Try it. The current step is marked Now, finished steps Done. A Go to the Dashboard link sits under the card on every step except the last, so you can leave at any point and come back later.
Step 1: Activate license or create account
What the first step asks for depends on which plugins are active.
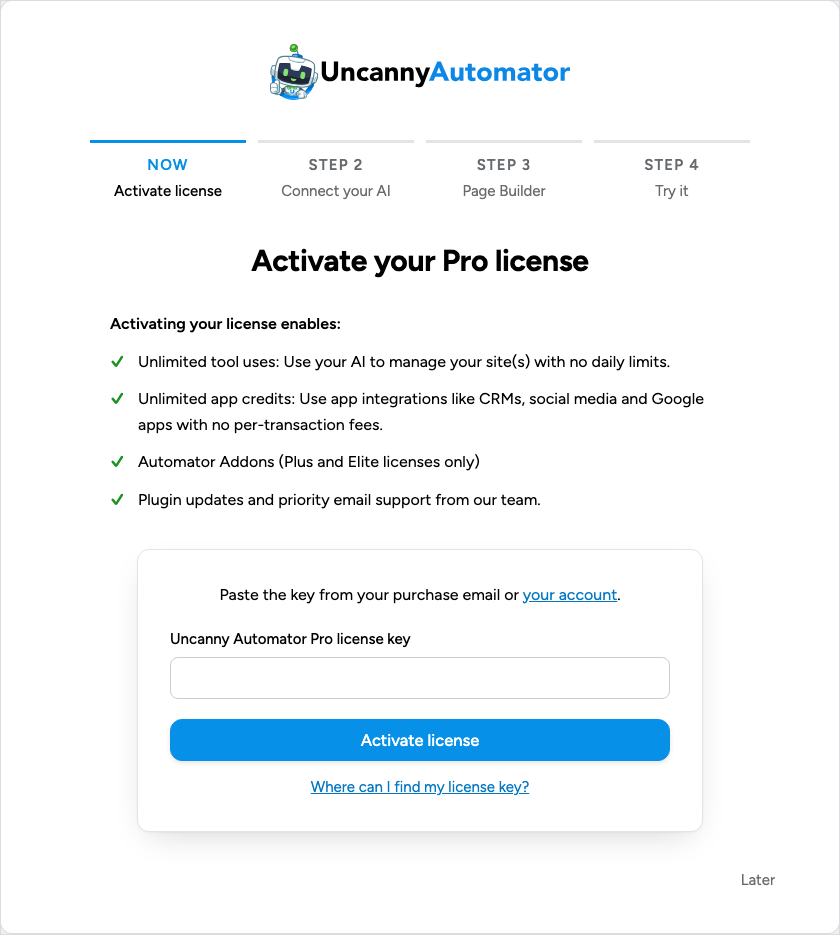
With Uncanny Automator Pro active, the step is Activate your Pro license. The step lists what an active license enables (unlimited tool uses, unlimited app credits, the addons on Plus and Elite licenses, and plugin updates with priority email support). Paste the key from your purchase email or from your account into Uncanny Automator Pro license key and click Activate license. The wizard confirms with “License has been activated” and moves on by itself. The Where can I find my license key? link under the field opens the article of the same name.
With only the free plugin active, the step is Start with a free account. Click Create free account or sign in: automatorplugin.com opens in the same window, where you sign up with Google, Facebook, or email, and you are sent back to the wizard once the account is linked to the site. The free account gives your AI its tool uses, gives you some Uncanny Agent usage, and gives your recipes app credits for app integrations such as Google Sheets, Slack, and Mailchimp. Recipes between the plugins on your site don’t use credits.
Either version of the step can be skipped with Later at the bottom right. The wizard asks Are you sure? and lists what won’t work without a license or account; Skip for now confirms and ends the wizard on the skipped screen described below.
Step 2: Connect your AI
The second step is Connect your AI to this site. An MCP server is how AI apps such as ChatGPT or Claude connect to other software, and Uncanny Automator is one, so the AI you already use can manage and automate the site. A green pill at the top confirms the first step (“Your Pro license is active on this site.” or “Signed in as” your account email).
Pick your AI from the cards: ChatGPT, Claude, Gemini, Copilot, Perplexity, or Another app for Cursor and other MCP apps. The card opens mcp.automatorplugin.com in a new tab, and the wizard switches to a waiting screen with three instructions: follow the steps in the new tab to add Uncanny Automator to your AI, approve the connection to this site (read-only, or read-and-write so your AI can make changes and build recipes), and come back to this tab. The page moves on to the next step by itself as soon as the connection is confirmed; if it doesn’t, the links under the instructions let you Reopen mcp.automatorplugin.com or Choose a different AI.
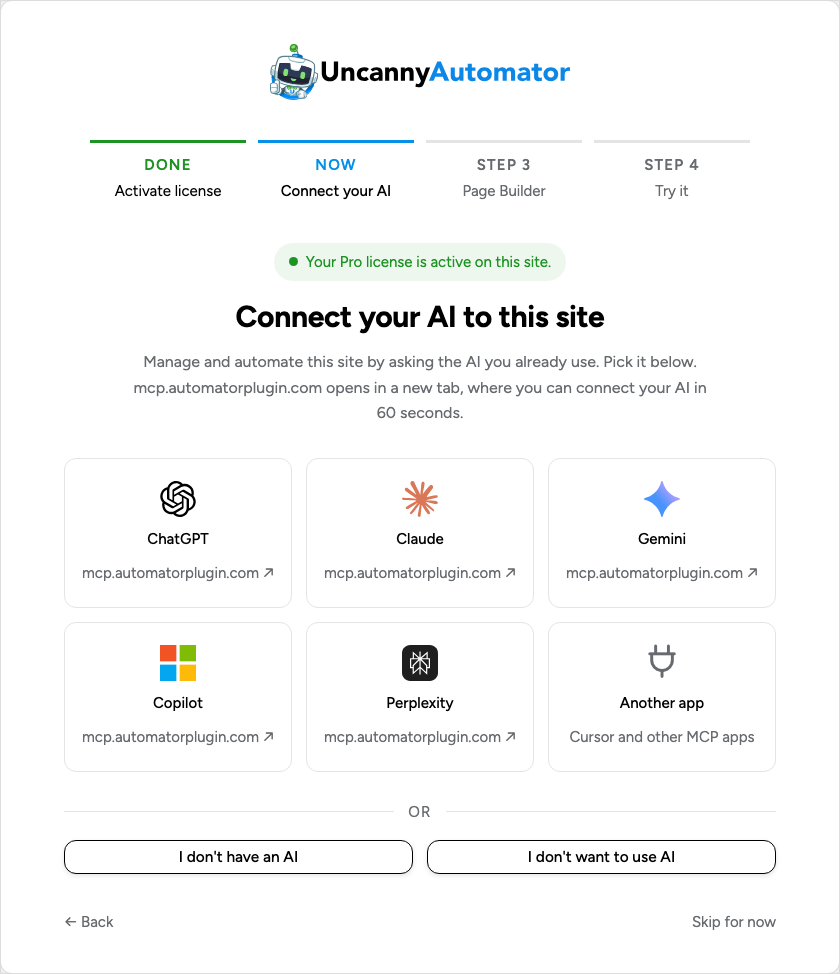
Below the cards, two buttons cover everyone else:
- I don’t have an AI: shows the Uncanny Agent is built in screen. Uncanny Agent is the AI assistant built into Uncanny Automator for people without an AI subscription; it does the same things a connected AI does, from your WordPress dashboard. Answer Enable Uncanny Agent? with Yes, enable Uncanny Agent or No, not now and click Continue. Yes goes on to the Page Builder step; No ends the wizard on the skipped screen. On a site where Uncanny Agent isn’t available, the button goes straight to the skipped screen.
- I don’t want to use AI: ends the wizard on the skipped screen. Your recipes work exactly the same without an AI connected.
Skip for now at the bottom right does the same as I don’t want to use AI, and Back returns to the first step.
Step 3: Page Builder
Once an AI is connected or Uncanny Agent is enabled, the wizard offers Uncanny Page Builder: Describe a page, and your AI builds it. Uncanny Page Builder is built into Uncanny Automator. Describe the page you want, and your AI (or Uncanny Agent) designs the layout, writes the content, and builds it as a draft you can edit by hand before anything goes live. If you already use Gutenberg, Spectra, or Elementor, your AI builds and updates pages in that builder too; Uncanny Page Builder is for sites without a page builder, or for a fast new landing page.
Answer Enable Uncanny Page Builder? with Yes, enable Uncanny Page Builder or No, not now, then click Continue. There is no skip link on this step; either answer moves on. You can change the choice later at Automator > Settings > Uncanny Page Builder.
To build your first page, see Getting started with Uncanny Page Builder.
Step 4: Try it
The last step, Now ask it to do something, lists ready-made requests in groups such as Get to know your site, Improve your site, and Automate it. Each request has a Copy button; paste it into your connected AI and watch it happen on the site. When you chose Uncanny Agent instead, the button is Ask and sends the request straight to Uncanny Agent. Each request uses one or more tool uses (a tool use is one thing your AI does on your site through Uncanny Automator).
The buttons at the bottom open your AI app (or Open Uncanny Agent) and Go to the Dashboard. The two links underneath, Build a recipe yourself and Connect another AI app, open the recipe builder and return to step 2.
If you skipped the wizard
Skipping from any step ends on the screen You’re set up. Connect your AI when you’re ready. Uncanny Automator is installed and working. The screen offers two tiles: Connect your AI, which restarts the wizard at step 1, and Build a recipe yourself, whose Open the recipe builder button starts a new recipe.
Later, Automator > Connect your AI opens mcp.automatorplugin.com directly, and the Connect your AI card on the Dashboard does the same. Once an AI is connected, the menu entry is named AI settings and opens Automator > Settings > MCP settings instead.
The Dashboard
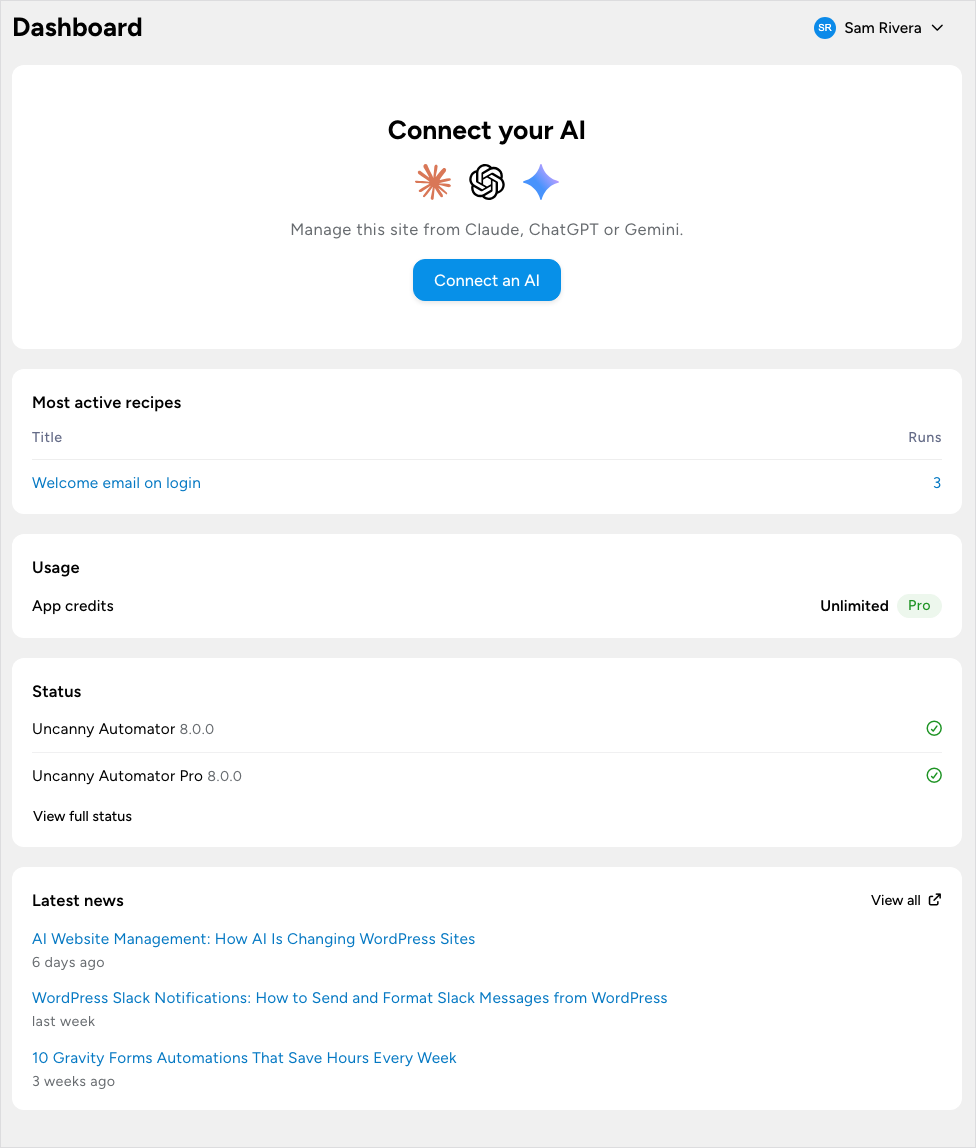
Automator > Dashboard is the first entry in the Automator menu and the page the wizard’s Go to the Dashboard link lands on. It has five cards:
- Connect your AI: a Connect an AI button that opens mcp.automatorplugin.com, so you can connect ChatGPT, Claude, or Gemini to the site without going through the wizard.
- Most active recipes: up to five of your recipes with the most runs, the busiest first, listed by Title with their number of Runs. The card appears once a recipe has run.
- Usage: your App credits. With Uncanny Automator Pro the card reads Unlimited with a Pro badge; on Lite with a connected free account it shows the credits used over the account’s limit above a progress bar, and a Get unlimited with Pro button. Once an AI is connected, the card also shows AI tool uses today.
- Status: the installed versions of Uncanny Automator and Uncanny Automator Pro, each with a green check mark, and the View full status link described in the next section. When an update is waiting, the check mark is replaced by an Update to button with the new version number, which opens Dashboard > Updates.
- Latest news: recent posts from automatorplugin.com, with a View all link.
Note: After updating from an earlier version, a notice at the top of the Dashboard and the Recipes list introduces the new way to manage the site with your AI and confirms that every recipe you have built keeps working as it does today. Not now dismisses it for the whole site. The notice appears only on sites that ran a version before 8.0; a new install introduces the same thing in the Setup wizard instead.
Status, Tools, and Debug
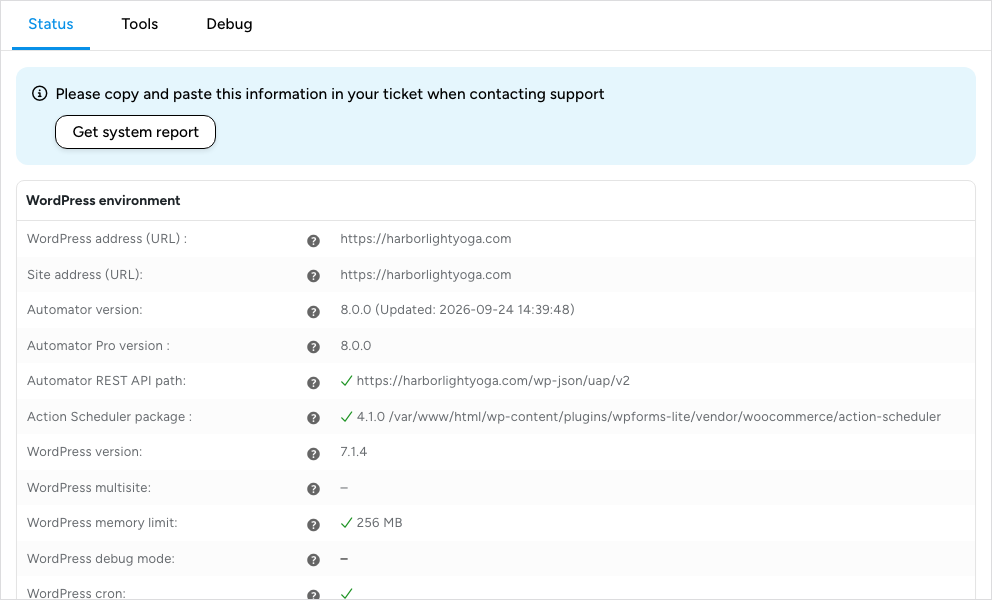
The Status and Tools entries from the 7.x menu are gone. Their page still exists: click View full status on the Dashboard’s Status card to open it. It has three tabs.
- Status: the system report. The Get system report button at the top copies everything on the tab; paste it into your ticket when you contact support. Below it are sections for the WordPress environment (site URL, plugin versions, WordPress version, memory limit, cron), the server environment (PHP, MySQL, cURL), the Automator App Platform connection, Automator stats, Uncanny Page Builder, the database tables, and the active and inactive plugins.
- Tools: two sub-tabs, or three with Pro. Resend App actions finds app-integration actions that failed (a timeout, a rate limit, or an error from the app) and sends the original request again. Set Look back (days) (seven by default), click Find failed actions, tick the rows, and click Resend selected. A resend replays the request as it was sent: it does not re-run the recipe or fill tokens again, and it can repeat the action’s effect in the app, so try a single row first. Database lists the Automator tables and views with their sizes and offers Repair Automator tables, which recreates any missing table, and Reset Automator log tables, which deletes every recipe, trigger, and action log record and resets every user’s run counts to zero. Recipes themselves are not affected, but the reset cannot be undone, so the button asks you to confirm. With Pro, Scheduled actions recovery scans for queued actions whose scheduled jobs went missing and reschedules the ones that can still run.
- Debug: a Settings sub-tab with one Logs switch, which turns on additional error logging when Uncanny Automator support asks you to, and Save settings. Once log files exist, each one gets its own sub-tab where you can read it or click Delete log.
Next: Creating a recipe, Finding integrations in the recipe builder, What is Uncanny Agent?


Comments (0)