

Before an AI app can work with your WordPress site, the site has to be connected at mcp.automatorplugin.com, the hosted connection that passes your AI’s requests to your site. This article covers signing in, choosing a license, connecting the site and approving it in WordPress, what to do when the site isn’t listed, and how to reconnect a site or add more.
You connect each site once. Every AI app you approve afterwards can use all of your connected sites, so this step comes before the steps for any AI app. For the whole journey, see Connect your AI to your WordPress site.
Before you start
- Uncanny Automator 8.0.0 or newer is installed and active on the site. See Installing Uncanny Automator.
- The site is linked to your Uncanny Automator account. On Lite, link it to a free account as described in Connecting your site with a free Uncanny Automator account. With Uncanny Automator Pro, activate your license key in the Setup wizard or under Automator > Settings > General > License, as described in Connect your AI to your WordPress site. Only sites linked this way appear at mcp.automatorplugin.com.
- The site has a public address that starts with
https://. Uncanny Automator reaches your site over the internet to connect it, so local development sites can’t connect, and neither can a site whose address starts withhttp://. - You can log in to the site as an administrator. Only an administrator can approve the connection.
Open mcp.automatorplugin.com from your site
Starting from your site’s dashboard means mcp.automatorplugin.com already knows which site you want to connect.
- In your WordPress dashboard, go to Automator > Connect your AI. The AI app cards in step 2 of the Setup wizard, Connect an AI on the Dashboard’s Connect your AI card, and Connect an AI app under Automator > Settings > MCP settings > Connections use the same link.
If you aren’t signed in at mcp.automatorplugin.com, the automatorplugin.com sign-in page opens straight away. If you’re already signed in, mcp.automatorplugin.com opens on Choose a license or on the Connect this WordPress site dialog, both described below.
You can also go to mcp.automatorplugin.com directly. Its home page reads Connect your AI to your WordPress site: click Connect now or Sign in. In that case you choose the site from a list after signing in.
Sign in
- On the automatorplugin.com Log in page, sign in with the Uncanny Automator account the site is linked to. Enter your Username or Email Address and Password and click Log In, or click Continue with Google or Log in with Facebook if that is how you created the account. If a Verify you are human check appears, complete it first.
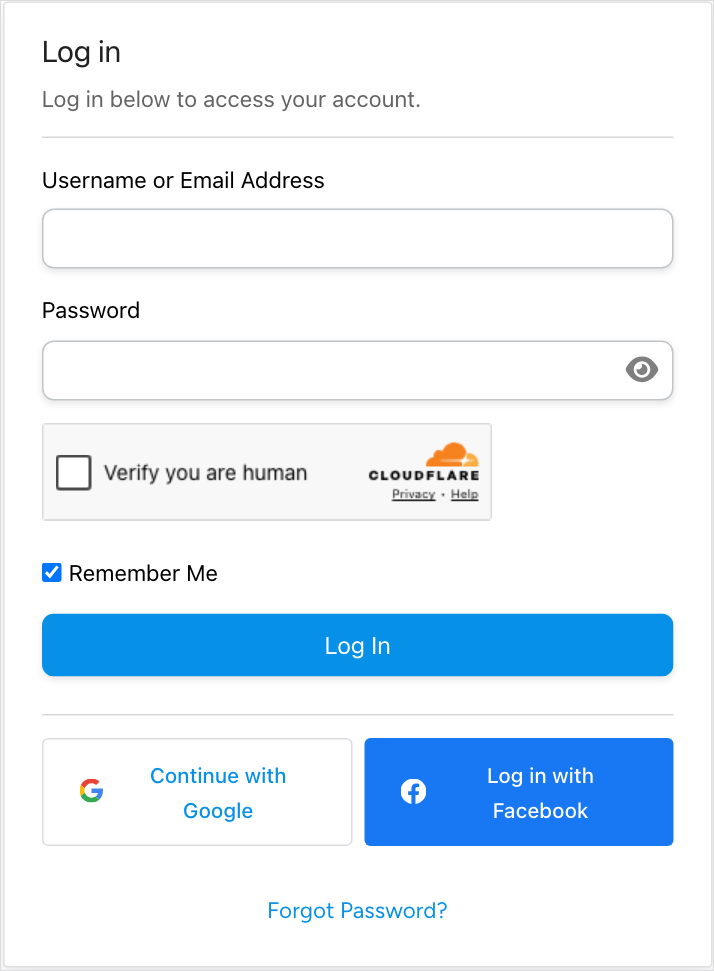
After signing in you return to mcp.automatorplugin.com. If the sign-in fails, you return to its home page, which shows Sign-in didn’t go through. Click Connect now to try again.
Choose a license
If your account has more than one Uncanny Automator license (a free account and a Pro license, for example), the Choose a license page opens first. Nothing else opens until you choose one, because only the sites activated on the chosen license are listed.
- Find the license your site uses and click Use this license. A license with no site yet shows Continue with this license and “I’ll activate it on my website later.”
You can change it later with Switch license in the account menu at the top right. The license you choose also decides your daily tool uses: see Tool uses and the daily limit.
Connect the site
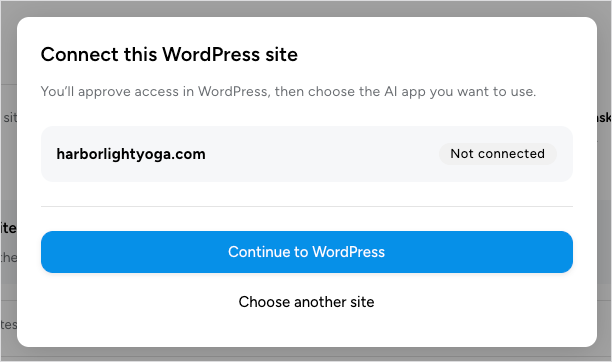
If you came from your site’s dashboard, a dialog headed Connect this WordPress site opens with your site’s address and a Not connected label. It explains that you’ll approve access in WordPress, then choose your AI app.
- Click Continue to WordPress.
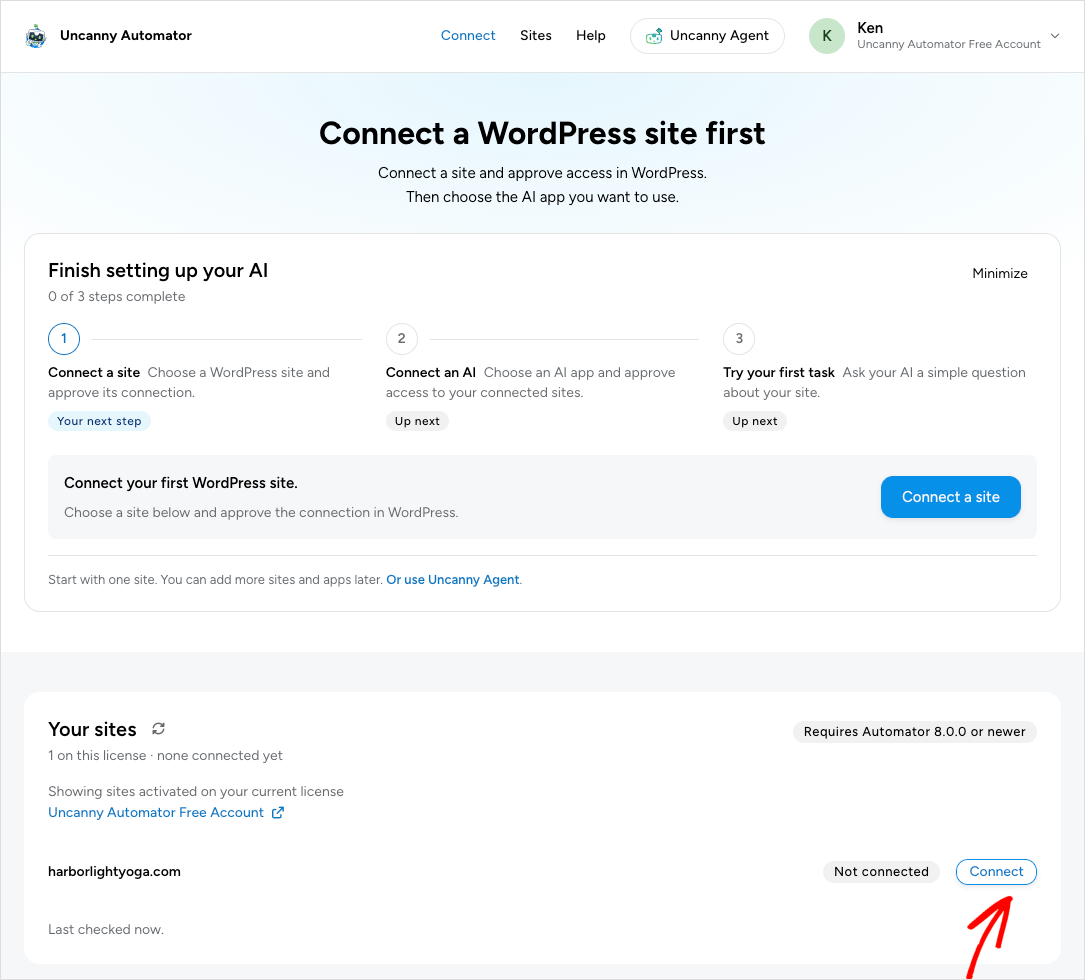
If you signed in directly, or clicked Choose another site in the dialog, the page reads Connect a WordPress site first. A Finish setting up your AI panel shows the three steps (Connect a site, Connect an AI, Try your first task), and the Your sites list below it shows every site activated on your current license. The AI app cards stay greyed out with “Connect a site first” until a site is connected.
- Under Your sites, click Connect beside the site, which shows Not connected.
Either way, your site opens in WordPress.
Approve the connection in WordPress
Your site opens on a page headed Connect this WordPress site?, with your site’s address below the heading. If you aren’t logged in to WordPress, the WordPress login page comes first.
- Check that the page shows your site’s address, that Your WordPress account is the account you want your AI apps to work as, and that you started this connection.
- Read Access you’re granting. It lists what Uncanny Automator can do on the site under Read site information and Make changes. Your WordPress permissions still apply, and you can limit the tools later.
- Click Approve connection.
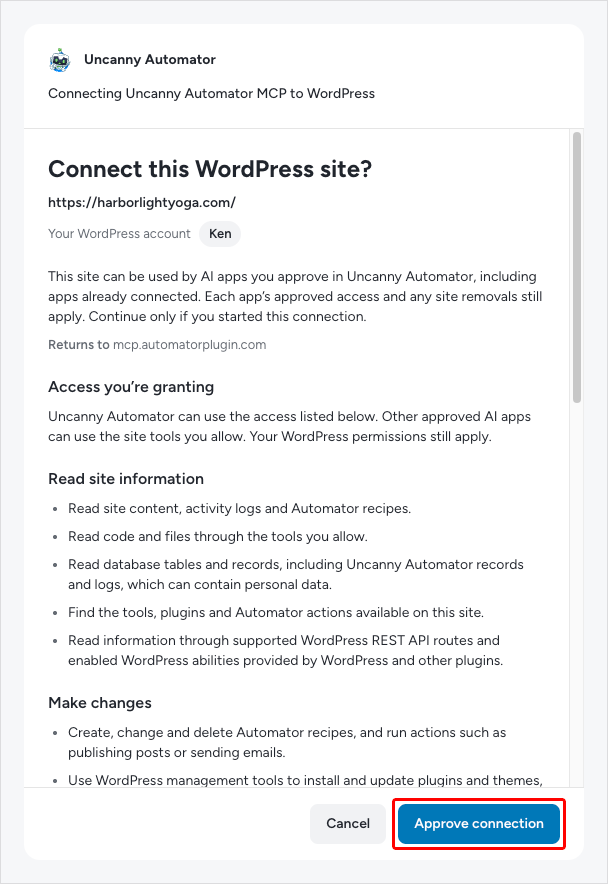
The connection uses the WordPress account that approves it: your AI apps work on the site as that administrator. Approve with the account whose permissions you want the AI to have. To change what AI apps may use on the site, see Choose what your AI can access.
If you’re logged in to WordPress with an account that isn’t an administrator, the page reads An administrator must approve this connection. Click Sign in as an administrator and log in with an administrator account.
Check that the site is connected
After you approve, you return to the Your connections page at mcp.automatorplugin.com. A notice reads your site’s address followed by is connected., and Finish setting up your AI moves on to its next step with a Connect an AI button. The tiles below count your connected AI apps and sites and show how many tool uses you have left today.
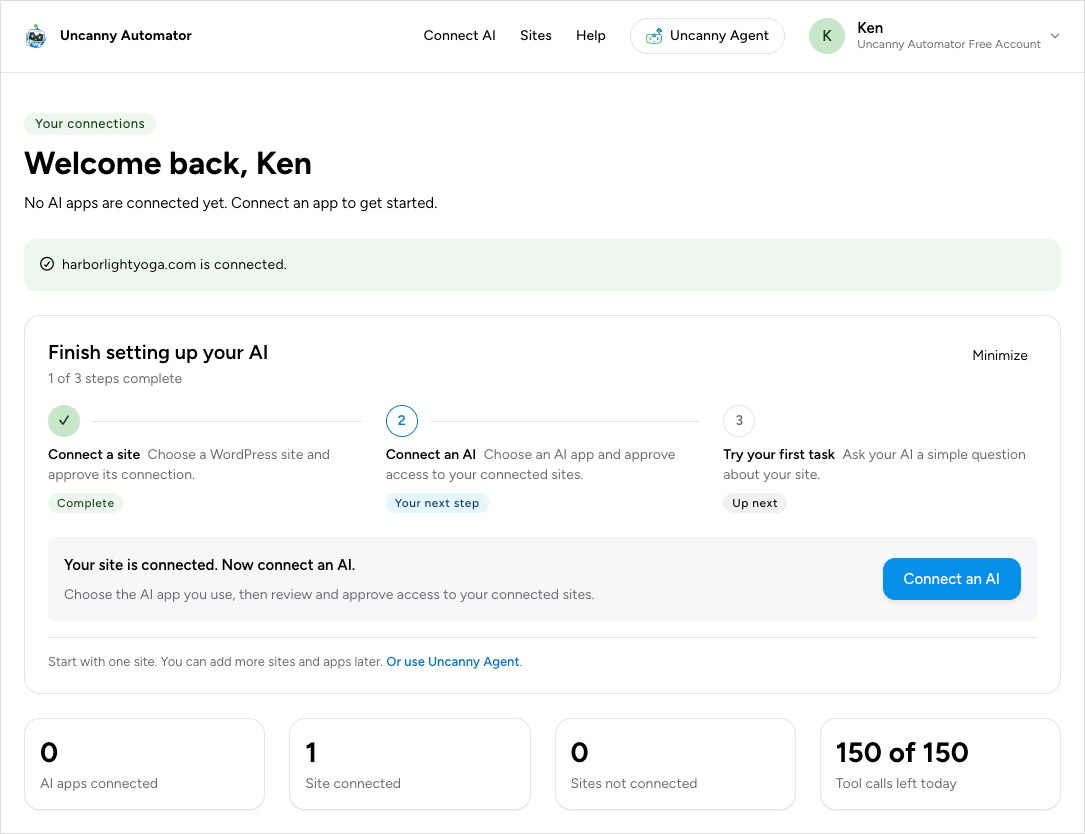
If something stopped the connection, the notice says so instead:
- The connection was declined in WordPress. You clicked Cancel on the WordPress page. Connect the site again.
- The connection didn’t finish in time. Connect the site again.
- Finish approving the connection in WordPress appears while the WordPress page is still waiting for you. Approve it there, then refresh the page at mcp.automatorplugin.com.
For messages about your host, a security check or a firewall, see Troubleshooting AI connections.
Now connect an AI app: click Connect an AI and follow the steps for your app. See Connect your AI to your WordPress site.
If your site isn’t listed
The Your sites list shows only sites that have Uncanny Automator linked to the license you’re using here. If your site is missing:
- In the site’s WordPress dashboard, link the site: go to Automator > Dashboard and click Link account on the Connect your AI card, or use Automator > Setup wizard, and sign in with the same Uncanny Automator account. With Uncanny Automator Pro, activate the license key under Automator > Settings > General > License.
- Return to mcp.automatorplugin.com and click Refresh sites (the circular arrows beside Your sites).
Your site may also be on a different license. The list says “Showing sites activated on your current license” and names that license. To use another one, click Switch license in the account menu at the top right.
When you open mcp.automatorplugin.com from a site it can’t match, the dialog shows one of these instead of Connect this WordPress site:
- Check this site’s license: “We couldn’t find this site on the license you’re using here.” The dialog shows the account you’re signed in with and the end of the license key in use. Compare them with Automator > Settings > General > License on your site (for a free account, compare the Account email). Then click Switch license, or Sign in with another account, and click Check again.
- This site needs a public address: the site is on a local address. Use a site that is available online at an
https://address, then open Connect your AI from that address. - We couldn’t confirm this site: the license check didn’t finish. Click Try again, or click Choose another site and pick the site from your list.
If your site’s address starts with http://, Automator > Settings > MCP settings > Connections shows a warning that AI apps can’t connect until the address starts with https://, and how to change it on your kind of site. If the list shows a site but your Uncanny Automator is older than 8.0.0, update the plugin first: the list’s Requires Automator 8.0.0 or newer label applies to every site.
Reconnect a site
A site labelled Reconnect needed was connected before, but WordPress no longer accepts its saved approval. This happens when someone removes access under Automator > Settings > MCP settings > Connections, when the WordPress user who approved it is deleted, or when the site’s old address now redirects to a different site. The label appears the next time an AI app tries to use the site. AI apps can’t reach the site until you approve it again. A site that is offline or blocked by a security service shows an error instead, and recovers on its own.
- Click Reconnect beside the site.
- Approve the connection in WordPress as described above.
The AI apps you had approved can use the site again once it is reconnected, without a new approval, as long as you approve it in WordPress as the same user as before.
Connect more sites
Repeat the steps for each site: open Connect your AI from that site’s dashboard, or click Connect beside it under Your sites. Lite connects as many sites as you like. The AI apps you’ve already approved can use a site as soon as it’s connected, without another approval.
Next: Connect your AI to your WordPress site, Connect Claude to your WordPress site, Connect ChatGPT to your WordPress site, Manage and remove AI connections


Comments (0)