

Connect Perplexity to your WordPress site and you can manage and automate the site by asking Perplexity. You add Uncanny Automator to Perplexity as a custom remote connector, approve access to your connected sites on mcp.automatorplugin.com, then try a first request.
An MCP server is how AI apps such as ChatGPT or Claude connect to other software. Uncanny Automator is an MCP server for WordPress with a built-in automation engine: it connects your AI to your WordPress site.
This is not the Perplexity integration in recipes, which adds a Perplexity API key so a recipe action can call a model. That integration is covered in Connecting Perplexity to WordPress.
What you need
- A WordPress site running Uncanny Automator 8.0.0 or newer, at a public web address. mcp.automatorplugin.com can’t reach a site on a local address, such as a development copy on your computer.
- An Uncanny Automator account. A free account is enough: on the Lite plan you get 300 tool uses a day for your first week, then 150 a day, shared across all your sites and AI apps. A tool use is one thing your AI does on your site through Uncanny Automator. Paid plans have unlimited tool usage. See Tool uses and the daily limit.
- A Perplexity Pro, Max or Enterprise plan. Custom remote connectors aren’t available on other plans: on Perplexity’s free plan, Add custom offers only plugin and skill options, with no way to add an MCP connector. On an organization account, an administrator must allow members to add custom connectors.
- Perplexity in your browser.
Connect your site first
Perplexity gets its tools from the sites connected to your Uncanny Automator account, so the Perplexity setup page opens only after at least one site is connected. If you haven’t connected a site yet, follow Connect your WordPress site at mcp.automatorplugin.com, then come back here.
Open the Perplexity setup page
The setup page on mcp.automatorplugin.com has the server address you paste into Perplexity. Keep it open next to Perplexity while you work.
- Go to mcp.automatorplugin.com and sign in with your Uncanny Automator account. If your account has more than one license, choose one first. The Connections page opens.
- Click Connect an AI (it reads Connect another AI once an AI app is connected). You can also click Connect AI in the header.
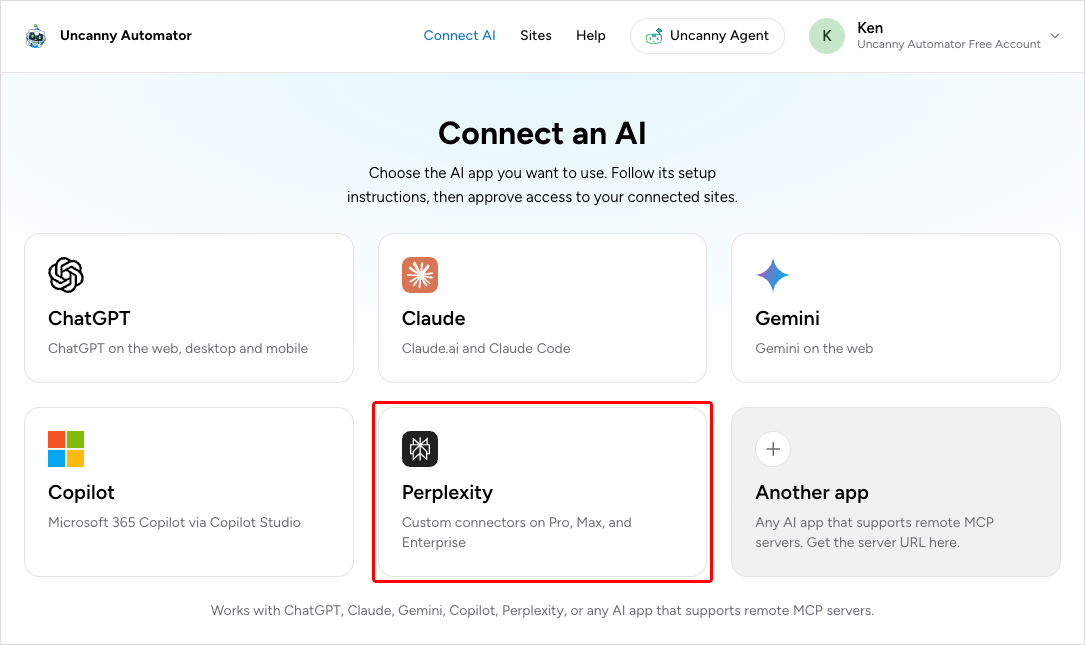
- On the Connect an AI page, click the Perplexity card.
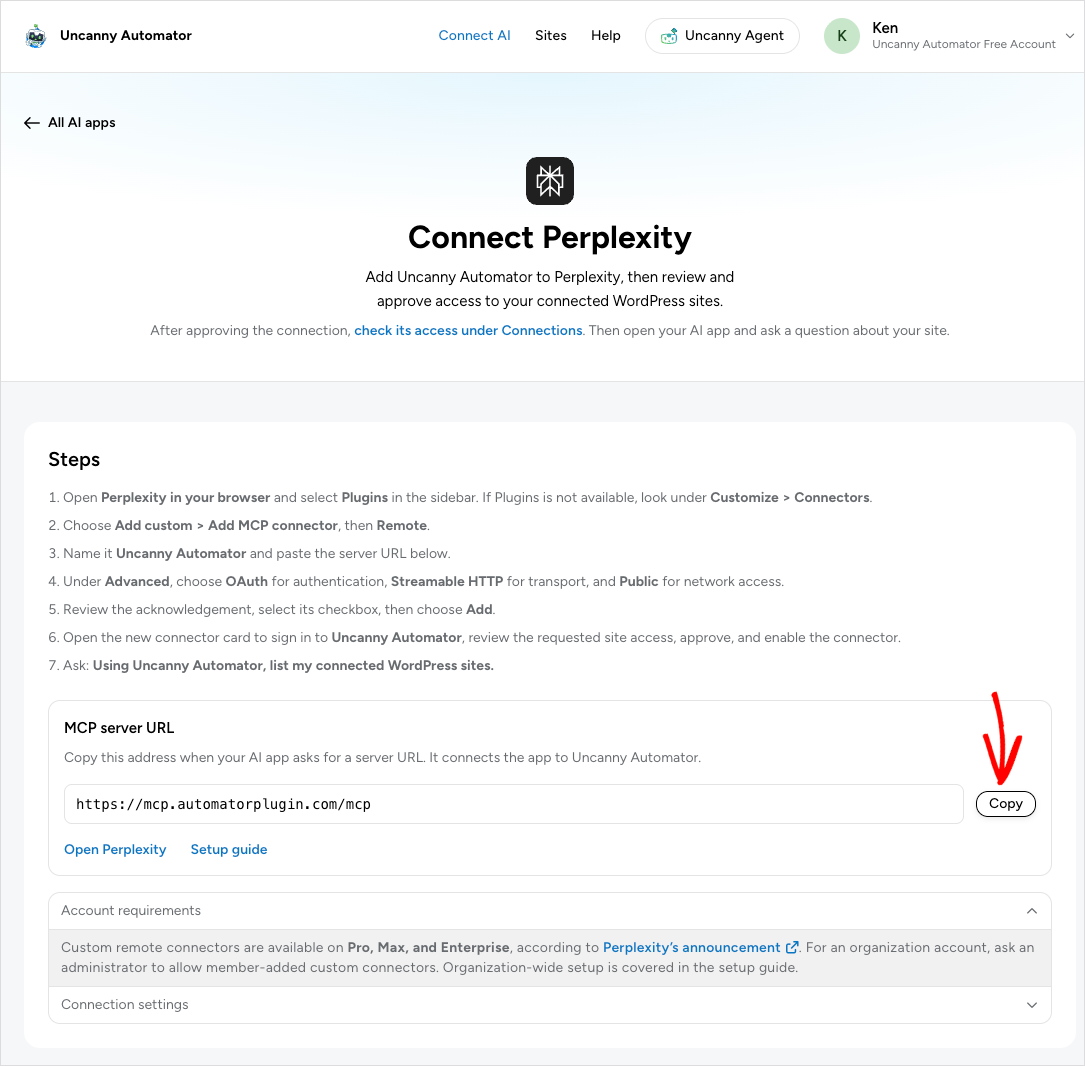
The Connect Perplexity page opens. It lists the steps for Perplexity, and under MCP server URL it shows the address https://mcp.automatorplugin.com/mcp. Every Uncanny Automator account uses this same address; your sign-in is what links Perplexity to your sites. Below the address, Account requirements repeats the plan requirement, and Connection settings confirms that sign-in sets everything up, with no client ID or password to enter.
- Under MCP server URL, click Copy.
Add Uncanny Automator to Perplexity
Add the connector in Perplexity in your browser.
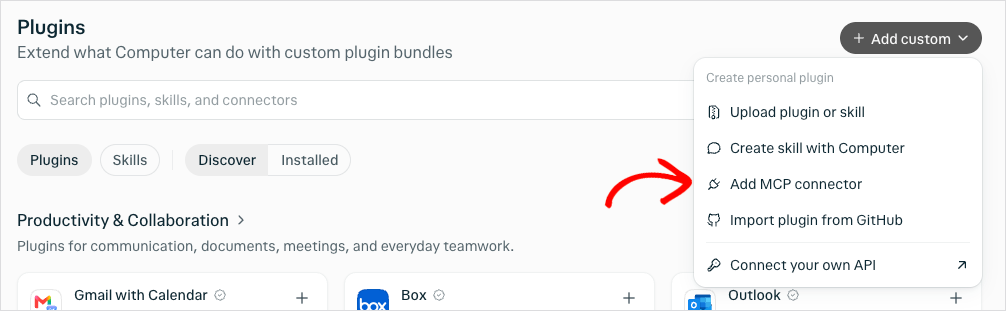
- Open Perplexity and select Plugins in the sidebar. Settings > Connectors opens the same page.
- Click Add custom at the top right and choose Add MCP connector.
- In Add MCP connector, enter Uncanny Automator under Name and paste the address you copied into MCP server URL. Description (optional) can stay empty.
- Leave Advanced as it is: Authentication is OAuth, Transport is Streamable HTTP and Network access is Public. Leave Client ID and Client Secret empty.
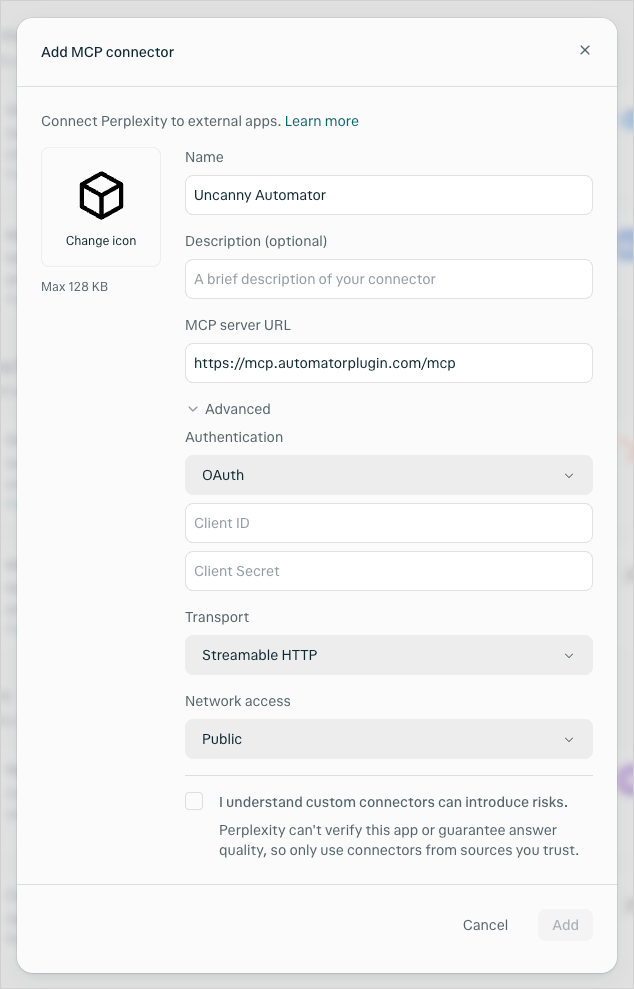
- Select I understand custom connectors can introduce risks., then click Add.
- On the Uncanny Automator page that opens, click + Connect.
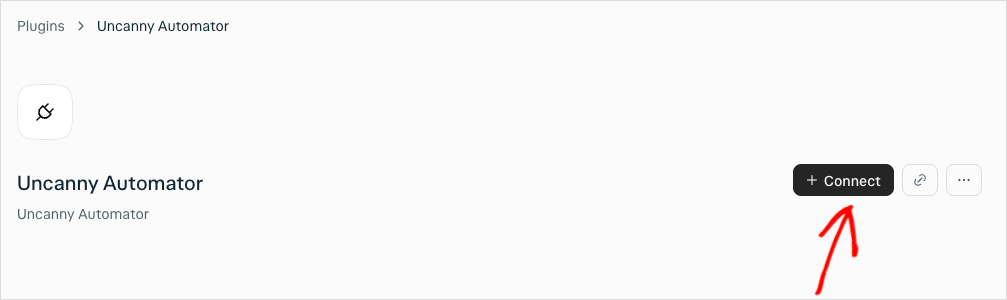
Note: Uncanny Automator registers Perplexity automatically during sign-in. You don’t need a client ID, client secret, API key or WordPress password.
Approve the connection
The approval page is on mcp.automatorplugin.com, in a window Perplexity opens. It decides which of your sites Perplexity can use.
- If the page reads Sign in to review this connection, click Sign in and sign in with the Uncanny Automator account your site is connected to.
- If your account has more than one license, choose the license your site is activated on and click Use this license. Only sites on the chosen license are included.
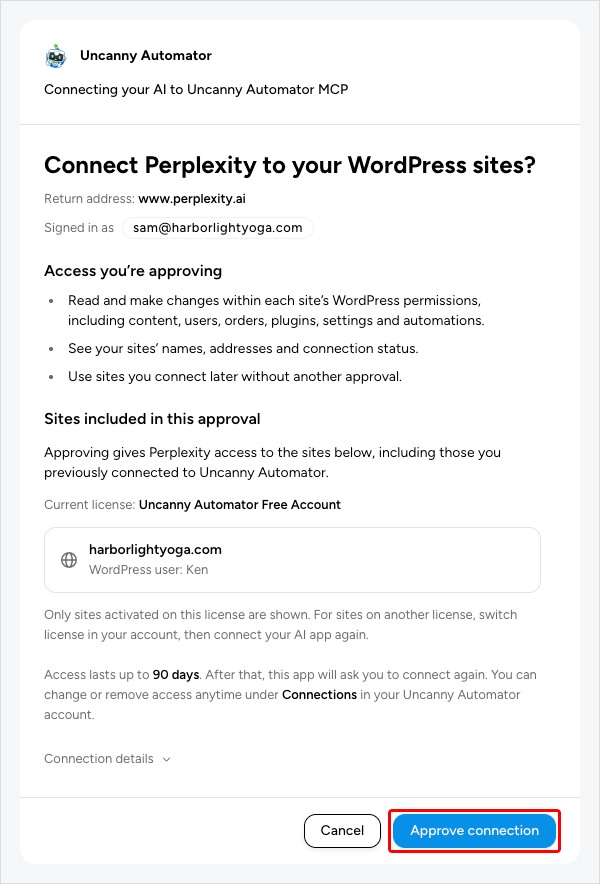
- Check the top of the page. The heading reads Connect Perplexity to your WordPress sites?, and Return address shows www.perplexity.ai.
- Under Access you’re approving, review what Perplexity can do: read and make changes on each site within that site’s WordPress permissions, see your sites’ names, addresses and connection status, and use sites you connect later without another approval.
- Under Sites included in this approval, check that your site is listed. To add a site that is on your license but not connected yet, click Connect next to it. Your site’s WordPress approval page, Connect this WordPress site?, opens; approve it there and you come back to this page.
- Click Approve connection.
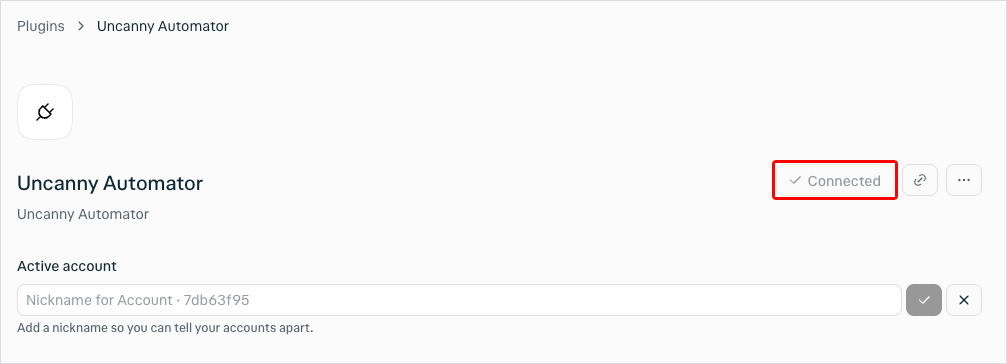
The window closes and the Uncanny Automator page in Perplexity shows Connected.
The approval page also says how long access lasts: up to 90 days. After that, Perplexity asks you to connect again. You can change or remove access at any time under Connections at mcp.automatorplugin.com.
Note: The approval page has no read-only choice. To limit what Perplexity can do on a site, use the switches in that site’s WordPress dashboard, described in Choose what your AI can access.
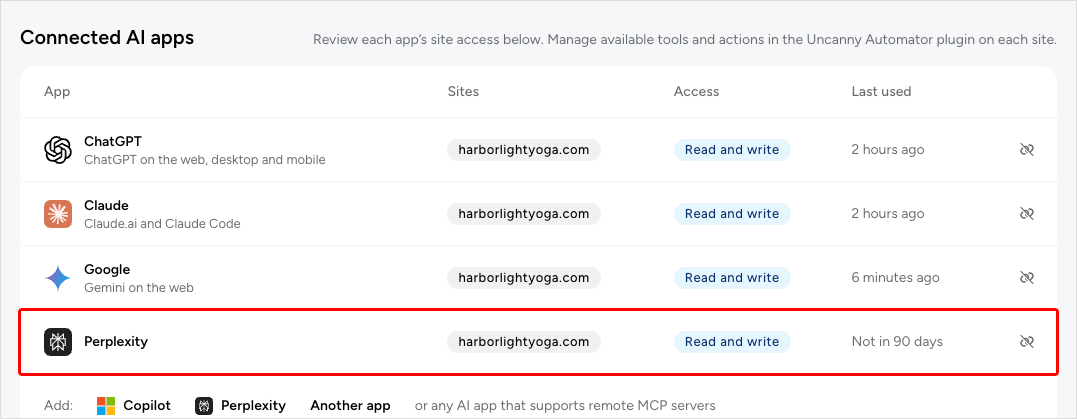
The Connect Perplexity page doesn’t show a connected status; it links to check its access under Connections instead. To confirm the connection, click Connections in the header on mcp.automatorplugin.com and find Perplexity under Connected AI apps.
Try a first prompt
- Start a new thread in Perplexity. Click + in the prompt box, choose Use a plugin and turn on Uncanny Automator. The connector is off in each new thread until you turn it on.
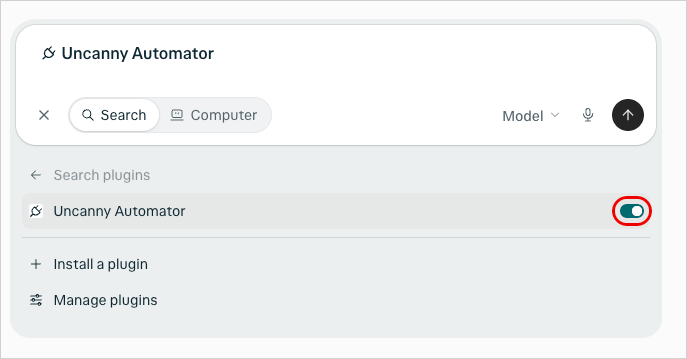
- Ask: Using Uncanny Automator, list my connected WordPress sites.
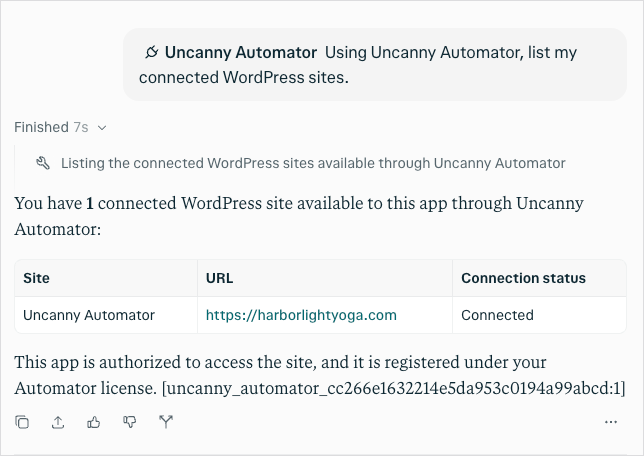
Perplexity asks Uncanny Automator for the answer and shows your sites. Once that works, try a request about one site, such as “What plugins are installed on my site?”, and name the site if several are connected. Each thing Perplexity does on your site counts as one tool use, so one request can use several.
What to do next
- What your AI can do on your site: the kinds of work Perplexity can do through Uncanny Automator.
- Choose what your AI can access: the switches on each site for tools, Automator actions and WordPress abilities.
- Manage and remove AI connections: Perplexity’s site access, last use and recent activity on the Connections page, and how to disconnect it.
- Troubleshooting AI connections: what to do when a step above fails.
Related: Connect your AI to your WordPress site, Connect ChatGPT to your WordPress site, Connect Claude to your WordPress site


Comments (0)