Learn how to troubleshoot WordPress plugin conflicts with AI. See how Uncanny Agent detects, diagnoses,…
The Best AI Writing Plugin for WordPress
Generate blog posts, featured images, meta descriptions, and even social media posts with the best AI writing plugin for WordPress—Uncanny Automator.

So you’ve just written a stellar blog post, have you? Now it’s time to create an SEO meta description, scour the internet for a featured image and then draft some copy to promote your post on social media. The only problem is that you’re out of creative energy.
Thankfully, we live in the 21st century with artificial intelligence.
In this article, we’ll show you how to use AI writing plugins for WordPressOpenAI integrations such as AIOSEO and Uncanny Automator to help manage your WordPress blog. By the end of this article, you’ll be able to:
- create SEO meta descriptions that boost your SERPs,
- generate unique featured images that capture your readers’ attention and,
- automatically draft and post content for social media to promote your work.
If you’re ready to give your WordPress blog an AI-powered boost then scroll on!
What is OpenAI?
If you’re going to be using OpenAI, it would probably be helpful to know exactly what it is. Don’t worry, we’re not going to crack open its digital skull and start rooting around its algorithmic gray matter—no computer neurosurgery here.
It’s enough to get a general sense of what OpenAI is and how it works so that you can make the most of it.

In a nutshell, OpenAI is an artificial intelligence platform that uses machine learning algorithms to generate human-like text. OpenAI’s GPT (Generative Pre-trained Transformer) model is the largest language model available, with over 175 billion parameters.
In layman’s terms, this simply means that OpenAI has read a lot (and we do mean A LOT) of content across the internet so that it can generate human-like text with impressive accuracy. Basically, it’s a very sophisticated version of “monkey-see, monkey-do”.
You can prompt OpenAI with a command, a question or even simply an observation and it will return a randomized response that is akin to a “collation” of everything it has read.
If you don’t have an OpenAI account, you’ll need to get one in order to follow along.
To set up a FREE OpenAI account:
- Click here to redirect to the OpenAI login page
- Navigate to Menu > Login
- Click Sign up

- Create an account using your email address, Google, Microsoft, or Apple account.
How to Write Better Titles and Meta Descriptions with AIOSEO
It goes without saying that the title and meta description for your WordPress blog posts greatly affect their SEO score and, ultimately, where they appear in SERPs. Given that OpenAI was born on the internet, it shouldn’t be surprising that it is an SEO expert.
Using AIOSEO, you can harness the power of OpenAI to generate optimized post titles and meta descriptions with the click of a button.
If you’re unfamiliar with AIOSEO, allow us to introduce you to your new SEO best friend.

AIOSEO is the go-to SEO plugin for more than 3,000,000 WordPress websites. For bloggers, businesses, digital marketers and developers alike, it is a must-have WordPress plugin.
From optimizing on-page content to managing XML sitemaps, monitoring site analytics, and improving social media integration, AIOSEO is your one-stop solution for all things SEO on your WordPress site.
In this section, we’ll show you how to use AIOSEO’s native OpenAI integration to generate optimized titles and meta descriptions for your WordPress blog posts.
Step 1: Get AIOSEO Pro
The OpenAI integration is an AIOSEO Pro feature, so you’ll need to get at least a Basic license first. AIOSEO is remarkably affordable, starting at just $49.60/year.
Step 2: Create an OpenAI API Key
Unlocking the power of OpenAI for your post titles and meta descriptions requires a key—an API key, to be exact.
- After creating your OpenAI account, head to your OpenAI Platform.
- From there, click on your Profile in the upper right hand corner and select View API keys.
- In the API Keys page, click Create new secret key.
- You can choose to name your key. For example, we’ve named our key “AIOSEO”. Next, click Create secret key.
- Copy the secret key.
Step 3: Connect AIOSEO to OpenAI
To complete the OpenAI integration with AIOSEO, return to your WordPress Admin Dashboard and select a post (or page). Scroll down to the AIOSEO Settings underneath your post content.
In the Post Title and Meta Description fields, you’ll see a little robot icon in the right hand corner.
Click the icon in either field and a pop-up window will appear. Paste the API key into the field and click Connect.

Once you’ve connected AIOSEO to your ChatGPT account, you can start to generate optimized titles and meta descriptions.

AIOSEO will prompt OpenAI to generate optimized titles and meta descriptions based on your post content.
(Note: AIOSEO makes use of OpenAI API. This is separate from ChatGPT Plus. You will need to set up a payment method from your OpenAI Platform to continue generating titles and meta descriptions.)
Uncanny Automator: #1 AI Writing Plugin for WordPress
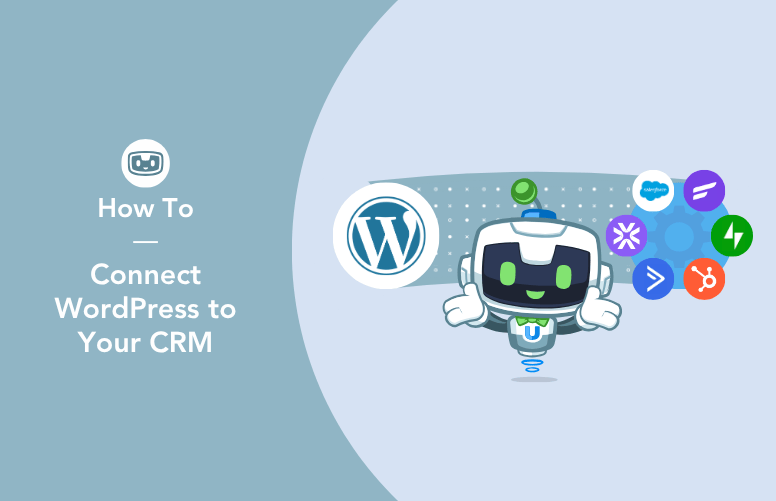
So now that you have some optimized titles and meta descriptions, it’s time to create eye-catching featured images and “share-worthy” social media posts. For this, you’ll need one more OpenAI integration for WordPress: Uncanny Automator.

Uncanny Automator is the #1 automation and integration plugin for WordPress websites. Connect all of your favorite apps and plugins using combinations of triggers and actions to create fully automated workflows across your WordPress website and beyond.
If OpenAI is the digital equivalent of a brain, then Automator is the body—the plugin that does all of the heavy lifting so you don’t have to.
Automatically Generate Featured Images for Blog Posts
Automator works using recipes (i.e., combinations of triggers and actions).

Here, we’ll walk you through recreating the recipe pictured above where OpenAI automatically generates a featured image for any blog post once the status changes to “Pending”.
Step 1: Get Uncanny Automator
OpenAI is an app integration for Uncanny Automator, meaning that you’ll need at least a Pro – Basic license to proceed. Alternatively, you can download Automator for free and register your account for a limited number of credits to experiment with app integrations such as OpenAI.
Step 2: Create a New Recipe
Once you’ve gotten Automator Pro, navigate to Automator > Add New from your WordPress Admin Sidebar. In the pop-up window that appears, select Logged-in users.

Step 3: Name Your Recipe
Give your recipe a name that makes it easy to recognize at a glance. For example, we’ve named this recipe Blog Post Featured Image Generator.
Step 4: Configure Your Trigger
(Note: We’re going to select a trigger that suits our specific workflow for publishing new blog posts. You can modify this trigger to suit your workflows or select a different trigger altogether.)
In the Triggers panel, from the menu of available integrations, click on WordPress.

From the drop-down list that appears, select A user’s post is set to a specific status.

Automator will prompt you to select the Post type and Post followed by the Status. You can configure these fields to suit your specific workflows.
Once you’re finished, click Save. Your trigger should look something like this:

Step 5: Configure Your Action
In the Actions panel, click on Add action. From the menu of available integrations, click on OpenAI.

Automator will prompt you to connect your OpenAI account. Just as you did before, return to your OpenAI Platform, create a new secret key and paste it into the field when prompted.
Once you’ve connected your OpenAI account, Automator will take you back to the recipe builder.
From the drop-down list that appears, select Use a prompt to generate an image.

You can create whatever prompt you believe will generate the kind of image(s) you want. In order to make the image generation dynamic, you can use tokens (i.e., pieces of data pulled from across your WordPress website and even from within recipes) by clicking on the Asterisk in the Prompt field.

Once you’re finished, click Save. Your action should look something like this:

Now, you’ll want to make the image that OpenAI generated the featured image for your blog post. You’ll need a second action for this.
In the Actions panel, click Add action and then WordPress. From the drop-down list that appears, select Set the featured image of a post.

Automator will prompt you to select the Post type, specific Post and the Media library ID/URL of the image you want to use as the featured image.
When selecting the specific post for which you want to set the featured image, Automator will only display posts that you have already published. However, to select the post from the trigger (presumably the post for which you want to set the featured image), you can use a token.
In the Post field, click on the Asterisk then select Use a token/custom value. In the subfield that appears, select the Post ID token from the trigger.

Next, in the Media library ID/URL field, you can use another token to select the image that OpenAI created in the first action.
Simply click the Asterisk and select either the Attachment ID or the Attachment URL token from the OpenAI action. (Note: Automator will save the image that OpenAI created in your media library without you having to do anything.)
This second action should be configure as follows:

When you’re finished, click Save. Your Actions panel should look something like this:

Step 6: It’s Alive! It’s Alive!
Now, all that’s left for you to do is to toggle your recipe from Draft to Live!
With an automation this powerful, it’s difficult to know whether or not the AI has come to life.
Just to give you an idea of how powerful this automation really is, we created a short blog post titled “The 5 Beaches You Must Visit in 2024” with the meta description, “Sun, sand and so much sunburn! These are the five beaches that every world traveler absolutely must visit in 2024.”
Here’s the featured image that DALL·E 3 returned for us as soon as we changed the post’s status to “Pending”:

Automatically Share Posts to Social Media with OpenAI
Now that you’ve got your optimized blog post title and meta description along with an eye-popping image, it’s time to hit publish. Once your blog post is out there, you can promote it on social media using Automator and OpenAI.

In the recipe pictured above, we’re able to generate a tweet with OpenAI then push it out to X (formerly Twitter) and BuddyBoss whenever we publish a new article. It all happens automatically thanks to Automator and OpenAI, working together.
Recreating that automated workflow is easy. Here’s how we did it.
Step 1: Create a New Recipe
From your WordPress Admin Sidebar, navigate to Automator > Add New. In the pop-up window that appears, select Logged-in users.
Step 2: Name Your Recipe
We’ve named this recipe Post to Social with OpenAI.
Step 3: Configure Your Trigger(s)
In the Triggers panel, from the menu of available integrations, click on WordPress. From the drop-down list that appears, select A user publishes a post.

Automator will prompt you to select the Post type. Once you’re finished, click Save. Your action should look like this:

Step 4: Configure Your OpenAI Action
In the Actions panel, click on Add action. From the menu of available integrations, click on OpenAI. From the drop-down list that appears, select Generate an excerpt suitable for Twitter with GPT-4.

(Note: Access to OpenAI API gives you more triggers with Uncanny Automator Pro. If you don’t see GPT-4 triggers available, your account might not have access to GPT-4 models. At the time of writing, OpenAI requires that at least $1 of usage be billed to the account before GPT-4 access is granted. Click here to learn more about Automator’s OpenAI API integration.)
Using the Post content token, we can have GPT-4 generate the perfect tweet for our new blog post, optimized with hashtags and emojis to gain traction.

Once you’re finished, click Save.
Step 5: Configure Your X/Twitter Action
OpenAI is ready to generate the perfect tweet for your new blog post. To go viral, click Add action then select X/Twitter from the menu of available integrations.

From the drop-down list that appears, select Post a tweet to X/Twitter.

Automator will present you with an editor where you can draft the tweet you want to post. Fortunately, GPT-4 already did that for you.
In the Status field, click on the Asterisk and select the Generated excerpt token under the OpenAI action.

If you want to include your new AI-generated featured image along with your AI-generated tweet, Automator can help with that too.
In the Image URL or Media library ID field, click the Asterisk and select either the Post featured image URL or the Post featured image ID token.

Once you’re finished, click Save.
Step 6: Configure Your BuddyBoss Action
There’s no need to stop at X/Twitter. If you really want to gain traction with your new blog post, you’ll need to post more social media platforms. Like BuddyBoss.
Click Add action then select BuddyBoss from the menu of available integrations.

From the drop-down list that appears, select Add a post to the sitewide activity stream whichever action best suits your workflow.

Once again, you can use the OpenAI token, Generated excerpt, to drum up excitement on your BuddyBoss activity stream. And don’t forget to include the WordPress token, Post URL, so that your followers and site members can read your new post with a click.

Once you’re finished, click Save. Your completed actions should look like this:

Step 7: Go Live!
You’re ready to hand over the management of your WordPress blog to AI. All that’s left for you to do is to toggle the recipe from Draft to Live.

With these kinds of OpenAI integrations for WordPress, it’s hard to believe that AI isn’t sentient.
More Ways to Use AI Writing Plugins in WordPress
Looking for more ways to use AI writing plugins like Automator and AIOSEO? Apply Automator’s R.I.C.H framework to identify opportunities to generate and optimize your content while still saving time and money.
Tasks that are ripe for automation are:
- Repetitive: Tasks, particularly unavoidable ones, that you perform over and over again.
- Iterative: Tasks that you can and/or do perform across any measurable number of customers, products, posts, pages, etc. or a subset thereof.
- Costly: Tasks that consume significant resources, namely time and money.
- Hard: Tasks that are complex and prone to human error.
If a task satisfies one or more of these criteria, it’s a strong candidate for automation. Remember, when it comes to automation, think RICH!
Ready to upgrade your content game with AI?
Generate AI content with Automator >>>
Frequently Asked Questions
Conclusion
AI and WordPress are constantly evolving. This means that you can always find new ways to use OpenAI for WordPress and to help you manage (and optimize) your WordPress blog. Likewise, AIOSEO and Uncanny Automator are always finding new ways to integrate AI into WordPress websites.
What are some of the OpenAI integrations for WordPress that you would like to see? Let us know in the comments section below and we’ll get right back to you.
Until next time, happy automating!

Related Posts


Comments (0)