

Wondering what WooCommerce AI can actually do? See what you can automate, create, and optimize…
The Complete Guide to WooCommerce Follow-Up Emails
Set up WooCommerce follow-up emails that send themselves: thank-yous, review requests, cross-sells and win-backs, using the email tool you already have.
Someone just bought from your store. WooCommerce sends the receipt. Then nothing happens.
No thank-you. No “how’s it going?” No nudge to leave a review or come back for the thing that pairs perfectly with what they bought. The customer who was most excited about your store hears nothing until your next newsletter, if you get around to sending one.
That silence costs you. Your happiest customers are the ones most likely to buy again, review you and tell a friend. They just need you to ask.
WooCommerce follow-up emails fill that silence, but WooCommerce doesn’t send them natively.
In this guide, I’ll show you how to set them up as one connected system with Uncanny Automator, using the email tool you already have: your WordPress website or existing CRM. You’ll get the full follow-up timeline, two complete recipes (a thank-you email and a review request) and a map to every other follow-up worth sending.
Let’s dive in.
What Are WooCommerce Follow-Up Emails?
WooCommerce follow-up emails are automated emails that go out after a customer does something in your store. That “something” might be placing an order, repeatedly visiting a product page, leaving a review or quietly not buying anything for months.
They’re different from the transactional emails WooCommerce already sends, like order confirmations and status updates. Transactional emails tell customers what happened. Follow-up emails build the relationship around it.
Most guides treat follow-ups as a grab-bag of tactics. Try a review email here, a coupon there. That’s how you end up with five plugins, three sender addresses and a customer who gets two emails in one afternoon.
A better way to think about it:
A follow-up system is a timeline. Every email has one job, one trigger and one place in the customer’s journey, from the moment they order to the day they come back.
When you design the whole timeline at once, each email knows its role. Nothing overlaps. Nothing falls through the cracks.
How Uncanny Automator Sends WooCommerce Follow-Up Emails
Uncanny Automator is a WordPress automation plugin. It connects WooCommerce to the rest of your site and your apps using recipes (combinations of triggers and actions that execute workflows).
Every recipe has at least two parts:
- A trigger: the thing that starts the recipe, like “A user purchases a product”
- An action: the thing that happens next, like sending an email
You personalize each email with tokens (i.e., dynamic data from your store, like the customer’s first name, the product they bought or their order total). Write the email once, and every customer gets their own version.
It works with the email tool you already use
This is the part most follow-up setups miss. You don’t have to move your email to a new platform. Automator gives you two ways to send:
- Send directly from WordPress. Automator’s built-in Send an email action supports full HTML and tokens. It’s a great fit for simple, lower-volume follow-ups.
- Hand off to your CRM or email tool. If you already run email in Mailchimp, FluentCRM, ActiveCampaign, Brevo, MailerLite, Groundhogg, Drip or a similar tool, a recipe can tag customers or add them to a list. Your email tool then sends the campaign you’ve already designed.
Already using Drip? These Drip automations for WordPress and WooCommerce show how to move customers into the right campaigns automatically.
Product triggers vs. order triggers
One quick detail before we build. WooCommerce triggers in Automator come in two flavors:
- Product triggers fire once for each product in an order
- Order triggers fire once per order
If a customer buys three items, a product trigger could send three thank-you emails. An order trigger sends one. Our guide to WooCommerce product vs. order triggers walks through when to use each.
One email is nice. A timeline is a system.
You can send a great follow-up email from a single trigger. But the real magic happens when you control when each email goes out. That’s where delays and order-status triggers come in, and you’ll see them in action shortly.
And the best part? Automator doesn’t charge per automation. Build as many recipes as your timeline needs.
The WooCommerce Follow-Up Email Timeline
Here’s the full system at a glance: what each email does, what triggers it and when it should land.
Notice the pattern. Early emails give (thanks, help, a warm welcome). Later emails ask (a review, a second purchase, a return visit). You earn the right to ask by giving first.
One stop we’re skipping here: post-purchase surveys, which fit neatly between the review request and the cross-sell. We’ve covered them in our guide to automating WooCommerce post-purchase surveys.
Now let’s build the two emails most stores are missing.
Post-Purchase Thank-You Emails
A receipt says “here’s what you paid and what you got for it.” A thank-you email says “we’re glad you chose us.”
That difference matters. The thank-you is the first email on your timeline that doesn’t sell anything. It builds goodwill, sets expectations and makes the next email (the one that does ask for something) feel welcome instead of pushy.
A good thank-you email includes:
- The customer’s first name (tokens handle this)
- A note about what they bought, not just “your order”
- What happens next, like shipping times or when to expect a download link
- One helpful link, like a setup guide, care instructions or your FAQ
- A reply-to address with an inbox a real person reads, so “thanks!” replies don’t vanish
Keep it short. One job, one email.
Recipe: Send a Thank-You Email After Every Purchase
This recipe works in Uncanny Automator Lite, which you can install and activate for free. (Don’t forget to register your account to get limited access to some Automator Pro features.)
Step 1: Create and name a new recipe
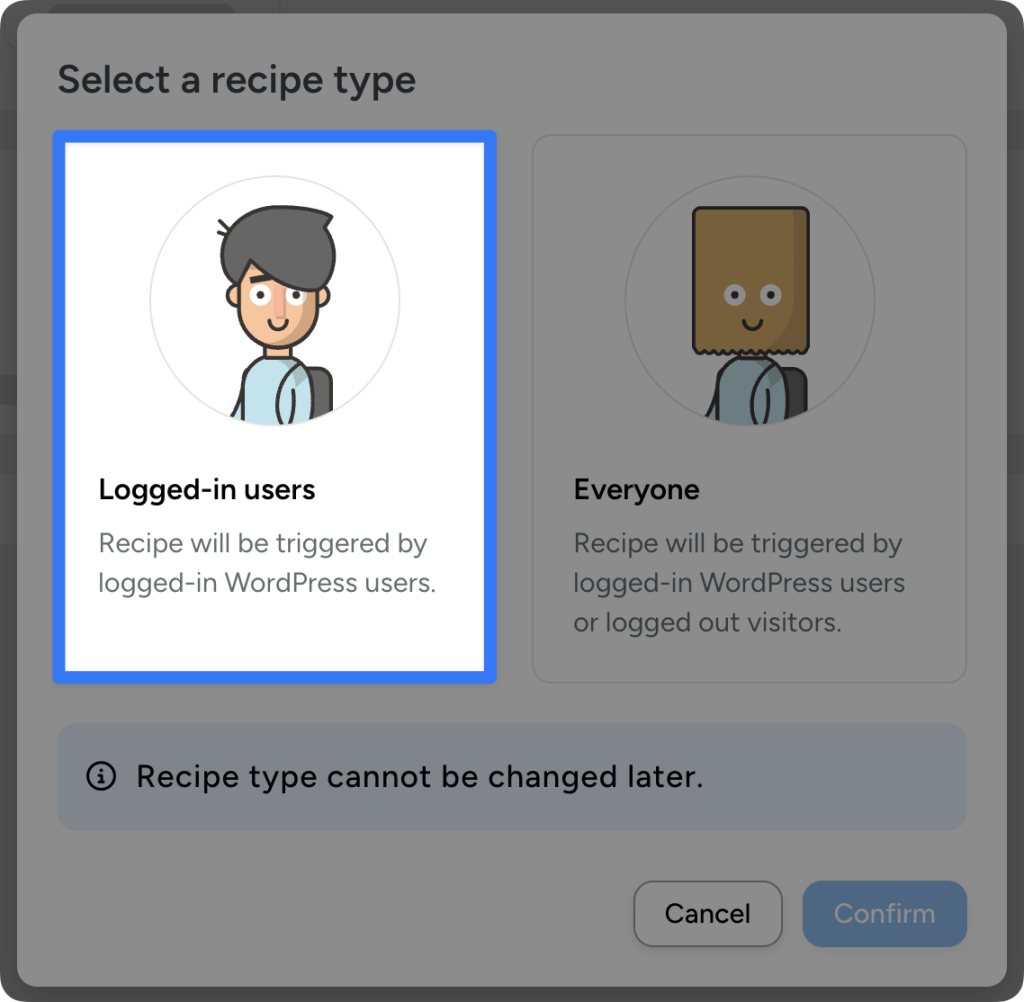
From your WordPress Admin Dashboard, navigate to Automator > Add new recipe. In the modal that appears, select Logged-in users. (This is only if you don’t allow guest checkout in your WooCommerce settings. If you do allow guest checkout, you can select Everyone, though you will need Automator Pro.)
Give your recipe a clear name, like “WooCommerce: Thank-you email.”
Step 2: Set up your trigger
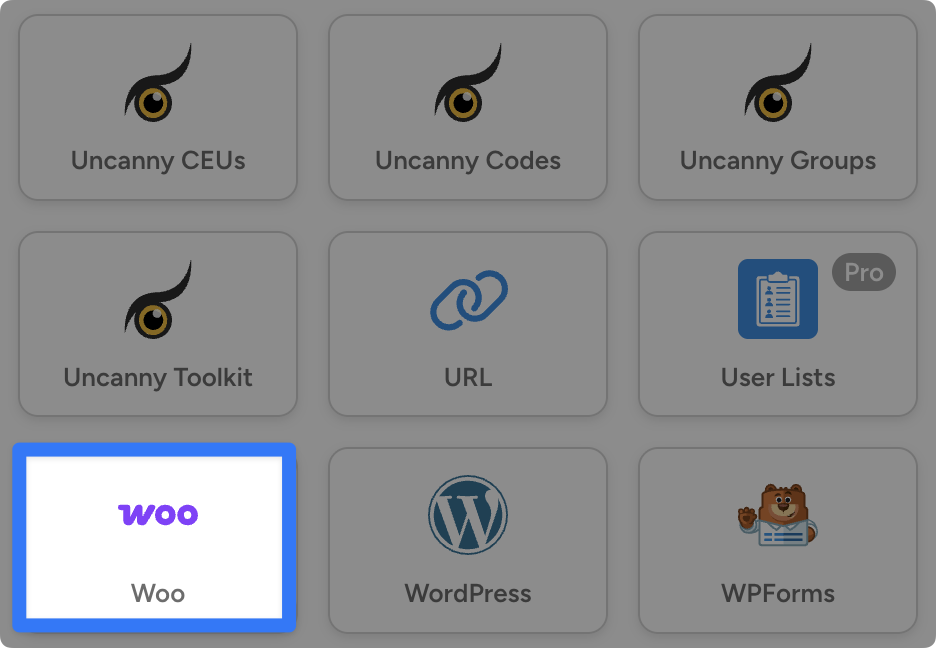
In the Trigger panel, from the menu of available integrations, select Woo.
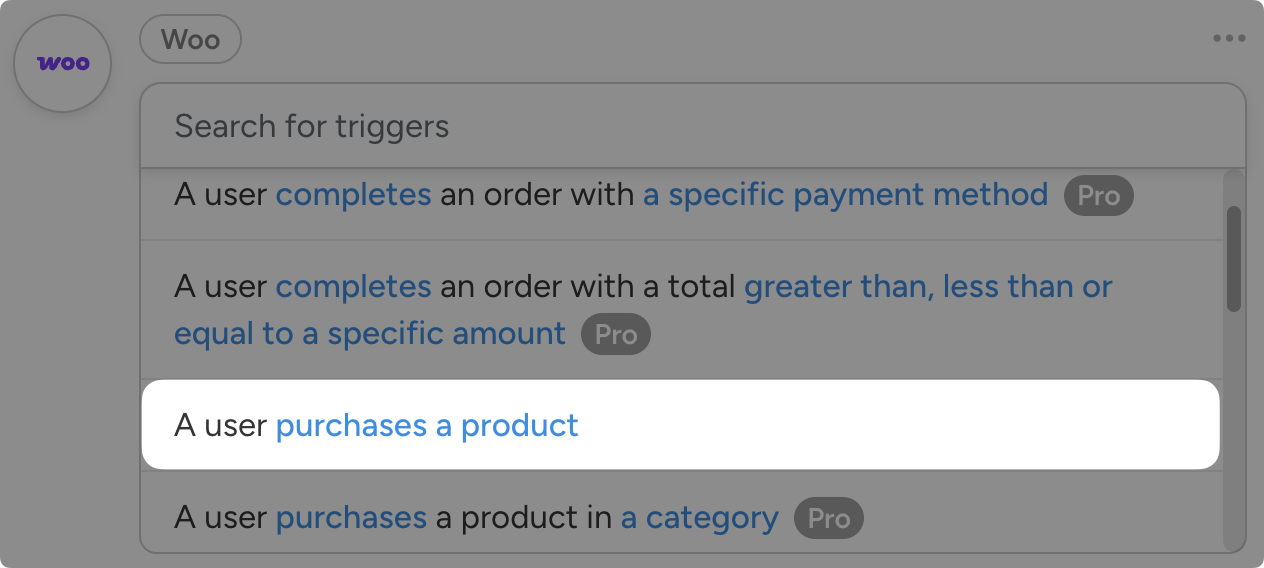
From the dropdown list that appears, select “A user purchases a product”.
Automator will prompt you to select the trigger condition and the product. You can select “pays for” as the trigger condition and “Any product” to ensure that all of your shoppers get a thank you.
Once you’re finished, click Save.
Step 3: Add the thank-you email
In the Actions panel, click Add action and select Emails (or your preferred CRM) from the available integrations.
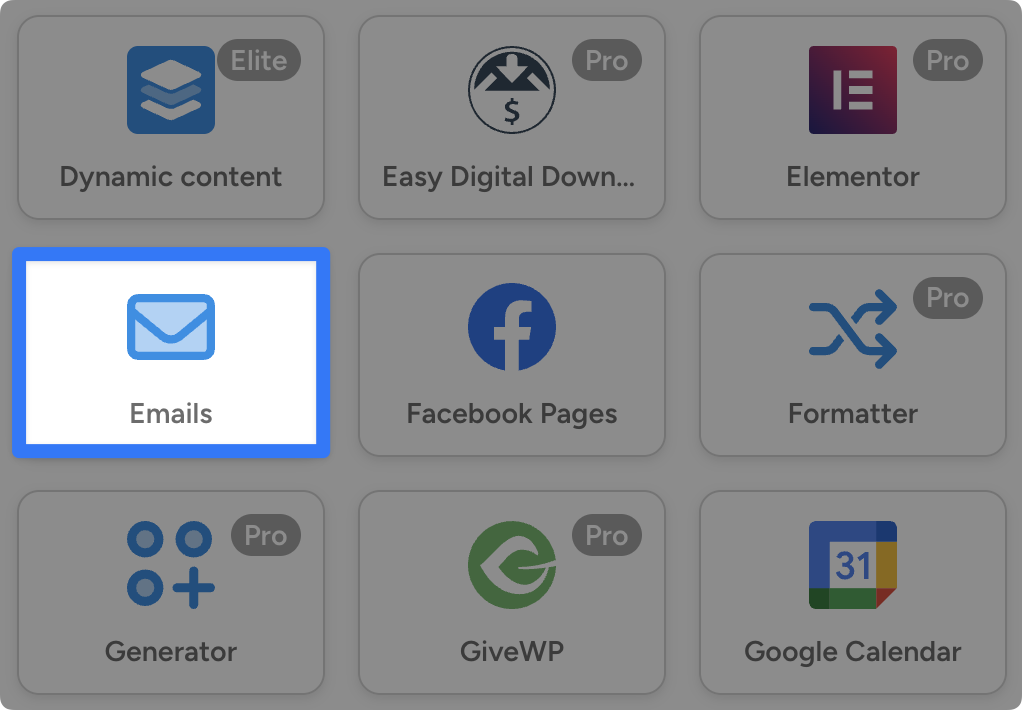
From the dropdown list, select Send an email.
Automator will then present you with an email form, consisting of all the fields needed to draft and send your email.
In the To field, select either the User email or Billing email token by clicking the Asterisk in the field.
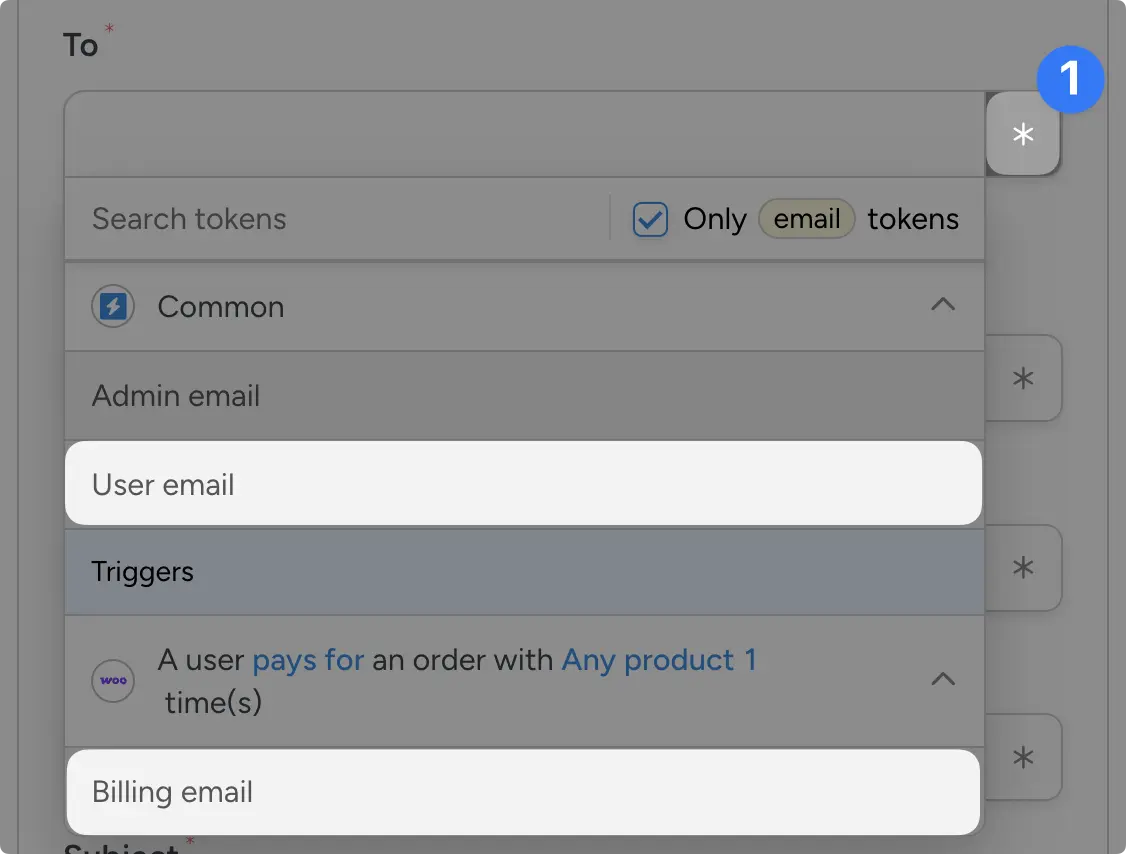
Next, fill out:
- Reply-to: an inbox you actually check
- Subject: something warm, like “Thanks for your order, {{First name}}!”
- Body: your thank-you message, with tokens for the customer’s name and the product they bought
For example, here’s the thank-you email that I drafted:
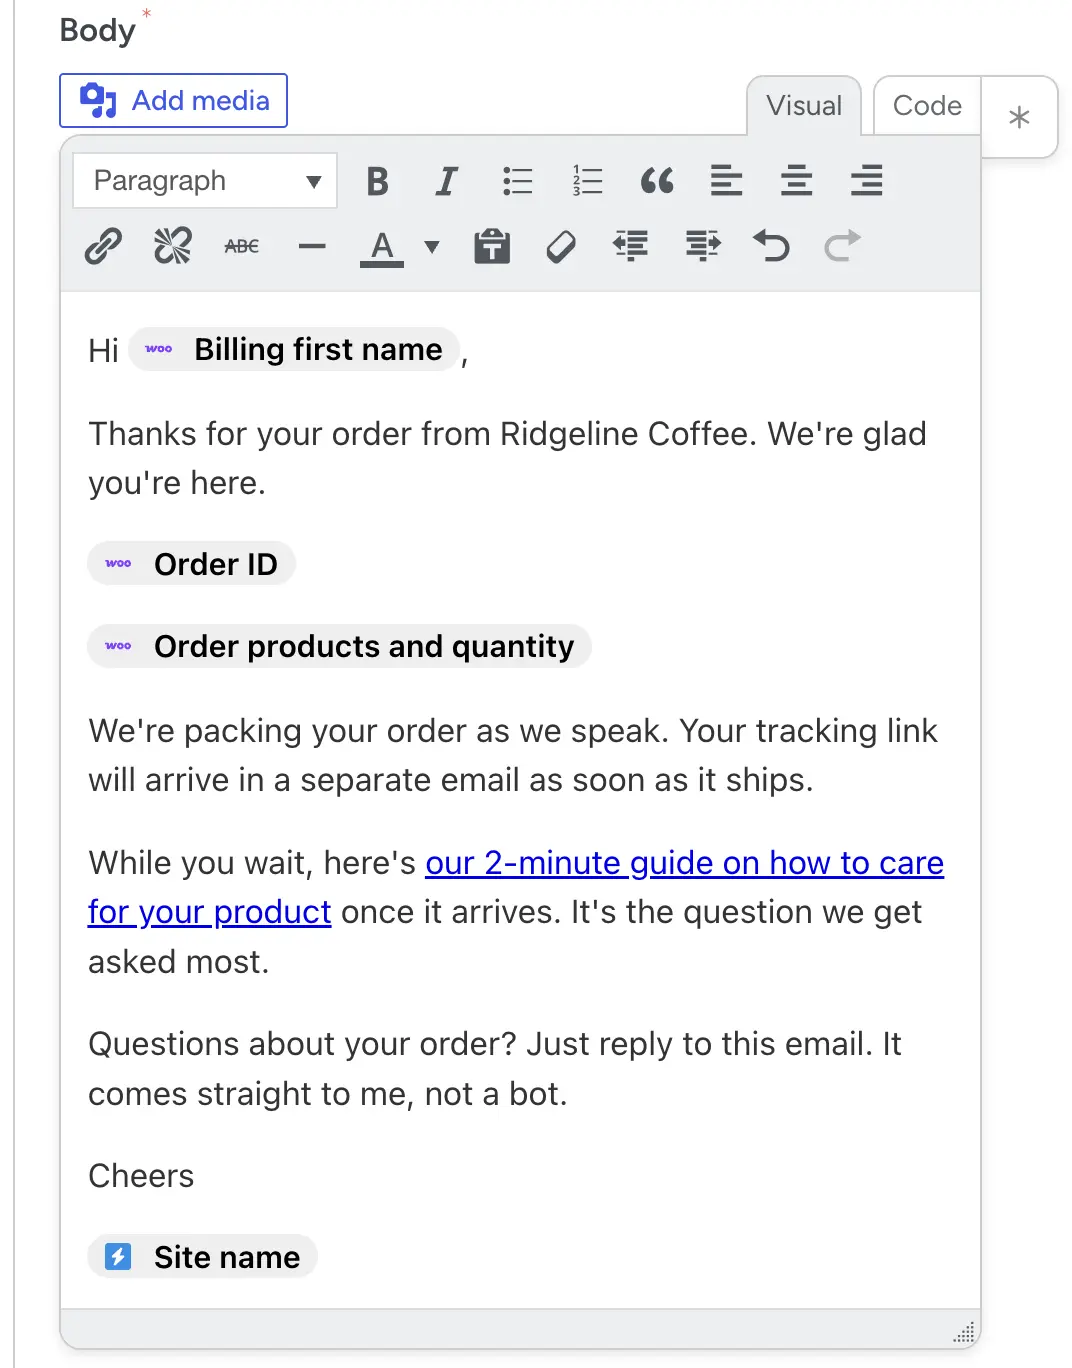
Once you’re finished, click Save.
Step 4: Go live
Flip your recipe from Draft to Live. That’s it!
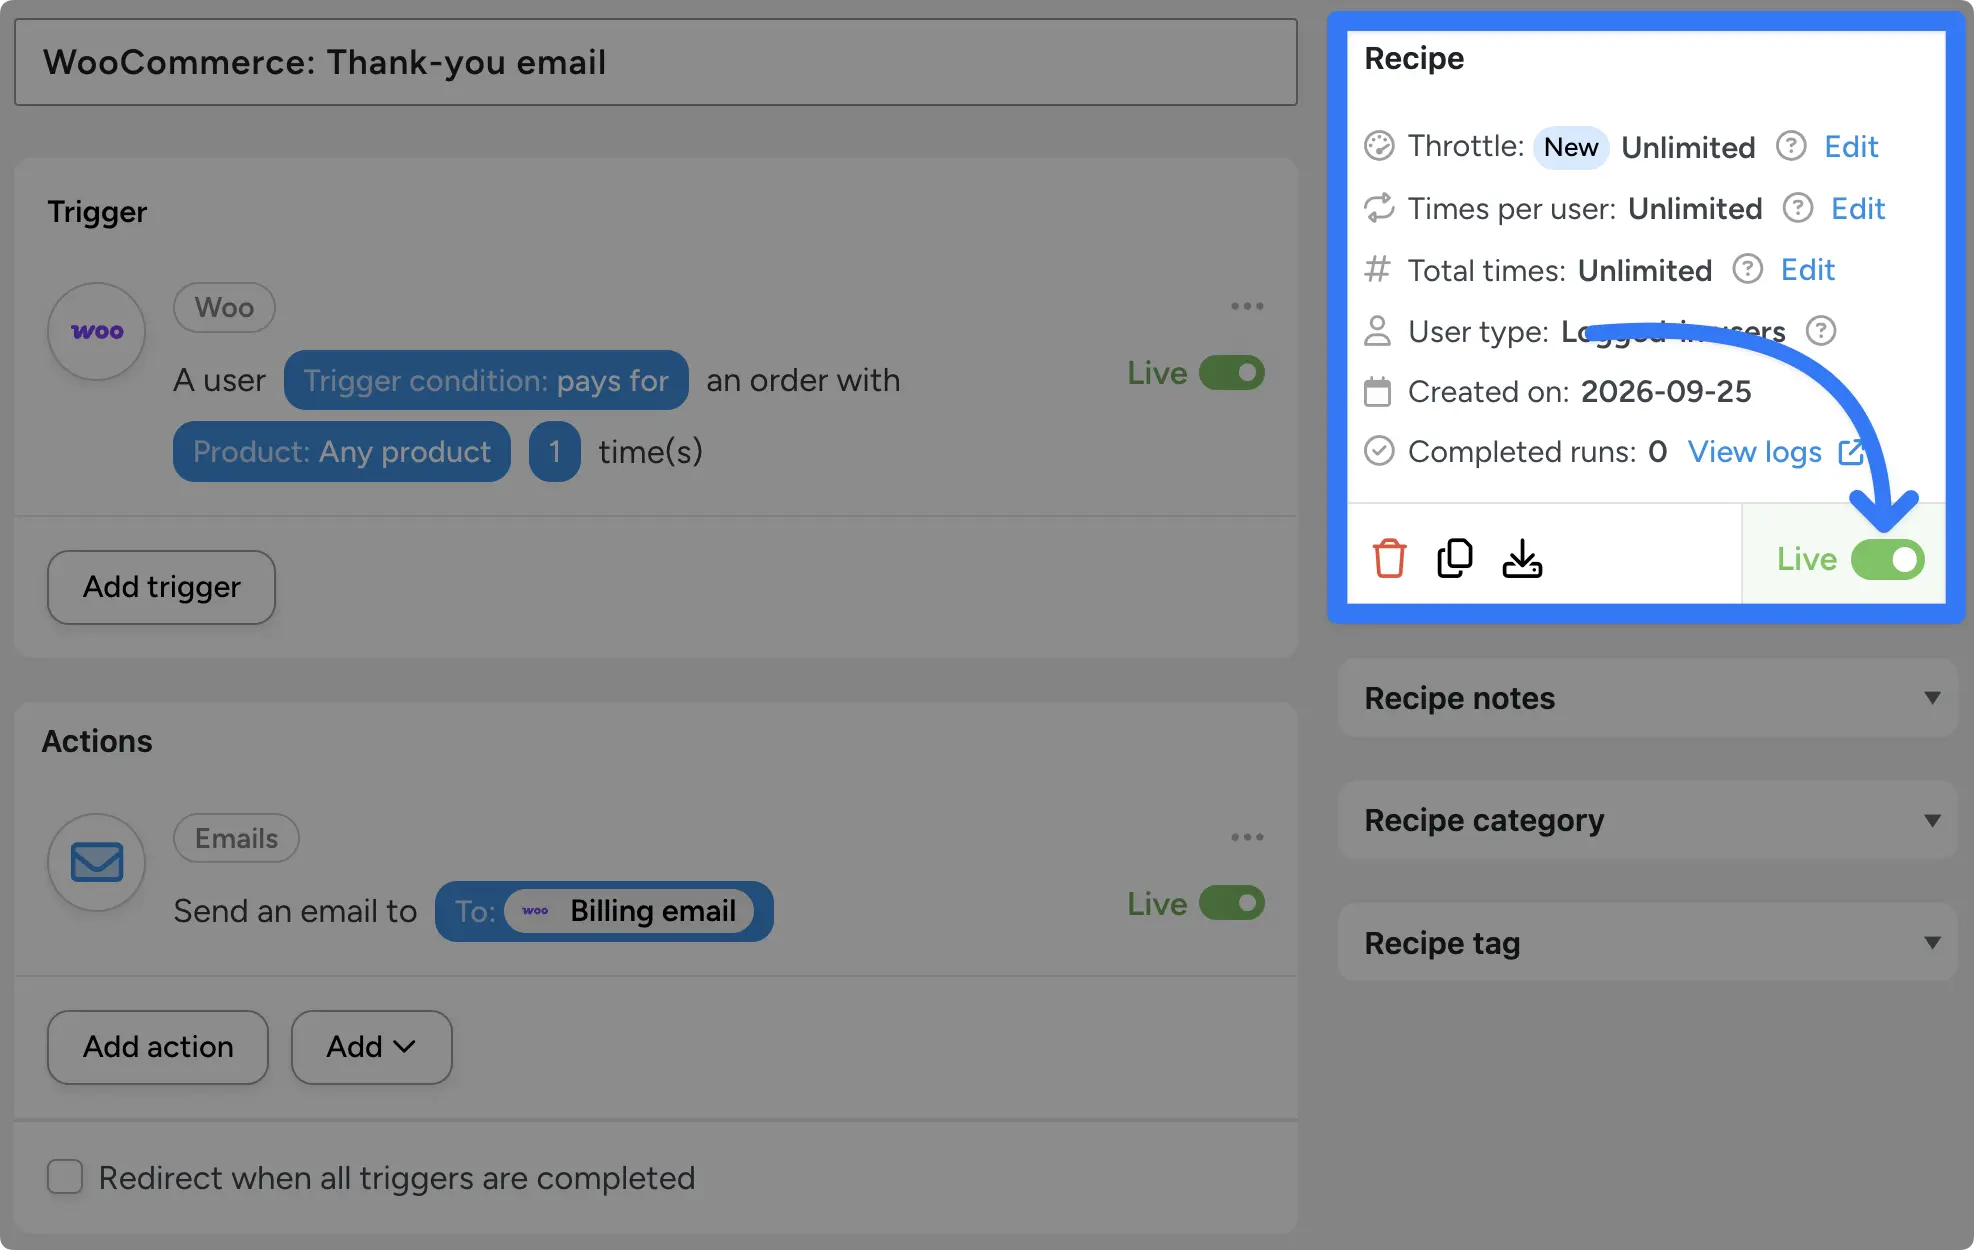
Every customer now gets a personalized thank-you email — and you won’t have to type out every single one.
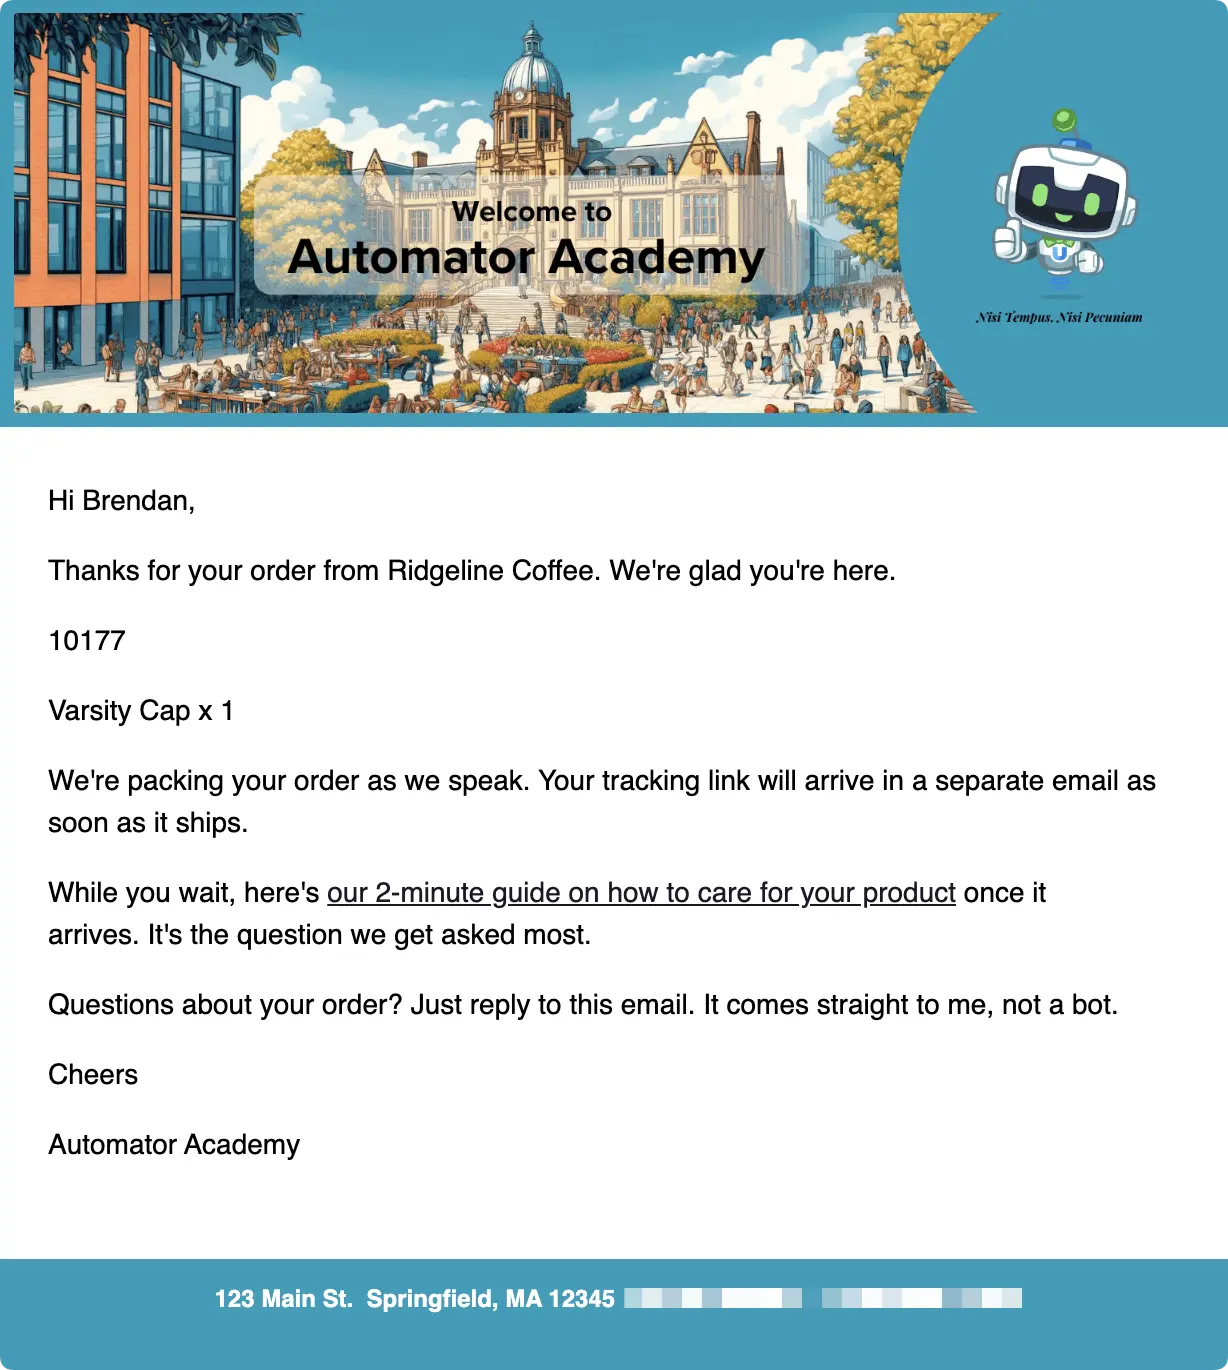
Want your follow-ups to look like they came from your store, not a plain-text robot? Here’s how to brand your WordPress emails so every automated message matches your logo, colors and style.
Level Up: Product-Specific Thank-Yous and a “Getting Started” Email
One generic thank-you is a great start. Here are two ways to make it feel even more personal.
- Write product-specific versions. Clone the recipe for your bestsellers or key categories and change the trigger to that specific product. A customer who buys a coffee grinder gets grind-size tips. A customer who buys a course gets a link to lesson one. Same system, more personalized content.
- Add a delayed “getting started” email. Add a second Send an email action to the same recipe and set a delay on it (a timer that holds the action for a set time before it runs). A few days after purchase, the customer gets tips for getting the most out of what they bought.
That second email is where one-off messages start becoming a system. (Delays are part of Automator Pro. More on that in a minute.)
If you run email through a CRM, you can also add an action that tags the customer, like “customer: coffee.” That way, your email tool knows exactly which sequence they belong in next.
Review Request Emails
Reviews work hard for you. They’re social proof for the next shopper who’s on the fence. They also tell you what customers love (and what needs work).
Most happy customers never leave a review, though. Not because they don’t want to, but simply because nobody asked them at the right moment.
Timing: ask after delivery, not after checkout
Here’s the classic mistake. The review request goes out right after checkout, before the package has even left the warehouse. The customer can’t review something they haven’t touched.
The fix is to start the clock when the order is completed, then wait. How long you wait depends on what you sell:
- Digital products can be ready for a review within a few days
- Physical products need shipping time plus enough time for the buyer to actually use them
- Products that take a while to show results (skincare, supplements, training gear) need longer still
Ask yourself: “When would a customer have a real opinion?” You know your products and how they’re meant to be used better than anyone.
Recipe: Ask for a Review After the Order Is Completed
This recipe uses Automator Pro for the order status trigger and the delay.
Step 1: Add a second action to the recipe
Instead of creating an entirely new recipe, you can add a second action to the recipe that you already created. I’ve simply renamed the recipe “WooCommerce: Follow-up email sequence” as it now contains more than the thank-you email.
In the Actions panel, under the first action, click Add action and select Email > Send an email.
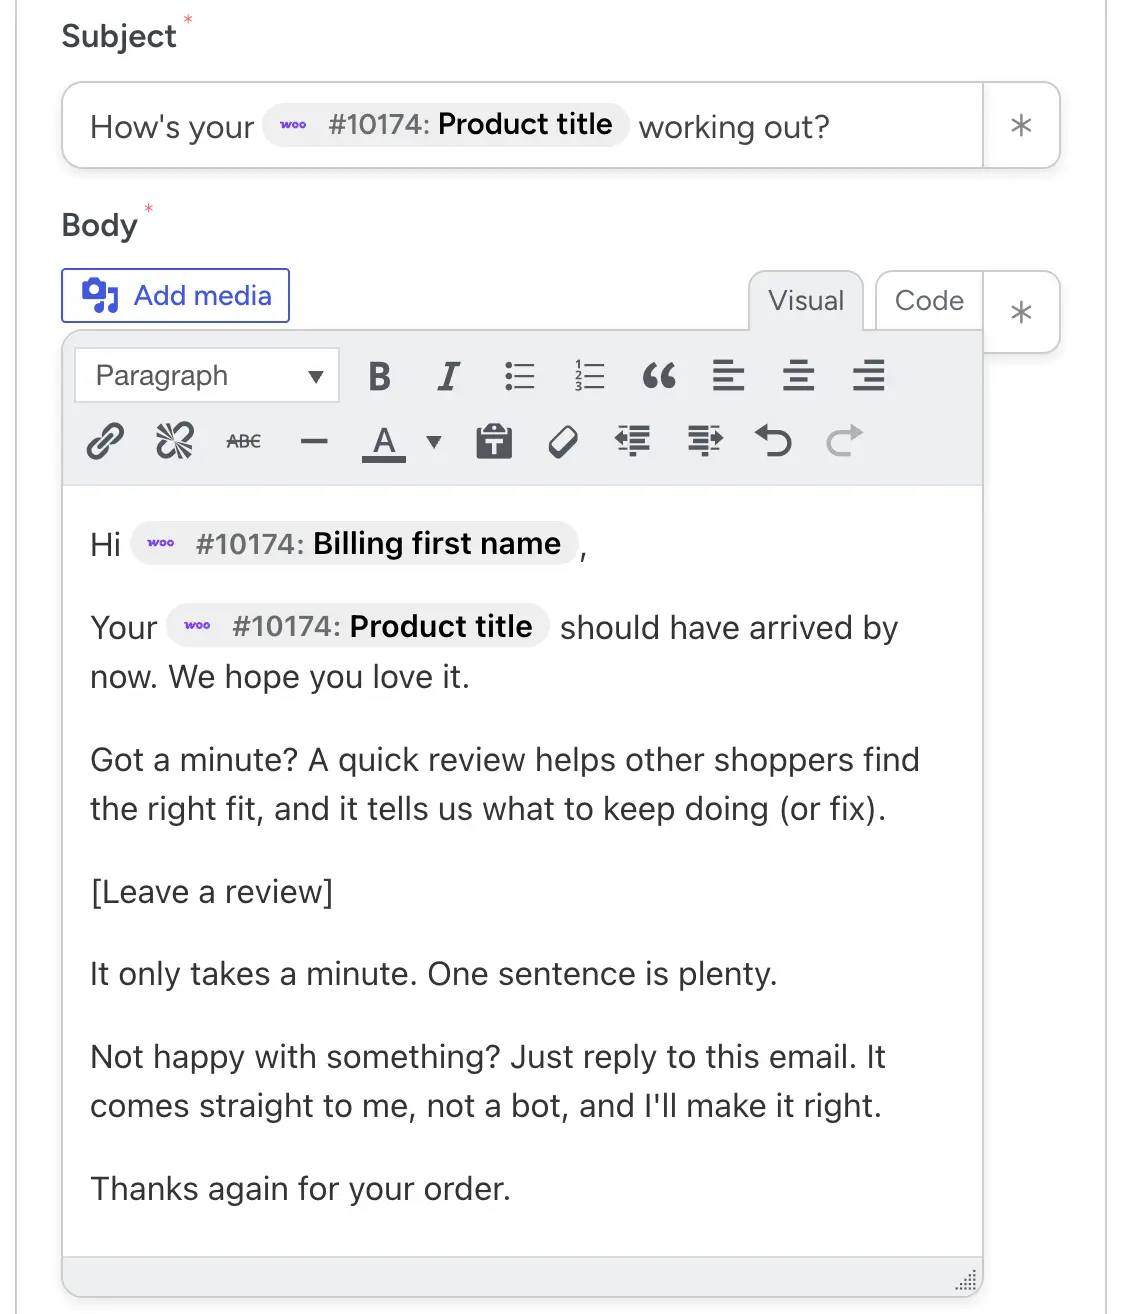
The shorter the path from inbox to review form, the more reviews you’ll get. One click is the goal.
Once you’re done, click Save.
(Note: prefer to send from your CRM? Swap this action for one that tags the customer or adds them to a “review request” list in Mailchimp, FluentCRM or the tool you use.)
Step 4: Add a delay
To add a delay, hover over the second email action and click Delay.
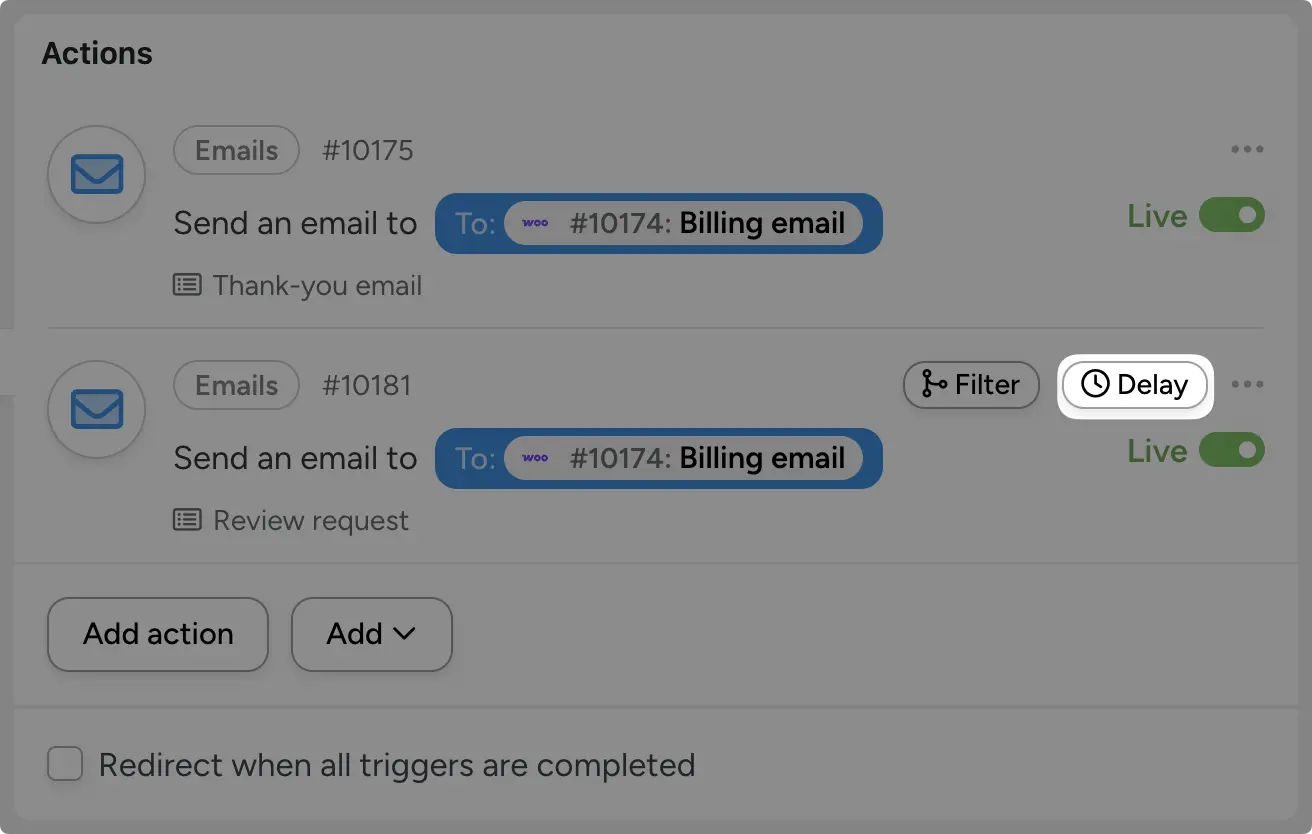
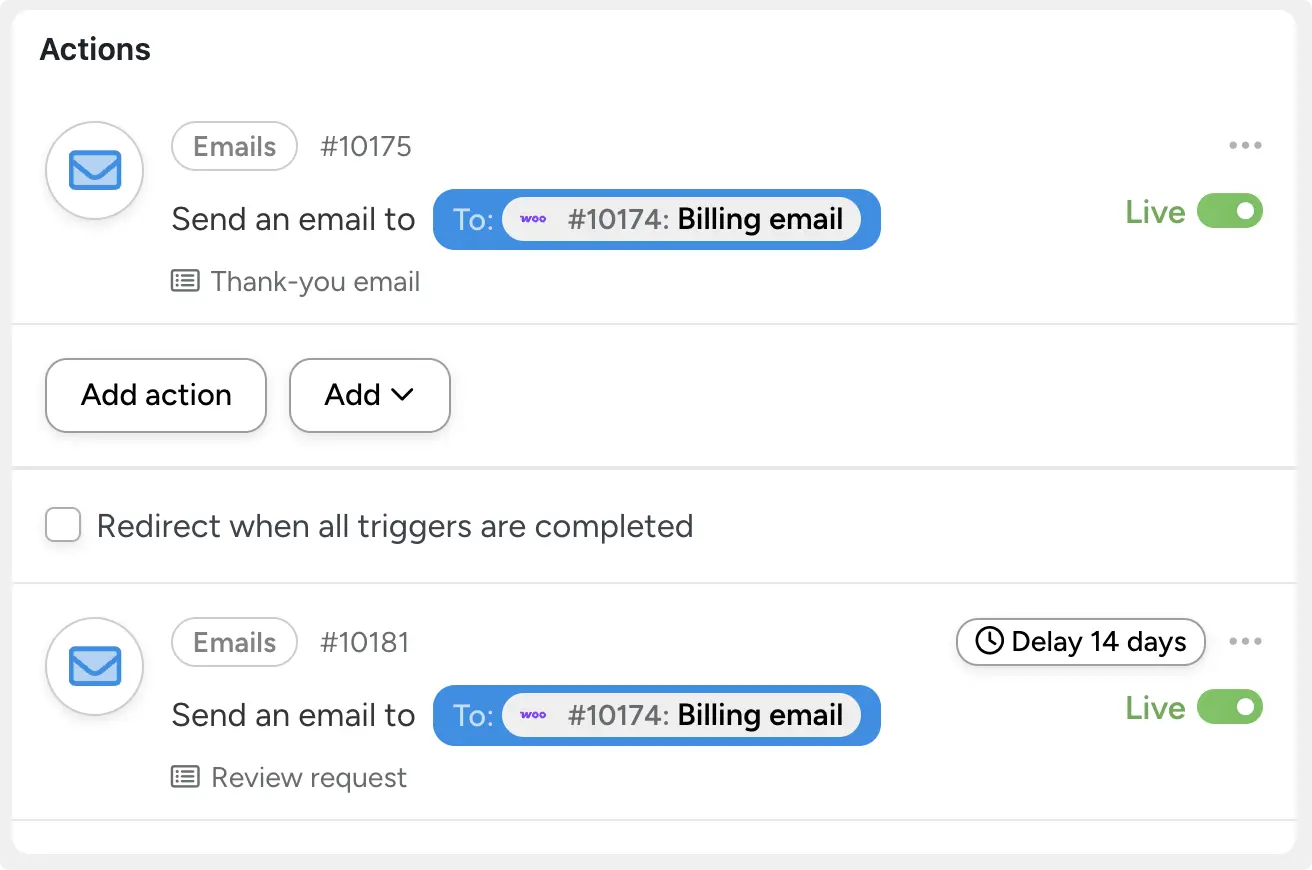
Automator will present you with a modal where you can set the delay. For example, I have set a 14-day delay.
Once you’re finished, click Save.
Close the Loop When the Review Comes In
A review request is only half the conversation. When the customer responds, respond back.
With Automator Pro, you can combine multiple triggers and actions with filters (conditions that sort actions) to run more powerful automations.
For example, you can build a second recipe with two triggers for A user reviews a product with a rating greater than, less than or equal to an amount. Then add actions based on the rating:
- High ratings: send a thank-you email. Want to go further? Add a coupon code for their next order.
- Lower ratings: alert your team by email or Slack so a real person can reach out and make it right.
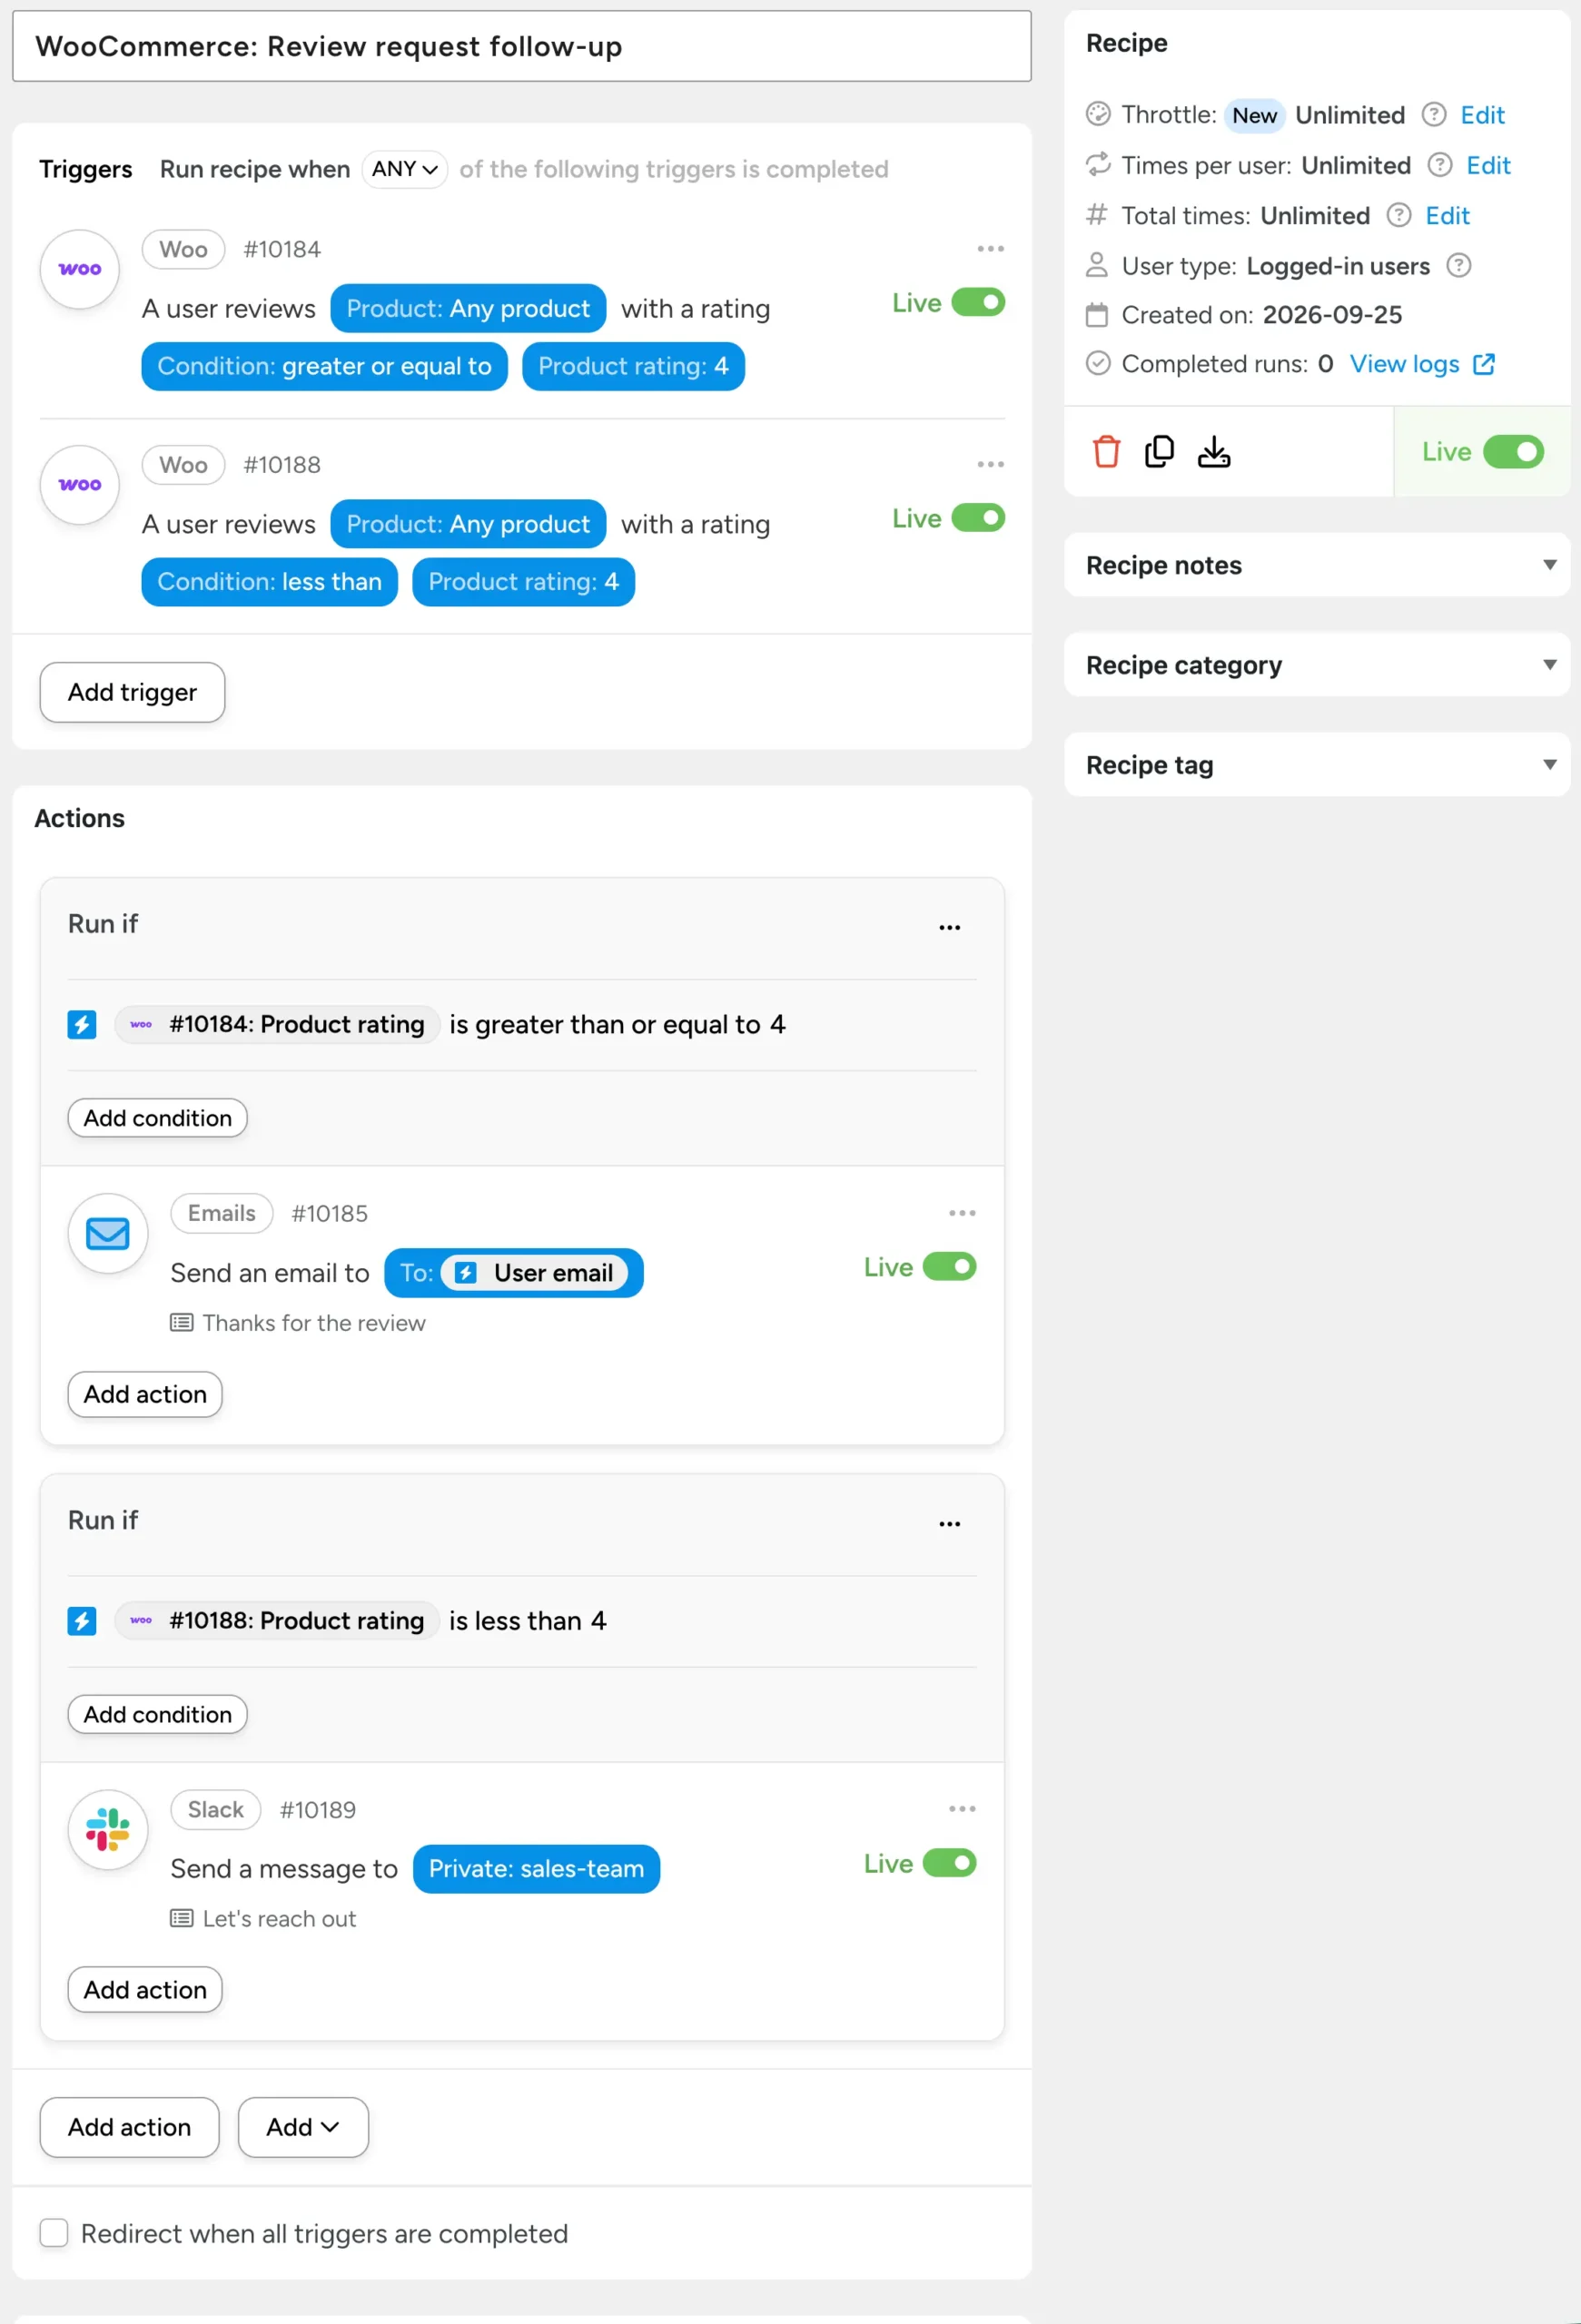
Both paths turn a review into a relationship. Happy customers feel appreciated. Unhappy customers feel heard, which is often the first step toward winning them back.
Want more ideas? Our post on automating WooCommerce product reviews covers rewarding reviewers and sharing top reviews on social media.
Look at what you just built: a trigger at the right moment, a delay that respects the customer’s timeline and a response that depends on what they say. That’s the difference between sending an email and running a follow-up system.
Delays and order-status triggers are what turn one email into a follow-up system. Get Automator Pro >>>
More WooCommerce Follow-Up Emails (and Where to Learn Each One)
The thank-you and the review request cover the first days after an order. The rest of your timeline has its own full walkthroughs. Here’s what each email does and where to learn how to build it.
Welcome Emails for First-Time Customers
A first order is the start of a relationship, not the end of a transaction. A welcome sequence introduces your brand, shows off what makes you different and gives new customers a reason to stick around.
The recipe starts when a new user account is created. It then sends a series of emails over the first week, using delays to space them out. You can even include a WooCommerce coupon partway through.
Cross-Sell and Upsell Emails
The best time to recommend a product is right after someone buys the thing it pairs with. A customer who just bought a camera is a great candidate for a memory card.
These recipes are triggered based on a purchase in a specific product or category. They can tag the customer for a targeted CRM campaign, or email a ready-made order with a unique coupon so checkout takes one click.
Win-Back Emails for Lapsed Customers
Some customers drift away. It’s rarely personal. Life gets busy. A well-timed “we miss you” email (sometimes with an incentive) brings them back.
For subscription stores, the recipe fires when a subscription expires and follows up by email, WhatsApp or both. For one-time buyers, a scheduled recipe checks each day for customers who haven’t ordered in a set number of days and reaches out automatically.
Or:
Birthday and Anniversary Emails
Nothing says “we remember you” like a birthday coupon that shows up on the actual day.
The recipe runs daily, checks each customer’s birthday (stored in a custom field) and generates a personal coupon code for anyone celebrating. It’s set once and runs forever.
Even if you don’t know your customers’ actual birthdays, you can always celebrate the anniversary of their first purchase.
The Follow-Up Before the Order: Abandoned Carts
One type of WooCommerce follow-up email happens before the purchase. When a logged-in customer adds a product to their cart but doesn’t check out, you can create a recipe that waits a short while, checks that they still haven’t bought the item(s) in their cart and then sends a friendly reminder.
It’s the only stop on your timeline that happens before the sale.
WooCommerce Follow-Up Email Best Practices
A great follow-up system is as much about restraint as reach. Here are the habits that keep yours helpful instead of annoying.
- Send high volume through your email tool. Automator’s built-in email action is perfect for simple follow-ups. As your volume grows, route campaigns through your CRM or email service so they’re built for sending at scale.
- Set a frequency budget. Map your timeline so emails don’t pile up. If a customer buys two things in one day, they shouldn’t get four follow-ups by dinner. Use tags and action filters (conditional logic that controls when actions run) to check what a customer has already received.
- Stop the sequence when the customer acts. If they buy again, leave a review or reply, pending follow-ups should step aside. The abandoned cart recipe does this by checking for a purchase before it sends. Borrow the same idea and apply it everywhere else.
- Give every email one job. Thank them, or ask for a review, or recommend a product. Every email should only have one job.
- Respect consent and unsubscribes. Marketing follow-ups should go to customers who’ve opted in, and every marketing email should offer a clear way out. If you send directly from WordPress, the User Lists addon (included with Automator Pro – Plus and Pro – Elite) adds unsubscribe links and an Unsubscribed list that the Send an email action respects. Upgrade to a Pro Plus or above plan >>>
- Test before you go live. Place a test order and check your inbox. Then check your recipe logs to confirm every trigger and action ran the way you expected.
Getting Started with Uncanny Automator
Ready to build your WooCommerce follow-up email workflows? Get started here:
- From your WordPress Admin Dashboard /wp-admin/, navigate to Plugins > Add new.
- In the search bar, enter “uncanny automator” and click Install and Activate. (This installs the free version of Uncanny Automator, which must be active to use Automator Pro features.)
- Register your account to get complimentary app credits and starter Uncanny Agent usage — Automator’s AI assistant for WordPress to get you building recipes and managing your site faster.
To unlock delays, order-status triggers, filters, and more powerful tools and features:
- Purchase your Automator Pro license from the Automator pricing page. Then download Uncanny Automator Pro from your Automator account.
- Navigate to Plugins > Add New, click Upload Plugin, select the Pro .zip file, then install and activate it.
- Visit Automator > Settings to enter your license key (you’ll find it in your purchase confirmation email).
Conclusion
Don’t ghost your customers after checkout — that’s just the beginning of the relationship, not the end of it.
Follow-up emails show your customers that you care and give you more touchpoints to make a lasting impression. And the good news is that you don’t need a CRM, a stack of single-purpose plugins or a weekend spent copy-pasting generic messages.
With Automator, you have all of the tools you need to build an automated pipeline for your WooCommerce follow-up emails, from simple thank-yous to to branching support workflows.
Build one recipe at a time. Each one keeps working long after you’ve moved on to the next. And when you’re ready to add delays and multi-step sequences, Automator Pro turns your follow-ups into a conversion-optimized system >>>
What will you do with more time?
Frequently Asked Questions
What are WooCommerce follow-up emails?
WooCommerce follow-up emails are automated emails that go out after a customer takes an action in your store, like placing an order, having an order completed or leaving a review. Common examples include thank-you emails, review requests, cross-sells and win-back emails.
Does WooCommerce send follow-up emails on its own?
WooCommerce sends transactional emails, like order confirmations and status updates. Marketing follow-ups, like review requests and win-backs, need an automation layer. Uncanny Automator adds that layer and works with the email tool you already use.
Can I send WooCommerce follow-up emails with the free version of Automator?
Yes. Automator Lite can send a thank-you email every time a customer purchases a product. Delays, order-status triggers and review triggers are part of Automator Pro.
Do I need a CRM to send WooCommerce follow-up emails?
No. Automator can send emails directly from WordPress with its built-in Send an email action. If you already use a CRM or email tool, Automator can tag customers or add them to lists so your tool sends the campaign instead.
Can I use Mailchimp, FluentCRM or another email tool with these recipes?
Yes. Automator integrates with popular email and CRM tools, including Mailchimp, FluentCRM, ActiveCampaign, Brevo, MailerLite, Groundhogg and Drip. Your recipes decide who gets what, and your email tool handles the sending.
How long after a purchase should I send a review request?
Send it once the customer has received the product and had time to form an opinion. Trigger the recipe when the order is marked Completed, then add a delay that fits your shipping times and product type.
Do follow-up emails work for guest checkout orders?
Yes. Automator Pro includes a trigger for guest order status changes, so guest buyers can get follow-ups too. Build a matching recipe alongside your logged-in customer version.
How do I avoid sending customers too many emails?
Plan your whole timeline before you build. Then use tags and action filters to check what a customer has already received, and stop pending follow-ups once they take the action you wanted.

Related Posts




















































Comments (0)