

In Uncanny Automator 8.0 you find integrations while you build. The picker is the modal that opens whenever you add a trigger, an action, or a recipe block, and it replaces the All integrations page from earlier versions. This article explains how to search and browse the picker, what the Ready-to-use only switch hides, what the Not installed, Not active, and Pro labels mean, and where you connect an app integration.
Opening the picker
Click + Add trigger in the Triggers section, the + at the end of the flow, or + Add inside a recipe block path. The picker opens on its first step, Integration; the second step is Trigger or Action, depending on where you clicked. The bar across the top shows which step you are on.
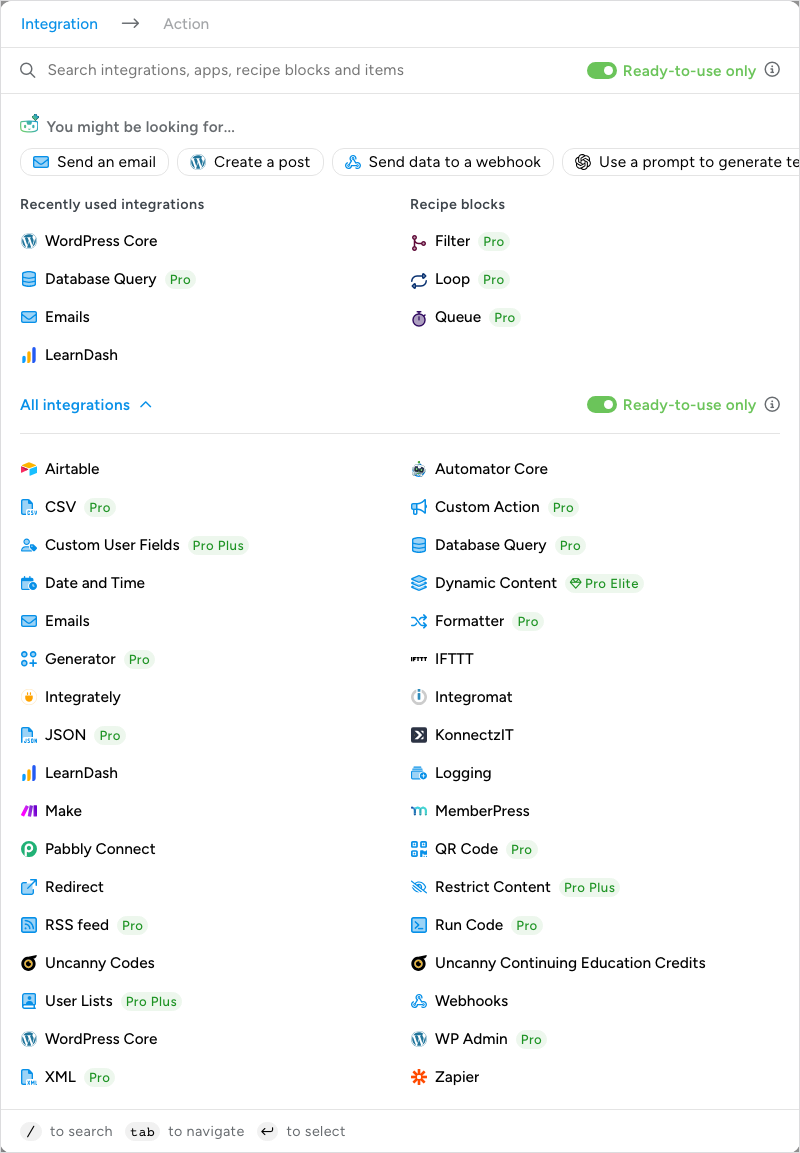
The picker is built for the keyboard as well as the mouse: press / to jump to the search box, Tab to move between results, and Enter to select the highlighted one.
Searching
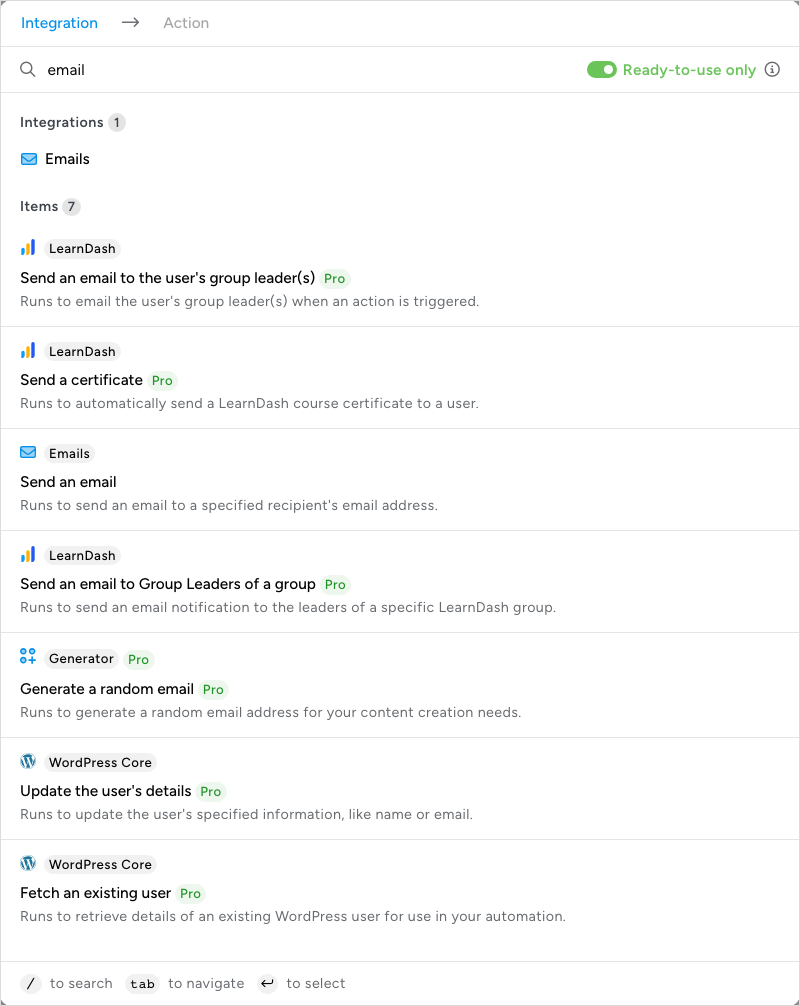
Type in Search integrations, apps, recipe blocks and items. Results are grouped under Integrations and Items, each with a count, so a search for “email” finds the Emails integration and every trigger or action whose name mentions email, in one list. A Blocks group is added when a recipe block matches what you typed. Each item shows its integration, its sentence, and a one-line description of when it runs. Select an integration to see its items, or select an item directly to go straight to its Set up step.
Browsing
With the search box empty, the picker shows these sections:
- You might be looking for… — a row of suggested items for the step you are on, such as Send an email, Create a post, and Send data to a webhook for actions. The row continues past the right edge of the picker.
- Recently used integrations — the integrations your site’s recipes used most recently, newest first. The group appears once at least one recipe uses an integration, so a new site does not show it.
- Most used integrations — the integrations used in the most recipes on your site, leaving out the ones already listed as recently used.
- Recipe blocks — Filter, Loop, and Queue, the containers that hold actions. The group appears when you add an action. Blocks require Uncanny Automator Pro, so on a site without Pro they are hidden while Ready-to-use only is on. See Recipe blocks: Filter, Queue and Loop.
- All integrations — click it to expand the full alphabetical list. The list has its own Ready-to-use only switch, so you can open up the complete catalogue here without changing the rest of the picker.
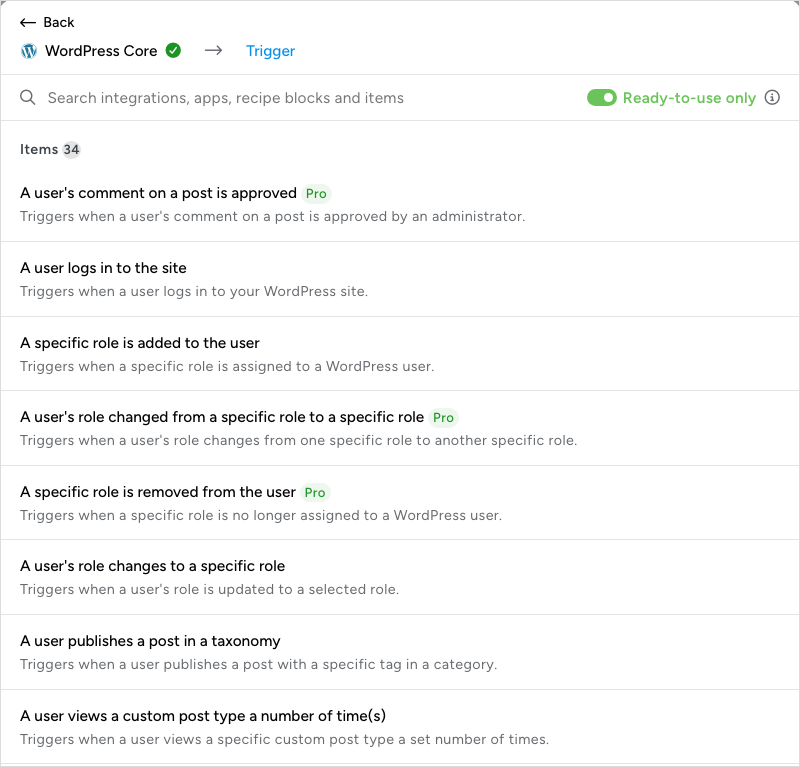
Select an integration to move to the second step. The picker shows Items with a count, each with its sentence and description. Click Back to choose a different integration.
The Ready-to-use only switch
Ready-to-use only is on the first time you open the picker. In the picker’s own words, it shows “only integrations, blocks, apps or items you can use in your recipe right away, with no extra installs or account connections”. That means it hides:
- integrations for plugins that are not installed and active on the site,
- app integrations whose account is not yet connected,
- items and blocks that need Uncanny Automator Pro, or a higher plan than your license, when you do not have it.
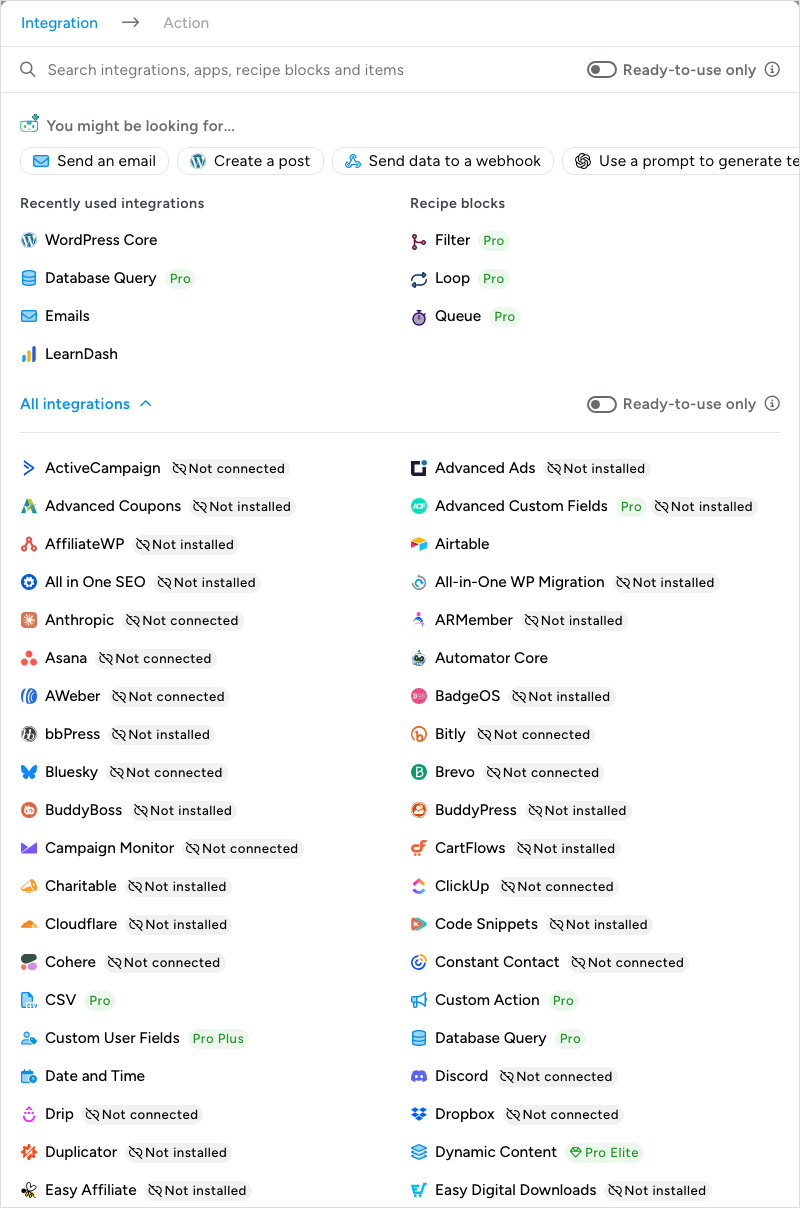
Switch it off to see everything Uncanny Automator can do, including what you would need to install, connect, or upgrade for. Your browser remembers the setting, so the picker opens the way you left it until you switch it back on. Another browser or device starts with it on.
Not installed, Not active, Not connected, and Pro
With Ready-to-use only switched off, a label on an integration or item tells you what stands between you and using it:
- Not installed — the plugin the integration works with is not on the site. Selecting the integration names the plugin and, for a plugin on WordPress.org, offers to install it. Install and activate the plugin, and the integration becomes ready to use the next time you open the picker. Uncanny Automator detects plugins by their folder, so a renamed plugin folder is not detected.
- Not active — the plugin is installed but switched off. Selecting the integration explains that the plugin “is installed but not active. Activate it to use this integration” and offers an Activate button that opens the Plugins screen with that plugin listed.
- Not connected — the integration is an app that needs an account connection. Connect it at Automator > Settings > App integrations (next section).
- Pro, Pro Plus, or Pro Elite — the badge names the plan level the integration or item needs. It is shown whether or not you have that plan, and its helper text names the plan, for example “You must have a valid Pro Basic license or higher”. When your license does not cover it, the integration or item is also marked Locked. Install and activate Uncanny Automator Pro with a license from that plan or higher; see the plans page for what each plan includes.
Some items are disabled in a search for a different reason and say so in their description. End loop, for example, reads “End loop can only be used inside a Loop.”
Connecting an app integration
App integrations such as Slack, Mailchimp, or Google Sheets run through the Automator Platform and need an account connection before their triggers and actions are ready to use. The connection is made outside the builder, and the steps are the same as in earlier versions:
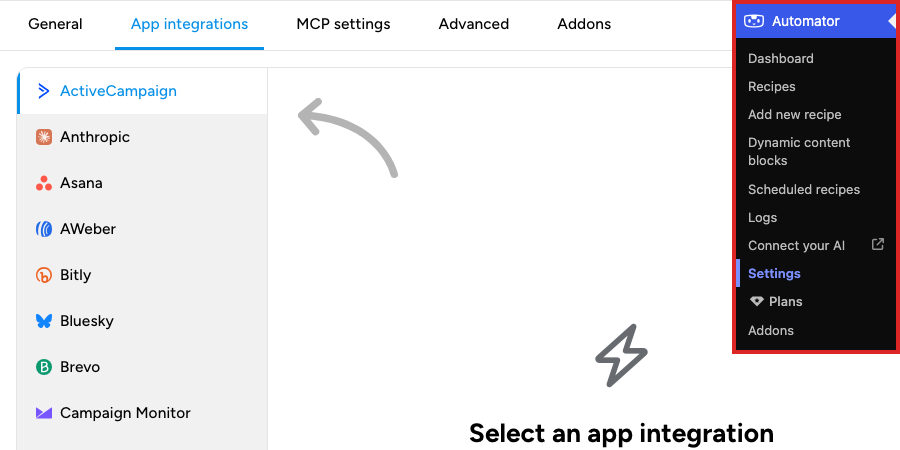
- Go to Automator > Settings > App integrations.
- Select the app in the list on the left. The panel on the right shows the connection steps for that app.
- Follow the app’s connection steps, then return to the recipe and open the picker again. The app’s items are now ready to use.
Each app has its own knowledge base article, titled “Connecting [App] to WordPress”, with the connection steps and any setup needed in the app itself. If you have Uncanny Automator Lite, you’ll first need to connect your site to a free Uncanny Automator account, which gives you app credits to use with app integrations. On a paid plan, app integrations are included. See Connecting your site with a free Uncanny Automator account and What are app credits?.
Related: Managing triggers, Managing actions, Recipe blocks: Filter, Queue and Loop, Moving to the new recipe builder


Comments (0)