

The XML, JSON, and CSV integrations in Uncanny Automator Pro read a file, or a URL that serves one, and turn every record in it into one pass of a loop. One recipe can create a user for each row of a CSV export, a product for each item in an XML catalogue, or an email for each object in a JSON list. This article covers what the three integrations share, the walkthrough on the Uncanny Automator 8.0 recipe builder, what differs for CSV, JSON, and XML, and the limits to know before a large import.
How a file import works
Each of the three integrations offers one trigger and one action with the same sentence: Import a CSV file, Import a JSON file, or Import an XML file. The item reads the file and exposes its records as a loopable token, a token that holds a list rather than a single value. When you save the item, Automator adds a Loop block to the recipe with Loop type set to Token and pointed at that list, with the loop filter The item is not empty already in place. Every action you put inside the block runs once per record, and the record’s fields (the CSV columns, the JSON keys, or the XML elements) are available as loop tokens in those actions.
The trigger and the action suit different jobs:
- The trigger starts the recipe itself. It is available in Everyone recipes only, and it runs when you click Run now in the builder, like the Run now trigger. The top bar shows a Run now button in place of the Recipe on / off switch as soon as the trigger is saved. Choose it for a one-off import you start by hand: a list of users to create, a catalogue to load once.
- The action sits in a recipe started by any other trigger, in either recipe type. Pair it with a Schedule trigger to re-read a URL every night, or with a form trigger so a submission starts the import.
Everything else, the fields, the loop, and the tokens, is the same whichever you pick.
Setting up the import
The steps below use the trigger. For the action, skip to step 3 and click the + at the end of the flow instead of Add trigger.
- Go to Automator > Add new recipe. In the Select a recipe type modal, choose Everyone and click Confirm. The import triggers are not offered in Logged-in users recipes.
- Give the recipe a name in the title field.
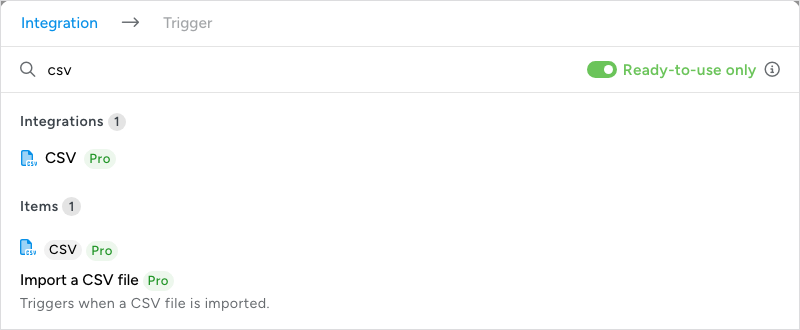
- Click Add trigger. In the picker, type the format name in the search box (“csv”, “json”, or “xml”). The integration appears under Integrations and its import item under Items; both carry the Pro badge, and they are hidden while Ready-to-use only is on unless Uncanny Automator Pro is active and licensed. Click the item.
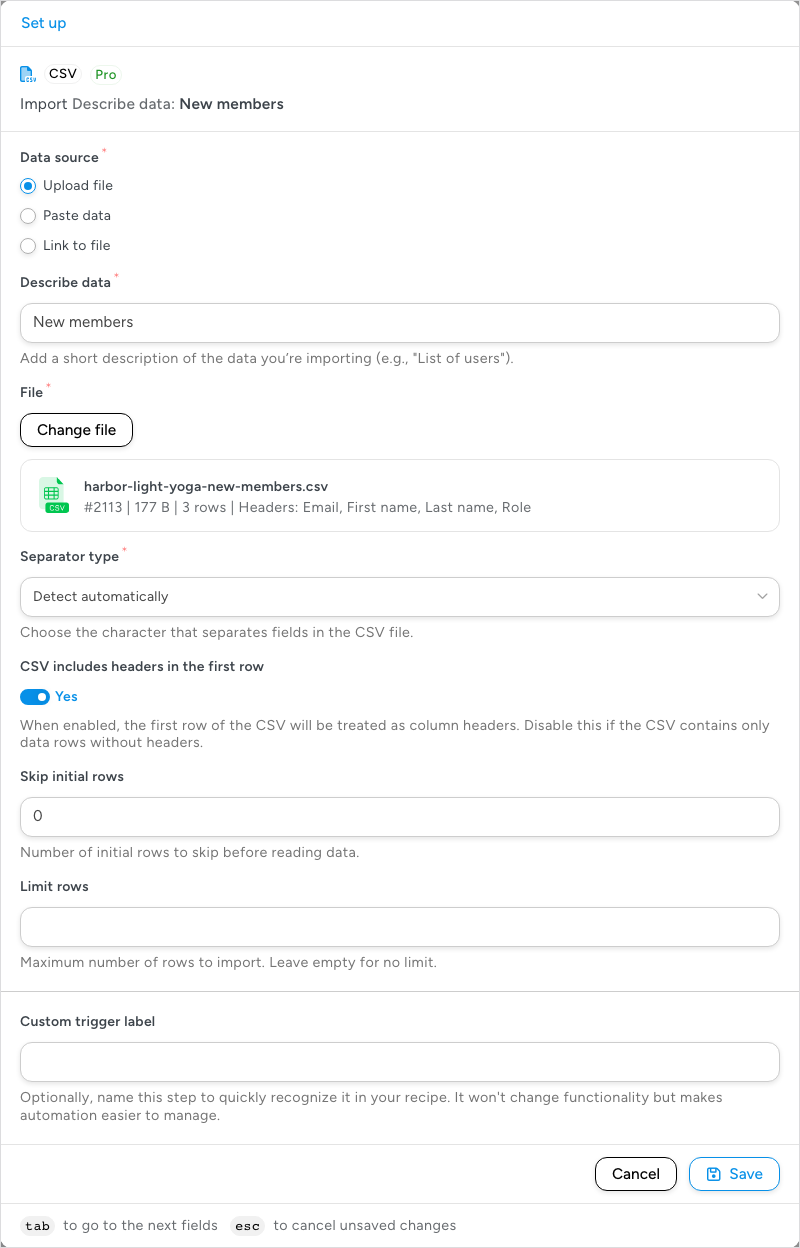
- In the Set up step, choose a Data source. Upload file is selected by default and shows a File field with a Select file button, which opens the WordPress media library on its Upload files tab. Once a file is chosen, the field shows its name and size (for a CSV file, also the number of rows and the headers) and the button becomes Change file. Link to file shows a Link to file field for the URL of a file on another server; the field does not accept tokens. CSV and JSON also offer Paste data, which shows a Data box you paste the raw text into.
- Fill in Describe data. This short label (“List of users”, “Spring catalogue”) completes the trigger’s sentence on the canvas (“Import Describe data: List of users”) and names the Loop block’s data, so make it recognisable.
- Set the fields specific to the format (see the CSV, JSON, and XML sections below). For JSON and XML this includes choosing which part of the file holds the records.
- Limit rows (CSV and JSON) or Limit items (XML) caps how many records the import reads, counted from the top of the file. The field is blank by default, which imports every record. Set a small number while you test a new recipe, then clear it.
- Click Save. The import items have no Test step, so the modal offers Cancel and Save only.
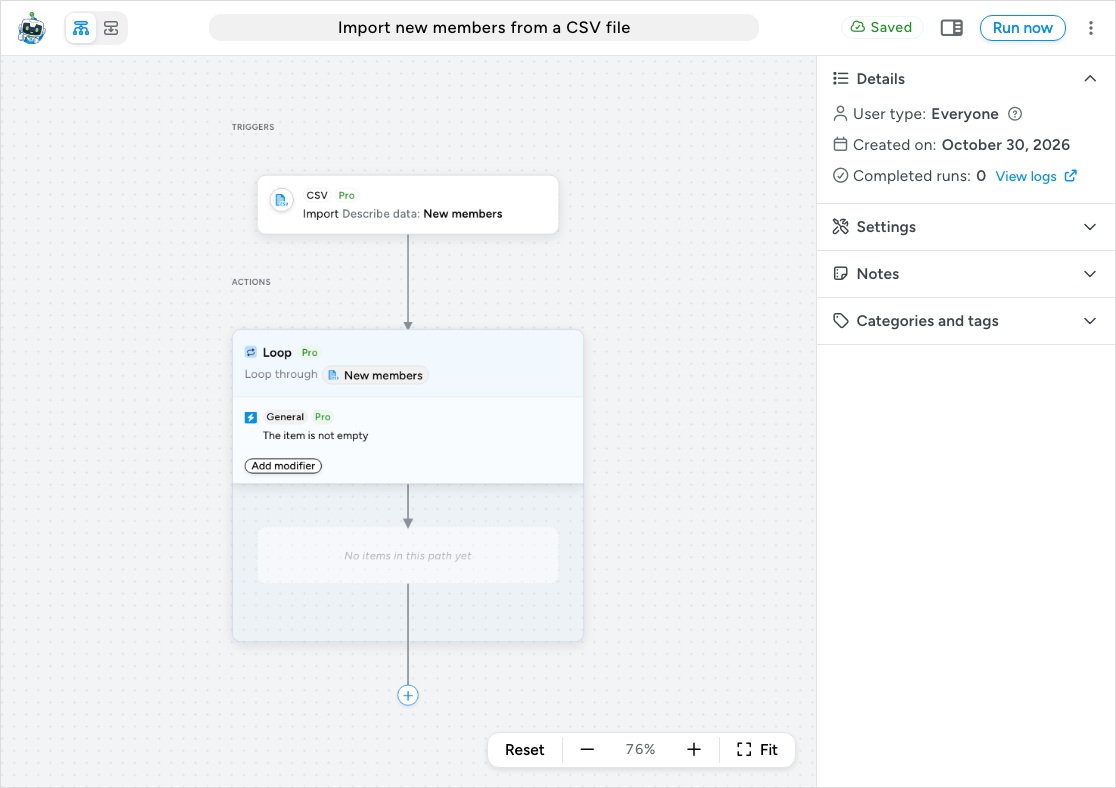
When you save, Automator reads the file and does two things. It records the structure of the first record so the token picker can list its fields, and it adds a Loop block to the ACTIONS section. The block’s header reads Loop through followed by your Describe data label, and its modifier row shows the loop filter The item is not empty (from the General integration), which drops blank records. The block is added once, the first time the item is saved with Describe data filled in; if you delete it, add a Loop block from the picker’s Recipe blocks, choose Token, and pick the import’s token with the ∗ button. The picker on that field lists only loopable tokens.
- Click + Add inside the Loop block and choose the action that should run for each record, for example WordPress Core > Create a post. Actions outside the block run once per recipe run; only the actions inside repeat.
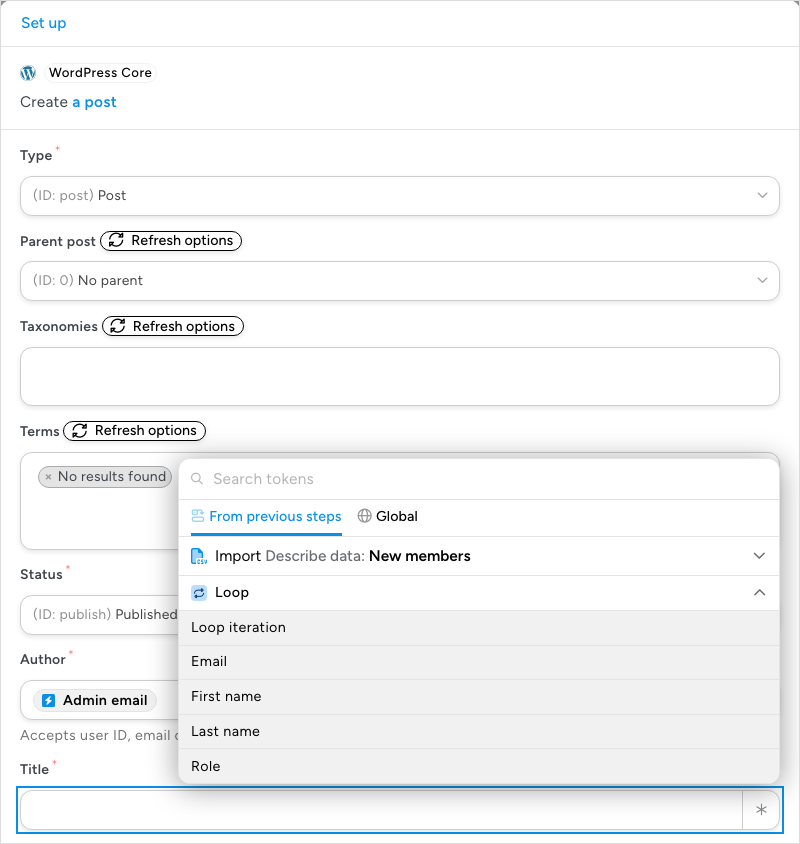
- In the action’s fields, click the ∗ button at the end of a field and open the Loop group under From previous steps. It holds Loop iteration and one token for each field of the record, named after the CSV column headers, the JSON keys, or the XML element names in the file. (The group named after the trigger, “Import Describe data: …”, holds the trigger’s own settings, not the record’s fields.)
- Click Save to save the action. An action with a Test step also offers Test, if you want to try it first.
- For the trigger route, click Run now in the top bar. The builder opens the log of that run, where the Loop block shows how many records have been processed and lets you pause or cancel. For the action route, switch Recipe on; the import then runs whenever the recipe’s trigger fires.
Important: There is no undo for the actions a loop runs. Test a new import with Limit rows set to one or two records, or on a staging site, before importing the whole file.
CSV
CSV is the plainest of the three formats: one record per line, fields separated by a character. These fields appear only on the CSV items.
- Separator type tells Automator which character separates fields. Detect automatically, the option selected when the item opens, picks whichever of comma, semicolon, tab, or pipe appears most often in the data, which is right for most exports. Choose Comma, Pipe, Semicolon, or Tab explicitly when the data is full of another one of those characters, for example addresses with commas in a semicolon-separated file.
- CSV includes headers in the first row is on (Yes) by default. Leave it on when the first row holds column names: that row is then read as names, and those names become the token names (an “Email” column gives an “Email” token). Switch it to No when the file has data from the first line; the tokens are then named Column A, Column B, and so on, in file order.
- Skip initial rows defaults to 0. Set it to leave out data rows at the top of the file. When the file has a header row, the header is still read for the column names and the skipped rows are counted after it. Limit rows then counts from the first row left.
Things to know for CSV:
- Uploads must be CSV files: the file field accepts the
text/csvandapplication/csvtypes, and WordPress validates the file during the media upload. Most spreadsheet apps set the type correctly when they export. - If the data cannot be read (invalid text pasted, a URL that cannot be reached, or a file that is not CSV), no tokens are generated. You notice this when you add an action inside the loop and the token picker’s Loop group has no record fields to choose from. Check the file, then re-save the import item so Automator reads it again.
- When CSV includes headers in the first row is Yes, a row with a different number of fields from the header row is left out of the import.
JSON
JSON files nest objects inside objects, so the import has to be told which list holds the records.
- Root path is a dropdown that Automator fills in after you pick a data source and the file has been read. It lists every path in the file that holds a list of items, in the
$.data.itemsstyle described in the field’s help text, and defaults to$., the whole file. Choose the path whose items you want to loop through; the tokens are then the keys of those items.
Things to know for JSON:
- Uploads must be JSON files (
application/json). - Token names come from the first item under the root path. Items that lack a key the first item has return an empty value for that token, and keys that appear only in later items are not offered. Keep the records in a JSON import uniform.
- When the file cannot be decoded, the error appears under the Root path field and its list is emptied, for example Failed to decode the JSON file content. Error details: Syntax error, or The JSON file appears to be empty. Unable to proceed with decoding. If the URL cannot be fetched, the field shows the fetch error instead. When the file is valid but holds no list, the dropdown offers only
$.and the loop has nothing to iterate.
XML
XML is the format of RSS feeds, sitemaps, product feeds, and many export tools. The XML items have no Paste data option: the data source is Upload file or Link to file.
- XPath to target elements is a dropdown that Automator fills in after reading the file. It lists the paths to the elements that contain other elements, in the
/channel/itemstyle of the field’s help text. Choose the path of the repeating element you want one loop pass for, such as eachitemin a feed or eachproductin a catalogue. The tokens are then the child elements of that element, named after the elements; a child element that appears more than once in the same element is not offered as a token. Attributes are not offered as tokens either. If the first record has exactly one attribute, the list also shows a token named @attributes; it does not return the attribute’s value, so don’t use it. An element that has both text and attributes gives a token with its text.
Things to know for XML:
- Uploads must be XML files (
application/xmlortext/xml). - If the URL cannot be reached, or the XML is malformed, the error appears under the XPath to target elements field and its list is emptied. If the XML is well formed but the chosen path matches nothing, no loop tokens are generated and the builder shows no message (No results found for the specified XPath is written only to Automator’s log files); you notice this when the token picker’s Loop group has no record fields.
- To process an RSS or Atom feed, use the RSS integration rather than the XML import. It knows the feed structure, needs no XPath, and can skip items it has processed before. See RSS.
Things to know
- Plan. The three integrations require Uncanny Automator Pro on any paid plan; the picker labels them “You must have a valid Pro Basic license or higher”.
- File size. We recommend files of up to 5,000 records. Automator reads the whole file each time the recipe runs, so larger files depend on your host’s PHP memory and upload limits.
- Linked files. A Link to file URL must be public. Automator fetches it with a 25-second timeout, follows up to three redirects, and accepts only a successful (200) response with content; addresses on private or internal networks are refused. The errors you may see are The URL provided is not valid, The request did not return a valid response, and No content was found at the provided URL.
- When the file is read. A linked file is fetched again on every run, so a URL whose contents change gives each run the current data. An uploaded file is read from the media library on every run. The token list, however, reflects the file as it was when you last saved the item: if the columns or keys change, open the item and save it again so the tokens update.
- Re-running an import. The CSV, JSON, and XML imports do not remember which records they have already processed; running the recipe twice processes every record twice. If the actions inside the loop create something, a second run creates duplicates unless the action itself checks first. The RSS integration is the exception: see RSS for its unique-title and GUID options.
- Scheduling. To import on a schedule, use the import action after a Schedule trigger. The trigger route runs only when you click Run now, and a run does not start while the previous run of the same recipe is still in progress.
- Filtering records. Add loop filters with Add modifier on the Loop block to skip records before the actions run (The item meets a condition compares a field with a value), or put a Filter block inside the loop to send records down different paths.
Related: Loop block: users, posts and tokens, RSS, Run Now, Schedule, Recipe types: logged-in users and everyone, Filter block and conditions, Managing tokens.


Comments (0)