Struggling with member churn? Get started with these proven, automated membership retention strategies for WordPress…
The Ultimate Guide to WordPress Email Tracking
Tracking WordPress emails, opens, and clicks doesn’t have to be difficult. In this guide, I’ll give you the tools and no-code know-how for WordPress email tracking.
TLDR? 100-word Summary
WP Mail SMTP Pro lets you track opens and clicks for every email sent from your WordPress site. Uncanny Automator integrates WordPress email tracking with your other workflows, from custom reporting to event management, and more.
In this article, I’ll show you how to:
- track all outgoing WordPress emails—including order confirmations, password resets, and admin notifications—using WP Mail SMTP Pro.
- enable open and click tracking to measure engagement and troubleshoot delivery issues.
- use Uncanny Automator to connect WP Mail SMTP Pro with CRMs, Google Sheets, and other plugins for automated reporting and workflows.
- trigger actions on your site based on email events (e.g., tags contacts in a CRM, add attendees to events, etc.).
- follow best practices for data retention, privacy compliance, and performance monitoring.
Get WP Mail SMTP Pro to enable reliable tracking >>>
Get Uncanny Automator to automate and extend your email insights >>>
Want to know if people actually read your emails? WordPress email tracking is your answer!
Whether you’re sending password reset emails, order confirmations, or newsletters from your WordPress site, tracking opens and clicks gives you super valuable insights. The good news? Setting up email tracking doesn’t have to be rocket science.
In this guide, I’ll walk you through the easiest way to track your WordPress emails using two powerhouse plugins that work like magic together.
You’ll learn how to see who opens your emails, which links get clicked, and (here’s the fun part) how to turn those insights into automated workflows that boost your business.
So, what’s the winning combo?
- WP Mail SMTP Pro handles all the tracking so your emails aren’t lost in cyberspace.
- Uncanny Automator connects everything together like digital duct tape.
Whether you’re running a small business or managing multiple WordPress sites, this setup works beautifully for everyone.
Ready to transform those mystery emails into trackable, actionable data? Let’s dive in!
p.s., Stick around to the end—I’ve got some tips and tricks for turning boring admin emails into money-making marketing machines.
WordPress Email Tracking Setup: 2 Steps (Too Easy)
Here’s the thing about WordPress email tracking: you’ve got tons of options, but most of them miss the mark!
Sure, your CRM might track those fancy marketing emails you send out. But what about the behind-the-scenes emails that really matter?
You know, the ones your WordPress site sends automatically; welcome emails, password resets, order confirmations, and all those other “invisible” messages that keep your site running smoothly.
Plot twist: These admin emails are often MORE important than your newsletters! They’re the emails people actually expect and open. Yet most tracking tools completely ignore them.
Enter WP Mail SMTP Pro.
This plugin doesn’t just handle your regular email delivery (though it does that brilliantly). It also tracks EVERY email your WordPress site sends, including all those admin messages that usually fly under the radar.
Plus, it’s designed to be ridiculously user-friendly, so you won’t need a computer science degree to figure it out.
Ready to finally see what happens to ALL your WordPress emails? Let’s get WP Mail SMTP Pro set up!
1. Install and Activate WP Mail SMTP Pro
To get started with your email tracking, you’ll need to install and activate WP Mail SMTP Pro. After you’ve purchased your license, we recommend following the WP Mail SMTP Setup Wizard to ensure that you configure all of your settings correctly.
The exact steps will vary depending on your web hosting service and existing CRM (if you have one) but the Setup Wizard will guide you through the process in simple steps.
(Note: While you can download the free version of WP Mail SMTP on your WordPress website, you’ll need at least a Pro license in order to make use of features like email logging, tracking and reporting. Throughout this article we’ll be using WP Mail SMTP Pro.)
2. Enable Email Tracking
After you’ve completed the setup process, WP Mail SMTP makes it easy to enable tracking for both email opens and clicks.
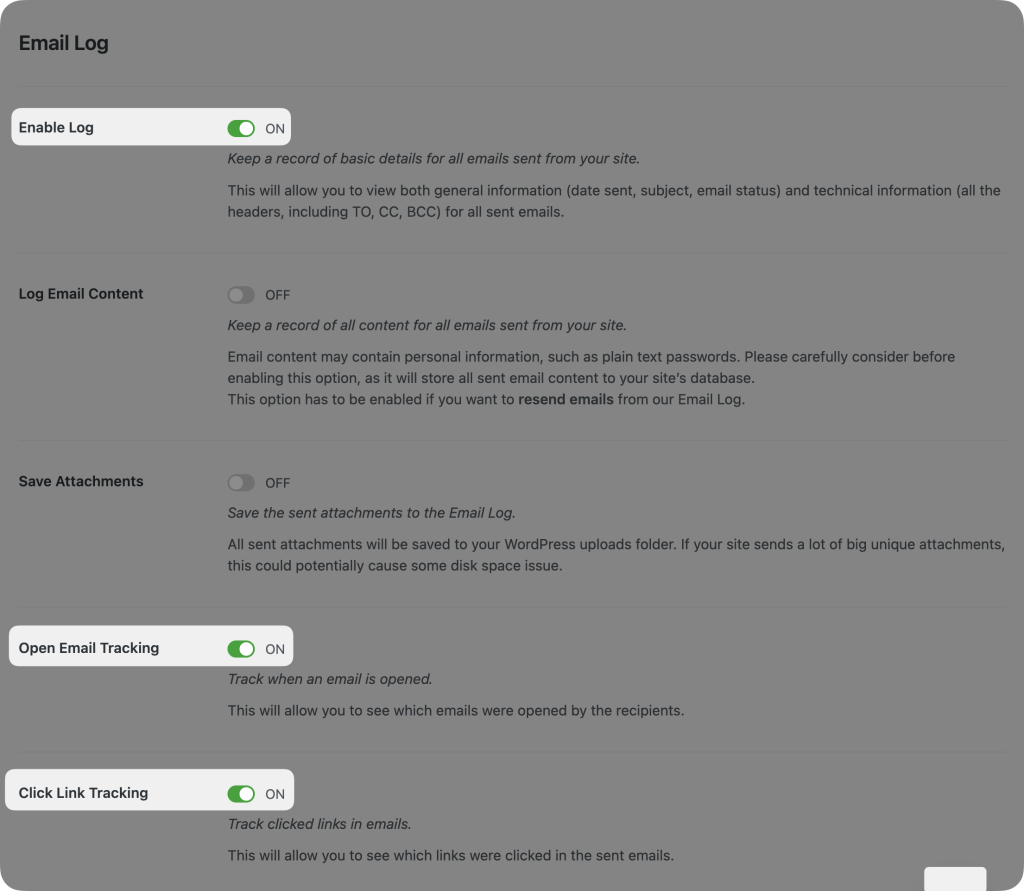
From your WordPress Admin Sidebar, simply navigate to WP Mail SMTP > Settings and click on the Email Log tab. In the new screen, toggle these options to the “On” position:
- Enable Log
- Open Email Tracking
- Click Link Tracking
WP Mail SMTP will now keep a detailed log of your WordPress email opens and clicks.
At the bottom of the screen, you can choose your desired Log Retention Period to determine how long WP Mail SMTP will store your tracking data. Once you’ve selected your Log Retention Period, click Save Settings.
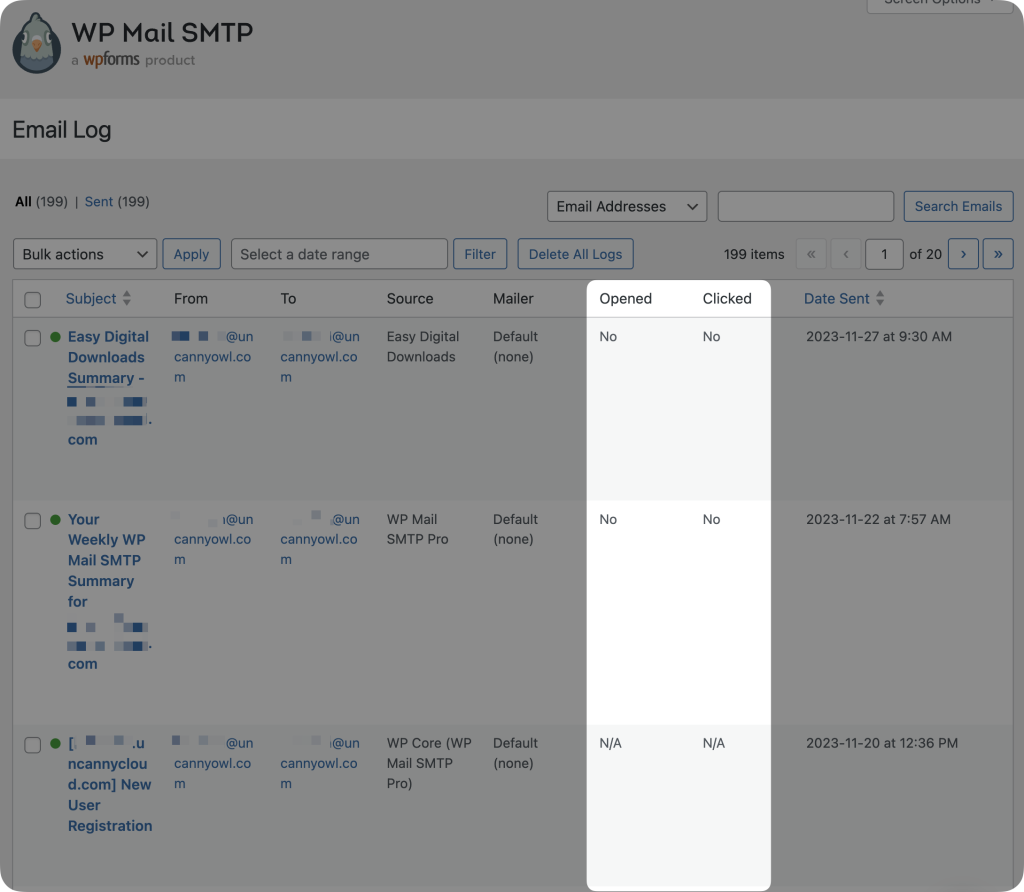
You can now check out your email tracking logs by navigating to WP Mail SMTP > Email Log from your WordPress Admin Sidebar.
That’s it! That’s all there is to setting up WordPress email tracking with WP Mail SMTP. Now all you need is a convenient way to optimize your email tracking and to incorporate it into your existing workflows. And why not expand your CRM’s capabilities while you’re at it!
3 Ways to Optimize Your WordPress Email Tracking
As promised, in this section, I’ll walk you through integrating WP Mail SMTP with your other WordPress plugins and apps to optimize your email tracking.
I’ll even show you how to turn admin emails into marketing channels with automations that can add tags to your contacts based on their email interactions!
Install and Activate Uncanny Automator Pro
To improve your WordPress email tracking and to integrate it into your existing workflows, you’ll need to purchase an Automator Pro license.
Uncanny Automator is the #1 WordPress automation and integration tool. Using simple combinations of triggers and actions, Automator lets you connect your favorite apps and plugins to automate your workflows.
For WordPress email tracking, Automator can connect your admin emails directly to apps like Google Sheets, ActiveCampaign or any other CRM.
How does Automator make WordPress email tracking better?
- Create custom reports in Google Sheets or Airtable.
- Tag and segment users in your CRM based on emails sent from your WordPress site.
- Integrate email engagement with other apps/plugins like LearnDash, WooCommerce, and more.
Ready to upgrade your email tracking?
Connect WordPress Emails to Your CRM
Want to unsubscribe, tag, or segment contacts in your CRM from your WordPress emails? A simple Automator recipe lets you do just that, and I’ll walk you through setting it up now.
Step 1: Create a New Recipe
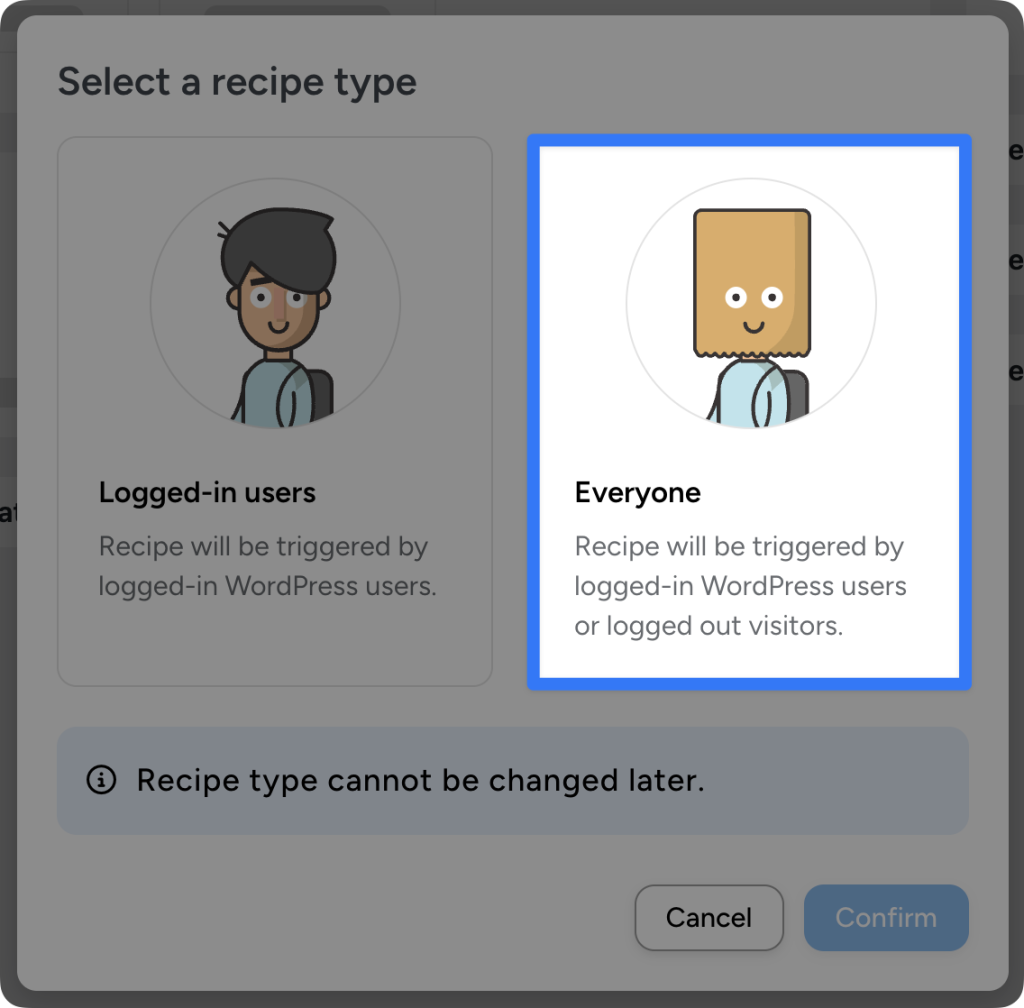
From your WordPress Admin Dashboard, navigate to Automator > Add new recipe. In the popup window that appears, select Everyone.
Step 2: Name Your Recipe
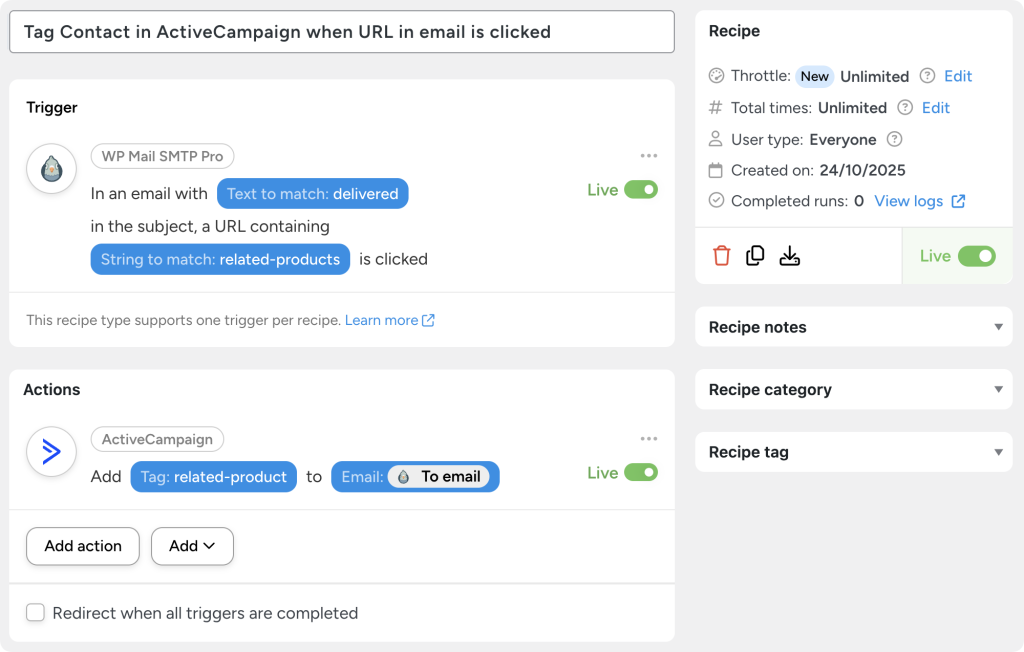
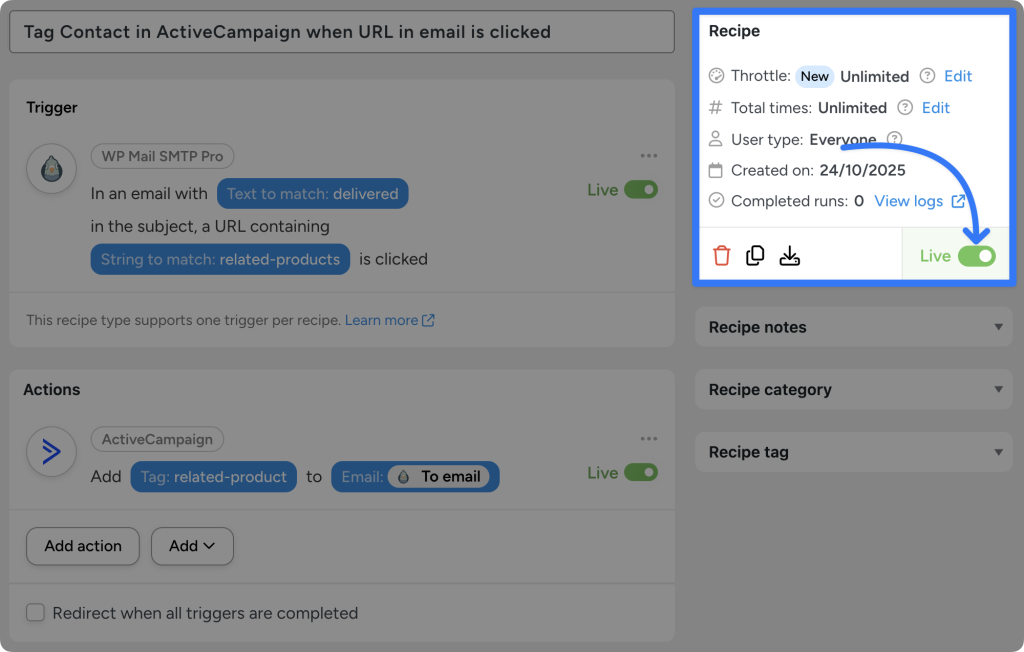
Give your recipe a name that makes it easy to recognize at a glance. For example, I have named this recipe, “Tag Contact in ActiveCampaign when URL in email is clicked”.
Step 3: Configure Your Trigger(s)
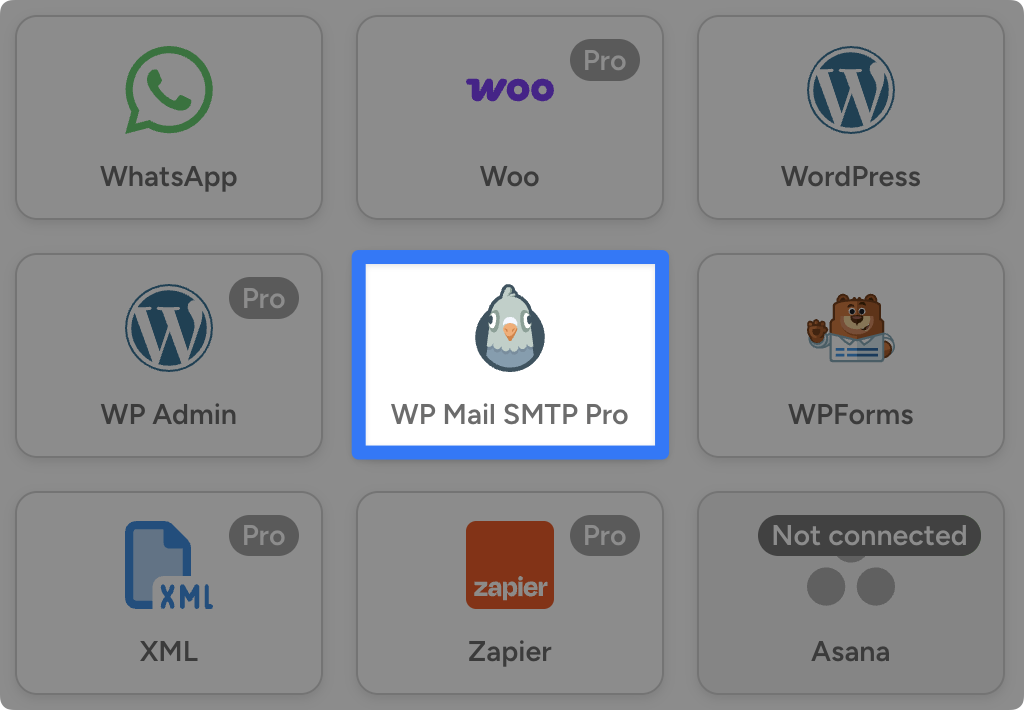
In the Trigger panel, from the menu of available integrations, select WP Mail SMTP Pro.
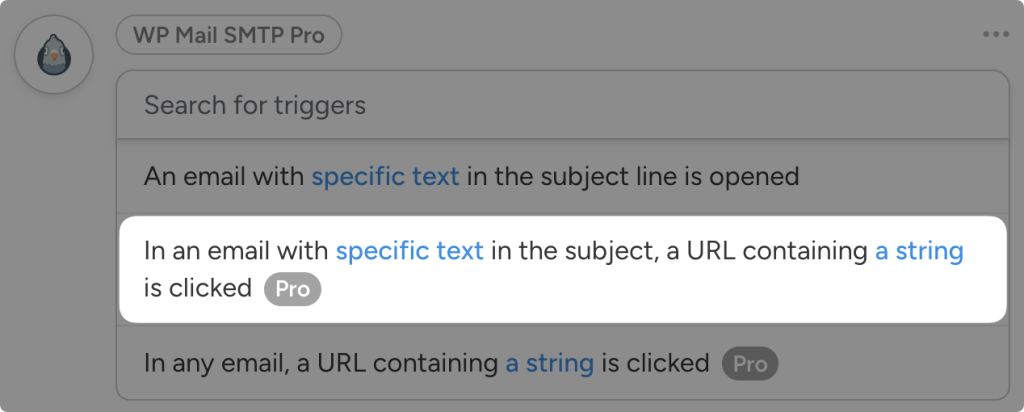
From the dropdown list that appears, select In an email with specific text in the subject, a URL containing a string is clicked.
Automator will prompt you to set the “specific text” and the “string”. This will depend on what specific workflow you’re automating. However, you should use unique text and strings for each workflow.
Once you’re finished, click Save.
Step 4: Configure Your Action(s)
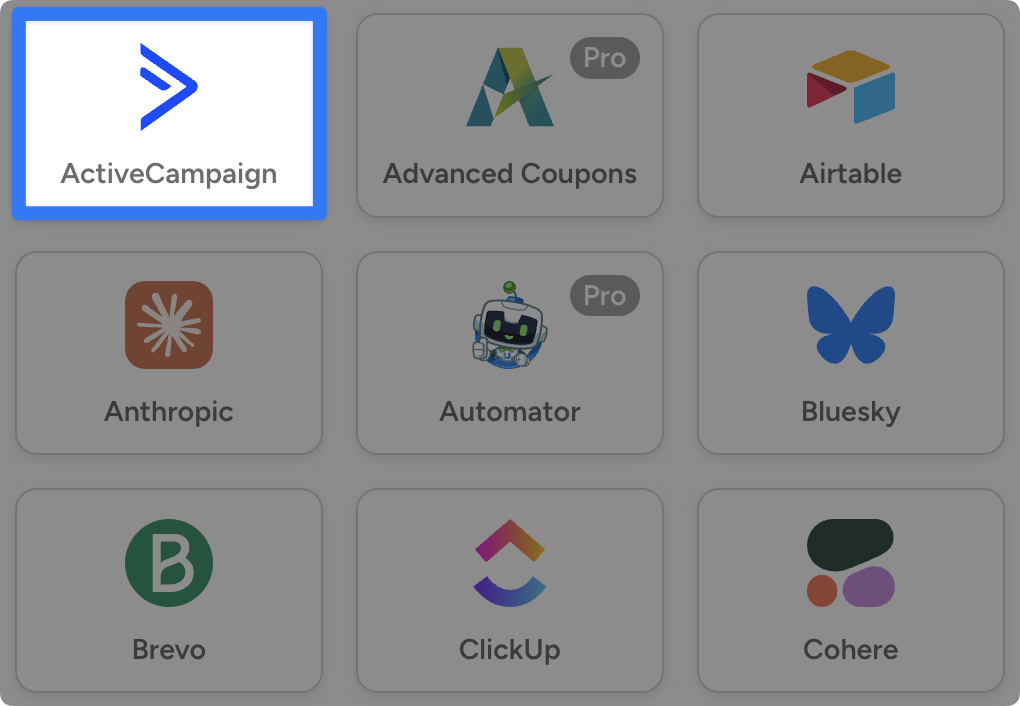
In the Actions panel, click Add action and select ActiveCampaign or your preferred CRM.
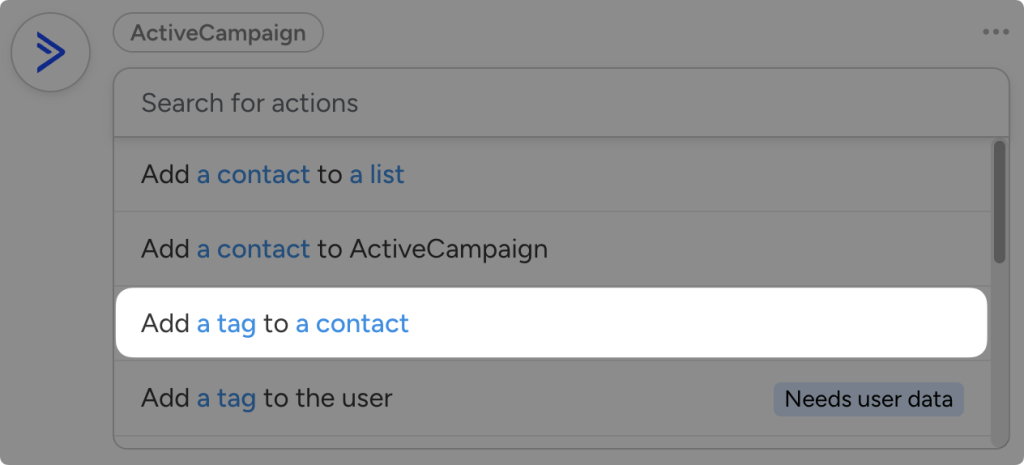
From the dropdown list, select Add a tag to a contact.
(Note: If you haven’t already connected your ActiveCampaign account to WordPress, simply follow the instructions. You can find a more detailed tutorial here on connecting ActiveCampaign and WordPress.)
Automator will present you with a form. First, select the tag that you want to apply to the contact to indicate that they have clicked the URL from your email.
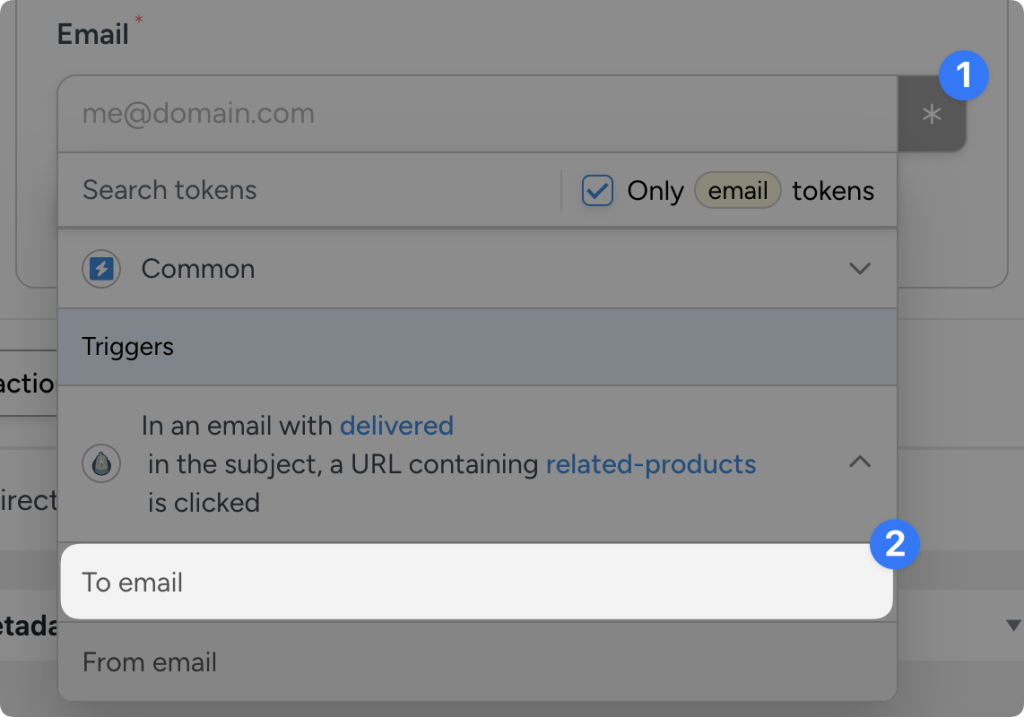
Next, we’ll use a token (i.e., dynamic data) to fill out the Email field. To use a token, click on the Asterisk in the field and select the corresponding token. In this recipe, select the To email token.
Once you’re finished, click Save.
Step 5: Go Live!
You’re just about ready to connect your CRM to your WordPress emails. All you have to do now is toggle the recipe from Draft to Live.
That’s it! And that’s just the tip of the iceberg. There are even more ways for you to integrate your WordPress email tracking into your various workflows to boost your marketing, sales, and reporting efforts.
Integrate Email Click Tracking Into Your Support and Event Workflows
With Automator, you can turn simple email CTAs into powerful tools that actually execute workflows for you.
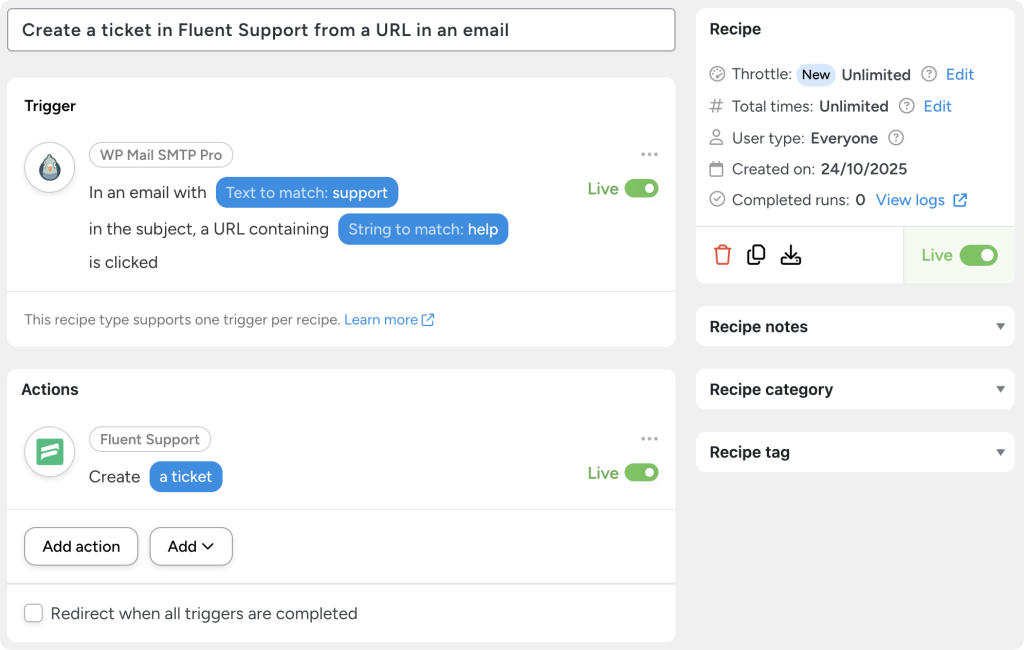
For example, you can open support tickets in Fluent Support, making it easier for your customers to get the help they need.
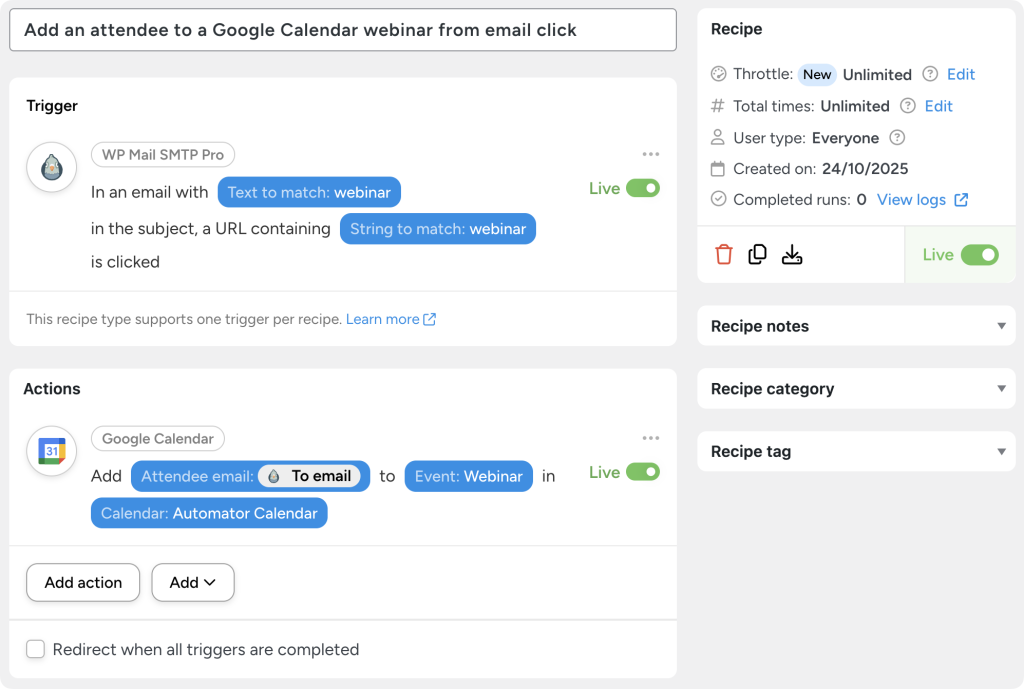
You can also make it easier to host webinars and meetings, adding attendees to your Google Calendar and Zoom events from a simple click.
Create Custom Email Tracking Reports
With all of these different automated workflows, you’ll need a way to create custom reports.
WP Mail SMTP Pro has some limited reports. However, once you start to incorporate email tracking into more of your operations, you’ll need more comprehensive reports.
Find out how to create custom email tracking reports in Google Sheets >>>
Best Practices for WordPress Email Tracking
Setting up WP Mail SMTP Pro and Uncanny Automator gives you all the right tools. But how you use them makes all the difference.
I’m sure you’re eager to put a lot of what we’ve gone through into practice. But before you do, here are some tips and tricks to make your WordPress email tracking not only accurate but actionable.
Track What Matters Most
Not every email deserves the spotlight. Focus your tracking on critical user interactions—like password resets, order confirmations, and onboarding sequences. These messages have the highest open rates and offer real behavioral insight.
Keep Your Data Clean and Secure
Set a log retention limit (WP Mail SMTP > Settings > Email log) in WP Mail SMTP Pro to avoid cluttering your database. It’s smart to store data only as long as you need it. And always ensure compliance with privacy laws (like GDPR) when tracking opens and clicks.
Automate Your Analytics
With Uncanny Automator, you can automatically send tracking data to Google Sheets, your preferred CRM, and any webhook-enabled app. This lets you visualize performance trends without manual exports. For example, set up an Automator recipe that logs each open and click event in a shared spreadsheet.
Turn Engagement Into Action
Don’t just watch the numbers—act on them. Create Automator workflows that trigger when users click specific links or open certain emails. Send follow-ups, assign CRM tags, or even unlock hidden content based on engagement.
Test, Refine, Repeat
Over time, the data that you collect will reveal exactly when and how your users engage best. Use these insights to try different strategies to maximize engagement.
Conclusion
With WP Mail SMTP Pro and Uncanny Automator, WordPress email tracking goes from guesswork to growth strategy.
You’ll know which emails land, which links get clicked, and how to turn every interaction into an opportunity. From automatic CRM updates to custom Google Sheets reports, these two tools make your data not just visible, but valuable.
So go ahead—track smarter, automate faster, and watch your WordPress emails work harder for your business.
Until next time, happy automating!





This Post Has 0 Comments