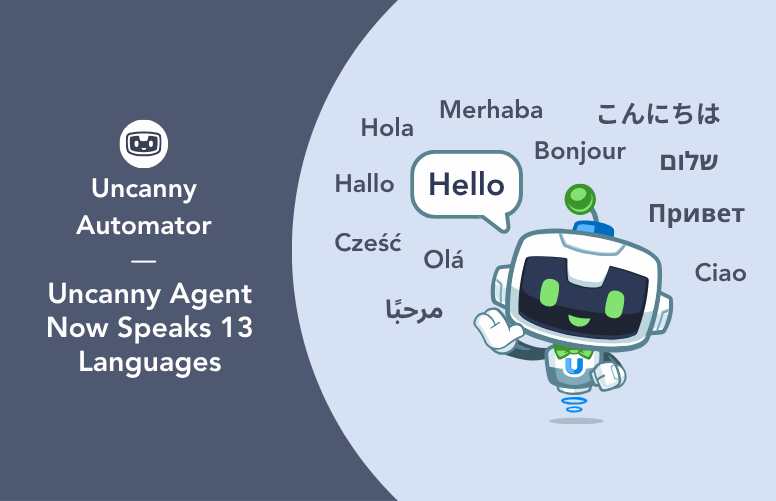
AI in WordPress just got multilingual. Uncanny Agent, the AI assistant for WordPress, is now…
Advanced WordPress Automation: How to Use Tokens, Filters, Loops, and Delays in Uncanny Automator
Learn how to use tokens, conditions, loops, and delays in Uncanny Automator to build advanced WordPress automations—no code required.
TLDR? Get the highlights:
Automator features like tokens, filters, loops, and delays help WordPress site owners and developers build advanced automations.
- Plain-language tokens let you pull dynamic data from anywhere in your WordPress site. Simply point and click to include them in your automations. No code or PHP.
- Filters (set using conditions) add if/then logic so your recipes only fire when specific criteria are met.
- Loops let you run a single action across dozens or hundreds of users, posts, or tokens at once.
- Delays and scheduling give you precise control over when your automations fire and their pacing. Delay actions by minutes, hours, or days or set a recurring schedule.
Combined, these four features give you the flexibility to create custom automated workflows. These are the tools that help you turn simple “if this, then that” statements into sophisticated, multi-step recipes.
So, you’ve built your first few recipes. Maybe it’s an order notification recipe that connects Slack to WooCommerce. Or, perhaps you built a data entry timesaver that connects Gravity Forms to Google Sheets.
Whatever you’ve built so far, they work great and they’re helping you save time.
But now you’re staring at a workflow that isn’t so simple. It requires branching logic based on dynamic data from two or three different integrations. Oh, and it needs to run across hundreds of users… every Monday.
Sound familiar?
After building your core automations, you’ve probably reached a point where a simple trigger-action pair just isn’t enough. The workflow in your head has branches, careful timing, and data flowing between systems.
Here’s the good news: with Automator, you don’t need to write code to get those kinds of bespoke development results. This guide covers four Automator features: tokens, filters, loops, and delays/schedules. Together, they replace custom development with point-and-click setup.
I’ll explain what each feature does, when to use it, and how to combine them in ways that make your recipes even smarter.
Let’s get into it.
Why Basic Automations Hit a Ceiling
Most automations start simple. A site visitor submits a form, and Automator adds their contact information to Mailchimp. Someone buys a product, and they get tagged in your CRM. One trigger, one action, done.

That’s the beauty of no-code automation—it handles the repetitive stuff so you don’t have to. But real-world workflows rarely stay that neat for long.
Think about what happens when your business logic gets even slightly more complex.
You don’t just want to add contacts to your CRM—you want to add them to different lists based on the lead source. You don’t want to tag every buyer. You want to tag only the ones who meet specific criteria, like their geographic region. You don’t just want to run an action for one person—you want to run it for every student who hasn’t logged in this week.
Developers have traditionally solved these problems with custom code. That means WP-Cron jobs, custom hooks, and conditional PHP functions scattered across a theme’s functions.php or single-purpose plugins. It works, but it’s slow to build, harder to maintain, and gibberish to anyone who isn’t comfortable with code.
Automator takes a different approach. It gives you four features—tokens, filters, loops, and delays/schedules. Together, they handle dynamic data, branching logic, batch processing, and timing, all from a visual interface. Think of them as the power tools in your automation workshop.
You can use each one individually, but the real magic happens when you combine them.
Tokens—Dynamic Data Without the Code
The most powerful automations often use data. The user’s name. The product they purchased. The date they registered. The value of a custom field.
Without data like that flowing through your recipes, all you can build are static, one-size-fits-all workflows.
That’s where tokens come in. Tokens are placeholders that represent real values when a recipe runs. They pull dynamic data from your WordPress site and from within recipes. If you’ve ever used “merge tags” in Mailchimp or shortcodes in WordPress, you’ve seen the concept before. Tokens are Automator’s version, and they’re available in virtually every action field.
To use a token, click the asterisk in any action field. This opens the token selector.

For any field in a recipe, Automator has dozens (sometimes hundreds) of tokens from which you can choose. Tokens are organized into dropdown categories for convenience. Examples include “Date and time,” integrations, and tokens made available by your triggers and actions.

You’ll find three main types of tokens:
- Trigger and action tokens: Data from triggers and actions that occur earlier in a recipe. For example, say your trigger is “A form is submitted” and your action is “Add a contact to an audience.” Later tokens will include form fields like “Email” and CRM data like “audience.”
- Global tokens: Data that’s always available regardless of the trigger. Your site name, the current date and time, the logged-in user’s info, and advanced tokens like user meta or calculations.
- Custom tokens: Values pulled from meta fields, including Advanced Custom Fields (ACF), custom post meta, and user meta. If the data lives in your database, there’s likely a token for it.
Practical Token Examples
Tokens are best understood through use cases. Here are a few that show up constantly in real-world workflows:
- Personalizing email actions. Use tokens to address users by name and reference their site activity such as quiz completions or recent purchases.
- Synchronizing your CRM and database. Use tokens to update your CRM and databases in real time. Pass in purchase details, login timestamps, lead sources, and more. You build the recipe once, Automator handles your data entry forever.
- Accurate real-time notifications. Send detailed site activity data to your inbox, your Slack channel, or wherever else you get messages.
Token Tips for Power Users
- Combining tokens. You can string together multiple tokens to create truly dynamic fields. For example, build a dynamic URL by combining your site URL token with a user ID token: {{site_url}}/members/{{user_id}}/dashboard.
- Formatting. Automator handles most token values cleanly, but it’s worth knowing the quirks. Date tokens (except for Unix timestamp tokens), for example, adopt the format from your WordPress settings. Always use the Formatter integration to resolve format conflicts across your integrations.
- Getting meta. Sometimes, the tokens that Automator offers aren’t enough. But there’s even a token for that. Can’t find the token you need in a recipe? Select the “User meta” or “Post meta” tokens to pull almost any data from your WordPress site.
Unlock more tokens with an Automator Pro license >>>
Filters—Adding Conditional Logic to Your Recipes
Tokens give your recipes data—filters tell them what to do with that data.
A filter (conditional logic that controls when actions run) lets you add if/then rules to your actions. The concept is simple. A trigger fires. Automator checks the filter conditions. The actions inside that filter run only if those conditions are met.
Without filters, every trigger fires every action, every time. With filters, your recipes can make decisions.
Setting Up a Filter
Adding a filter to your recipe is straightforward.
In the Recipe Builder, in the Actions panel, click Add > Filter. You can then add actions to run with that filter. Alternatively, you can add your actions first, then hover over individual actions and click Filter.

Automator organizes condition types into categories to keep things manageable:
- General: a token meets a specific rule (the most flexible option—you pick any token and compare it to a value)
- Automator: conditions based on recipe run data
- Date and time: fire actions only on certain days, during certain hours, or after a specific date
- Emails: conditions based on email domains
- WordPress: user role, post status or taxonomy, and other core WordPress data
- Automator Addons: conditions from extensions like Custom User Fields, Restrict Content, and User Lists
- Integration-specific: conditions tied to plugins like WooCommerce, MemberPress, Easy Digital Downloads, and others
Common Use Cases for Filters
- Threshold-based actions. Only send a discount email if the customer’s WooCommerce order total exceeds $100. The filter checks the order total token against your threshold—orders below it skip the email entirely.
- Role-based routing. Only add a user to a private group if they have a specific role, such as “Student,” “Customer,” or “Administrator.” One recipe, one trigger, but the action only fires for people who qualify.
- Date-aware automations. Skip an action on weekends using a date-based condition. Useful for Slack notifications, task assignments, or anything you don’t want cluttering up someone’s Saturday.
- Multi-condition logic. Stack multiple conditions inside one filter. Then choose whether all conditions must be true, or whether any one of them is enough. For example: “Run if the user’s role is ‘Student,’ they are enrolled in a specific course, AND they have not yet purchased a specific item.”

The kind of precision that filters allow used to require custom queries. Now it’s a few dropdowns.
Build branching automated workflows with an Automator Pro license >>>
Loops—Batch Automation at Scale
Most recipes are event-driven—they fire once per trigger event, for one user, one post, or one transaction at a time. That’s perfect for real-time workflows like sending a welcome email when someone registers.
But what about workflows that need to operate in bulk?
Sending a re-engagement email to every student who has fallen behind. Updating user roles across your entire membership when you restructure your plans. Refreshing the meta descriptions on hundreds of blog posts. These aren’t one-at-a-time jobs—they’re batch operations.
That’s the purpose of Loops, automations that run across multiple records. Loops let you perform a single action—or a chain of actions—on a filtered set of records, all in one recipe run. They turn Automator from a per-event tool into a batch-processing engine.
Automator has three types of loops to cover different scenarios:
- User Loops: iterate across a filtered set of users
- Post Loops: iterate across a filtered set of posts or custom post types
- Token Loops: iterate across a set of token values (such as an imported CSV, XML or JSON file)
Token Loops: iterate across a set of token values (useful for processing lists or arrays)
How Loops Work
Setting up a loop starts with choosing a type: users, posts, or tokens.

No matter what type of loop you’re configuring, you’ll want to set the “loop filter” first. The conditions of the loop filter will define the records you want to process.
Just as with action filters, the conditions for loop filters can be just about anything. For user loops, conditions could be a user role or membership status. For post loops, the conditions could be publication date or even tied to a custom post field. The same is true for token loops.
When the recipe runs, Automator queries all matching records and executes the actions for each one. Say your user loop targets all users with the “Customer” role. If 11 users match, the actions run 11 times—once per administrator. Each iteration uses that administrator’s data as the token context.

Loops are particularly powerful when paired with a Schedule integration trigger. For example, you could set a recipe that populates a Google Sheets sales summary every Monday at 9am.
Loop Use Cases
- Create lists and segments with a single recipe. Create entirely new lists and segments in CRMs and email platforms like Mailchimp and HubSpot. Tag hundreds or even thousands of contacts at once based on conditions you define, like users that purchased a specific product or are enrolled in a particular course.
- Bulk role updates for membership changes. Restructuring your membership tiers? Use a user loop to update roles in bulk. For example, move everyone from “Basic Member” to “Starter” without editing profiles one by one. Pair it with a notification action and your members get informed at the same time.
- AI-powered content refreshes. Here’s one for content teams: use a post loop to iterate through blog posts in a specific category. Then update each post’s meta description with AI-generated, SEO-friendly copy. Schedule it annually and your evergreen content stays fresh without a manual audit.
Get the full power of one-click bulk automations with an Automator Pro license >>>
(Note: Automator has a native email integration for simple sequences and loops. For higher-volume email workflows or full marketing automation, connect to a CRM like Mailchimp, HubSpot, or Brevo. This avoids hitting your web host’s sending limits. Automator can add/remove tags or trigger sequences in your CRM from WordPress.)
Delays and Scheduling—Timing Is Everything
The final piece of the advanced automation toolkit is time itself. Not every action should fire the instant a trigger occurs. Sometimes the right action at the wrong time is the wrong action.
Automator’s delay feature pauses a recipe before the next action fires. You can set the pause for minutes, hours, or days.
This is different from scheduled triggers, which start a recipe at a specific time. Think of it this way: scheduling controls when the recipe begins; delays control when actions in the recipe occur. Together, they give you full command over timing at every stage of a workflow.
Delay Scenarios
Delays are often overlooked, however, they have the potential to form the structure of your workflows. Everything from abandoned cart reminders to publishing content has a delay built in.
- Post-purchase follow-ups. A customer buys a product—but you don’t want to ask for a review immediately. Add a delay of 24 hours (or three days, or a week) between the purchase trigger and the review request action. The customer has time to actually use what they bought before you ask them about it.
- Onboarding check-ins. A new user registers on your site. Wait 7 days, then check whether they’ve completed the onboarding steps. If they haven’t, send a nudge. The delay gives them a fair window to act on their own before you intervene.
- Drip sequences. Space out a series of actions across days, weeks or months. Day 1: welcome email. Day 3: link to your getting settled guide. Day 7: invitation to join the forum.
Combining Delays with Filters
This is where things get really interesting. A delay on its own just adds a pause. But a delay combined with a filter creates a decision point in time. The recipe waits, checks a condition, then decides whether to proceed.
Example: cart abandonment recovery. A customer adds an item to their WooCommerce cart. The recipe triggers, then delays for 30 minutes. After the delay, a filter checks whether the customer has purchased the product since the trigger fired. If they haven’t, Automator sends a recovery email with their cart contents (pulled in via tokens, naturally). If they have, the recipe skips the email entirely.

This delay-then-filter pattern is one of the most powerful combinations in Automator. It’s the same logic that drives re-engagement campaigns, conditional drip sequences, and time-sensitive eligibility checks.
Putting It All Together—A Real-World Workflow
The real power of these features isn’t in any one of them—it’s in knowing how to combine them. Let me walk you through a complete recipe that uses all four.
Scenario: Automated SEO audits and content refresh
Unless you are a content writer, staying on top of SEO is probably not high on your list of to-dos. Nevertheless, it’s a crucial part of doing business online. You want a recipe that updates your content on a schedule.
Here’s what that recipe might look like:Trigger: Schedule > Every Monday at 8:00 AM.

Loop and Filters: Post Loop > Posts > SEO score less than 70

Actions:
- Anthropic > Use a prompt to generate a text response with a Claude model
- All In One SEO > Set a post’s SEO description to a specific value
The first action uses Anthropic’s Claude to run an SEO analysis of the post. It then asks Claude to write an updated SEO meta description. The second action updates the meta description with Claude’s response in the form of a token.

You could even have actions to rewrite the entire post, or create tasks for a person to review manually in ClickUp or Asana.. Each task would include easy-to-implement SEO recommendations from your preferred AI platform.
This entire workflow—from the schedule to the updated results—is built visually in the Recipe Builder. No cron jobs. No custom plugins. No code.
Take Your Advanced WordPress Automation Further
Tokens, filters, loops, and delays are the building blocks of advanced WordPress automation.
Individually, each one solves a specific problem: dynamic data, conditional logic, batch processing, timing control. Together, they let you design workflows that rival what most businesses build with dedicated development teams and external platforms.
My advice? Strategize. Draw out your workflows, starting with how you want them to begin. Then picture different scenarios: customers moving through your funnel, learners progressing in their courses, or members engaging and disengaging with your content. Then apply the tools that we’ve explored here to your recipes so they can truly get the work to flow.
Tokens, filters, loops, and delays are all available in Automator Pro. Ready to move beyond basic trigger-action recipes? This toolkit adds real logic, real data, and real timing control to your workflows.
Get Uncanny Automator Pro >>>
What will you do with more time?
Frequently Asked Questions
Do I need to know how to code to use tokens, conditions, loops, and delays?
Not at all. All four features are built into Automator’s visual Recipe Builder. You configure them with dropdowns, a token browser, and point-and-click condition logic. No PHP, no JavaScript, no command line. The only thing you need is an idea of what you want your workflow to do—Automator handles the execution.
Which of these features are available in Automator Lite vs. Automator Pro?
Tokens, filters, loops, and delays are all Automator Pro features. Automator Lite includes the Recipe Builder with basic triggers and actions. It’s a great way to get started and see how recipes work. When you’re ready for conditional logic, batch processing, dynamic data, and timing control, upgrade to Pro to unlock the full toolkit.
Can I use multiple conditions in a single filter?
Yes. You can stack multiple conditions within a filter and choose whether all conditions must be true (AND logic) or any of them (OR logic). This lets you create precise eligibility rules. For example: “user role is Student, they haven’t completed a course, AND their last login was more than 7 days ago.”
How many records can a loop process at once?
There’s no hard-coded limit. Loops process records sequentially, so very large sets (thousands of users or posts) will take longer to complete. Automator includes intelligent batching logic that adjusts batch size based on your site’s resources so that large batches won’t slow down your site.
Can I combine delays with third-party integrations like Mailchimp or Slack?
Absolutely. Delays work with any action in Automator—including actions that connect to third-party apps. You can delay a Mailchimp tag, a Slack message, a Google Sheets row, or any other integrated action. The delay pauses the recipe regardless of what comes next.
What happens if a filter’s conditions aren’t met?
The actions below that filter simply don’t run for that particular recipe execution. The recipe itself stays active and will evaluate the filter again the next time the trigger fires. Nothing breaks—the recipe just skips the protected actions and moves on.
Can I use tokens inside filter conditions?
Yes, and this is one of the more powerful combinations. A General condition checks whether a token meets a rule. You pick a token as the data source, then compare it against a static value—or even another token. This means your filters can make decisions based on any dynamic data available in the recipe.
What’s the difference between a scheduled trigger and a delay?
A scheduled trigger controls when the recipe starts—for example, “Every Monday at 9am.” A delay controls what happens during the recipe—for example, “Wait 3 days before running the next action.” You’ll often use both in the same recipe. A schedule kicks things off at the right time. Delays then space out the actions that follow.

Related Posts


Comments (0)