

Once you have created your user lists, subscribe users to them so you can send targeted emails to segments of your user base, or run bulk operations on the users in a list with a Loop block. There are three ways to manage a user’s subscriptions:
- From the WordPress Edit User screen
- With a recipe
- From the Manage emails page, where users manage their own subscriptions
From the WordPress Edit User screen
The User Lists Addon adds an Uncanny Automator User Lists section to the WordPress Edit User screen. To open it, go to Users > All Users and click the user’s name.
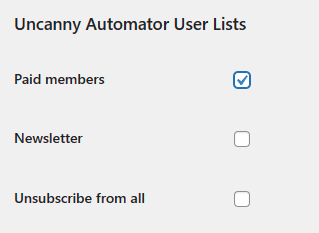
Select the lists the user should be on and click Update User to save their subscriptions.
With recipes
A recipe is a deterministic automation: triggers, conditions and actions that run the same way every time. The User Lists Addon adds two actions for subscriptions:
- Add the user to a list
- Remove the user from a list
Pair them with any trigger Automator supports, such as submitting a form, purchasing a product, or completing a course, and list membership stays up to date without manual edits. User Lists Integration with Automator covers everything else the addon adds to recipes.
From the Manage emails page
When the addon is activated, it creates a Manage emails page at /manage-emails. The page holds the [[automator_ul/]] shortcode, which lists the user’s current list subscriptions, each with a checkbox, plus an Unsubscribe from all option.
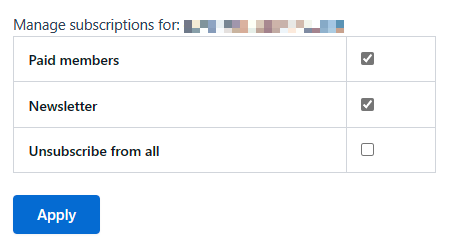
A user clears the lists they want to leave and clicks Apply. Ticking Unsubscribe from all adds them to the Unsubscribed list and removes them from every other list; see The Unsubscribed list and managing subscriptions.
Important: Only lists the user is already on appear on this page, so users can leave lists here but cannot join new ones. Subscribe users from the Edit User screen or with a recipe.
Related: Managing user lists, The Unsubscribed list and managing subscriptions, Sending bulk emails with user lists, User Lists Integration with Automator

Comments (0)