

Once you have defined your custom user fields, there are three ways to fill them: type a value on a user’s profile, set the value from a recipe when something happens, or update many users at once with a Loop block. This article covers all three in the Uncanny Automator 8.0 recipe builder, then shows how to read the values back in later recipes.
You need the Custom User Fields Addon installed and active, which requires the Plus or Elite plan, and Uncanny Automator Pro for the recipe action; the Loop block for the bulk case is also Pro. Fields are created at Automator > Settings > Addons > Custom user fields.
Updating a field from the Edit User page
Every custom field you define appears on the standard WordPress user profile, so an administrator can set or correct a value by hand.
- Go to Users > All Users and click the user’s name.
- Scroll to the section Uncanny Automator Custom User Fields. Each custom field is a row with its name and a text box holding the current value.
- Enter or change the values and click Update User.
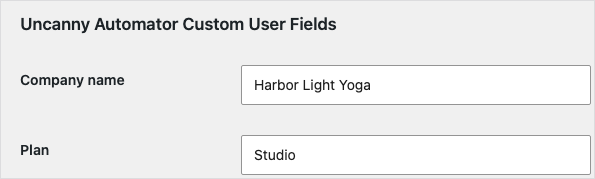
The same section appears on a user’s own Profile page, so users who can edit their profile can also edit their own custom field values. Only users allowed to edit the profile can save it.
Updating a field from a recipe
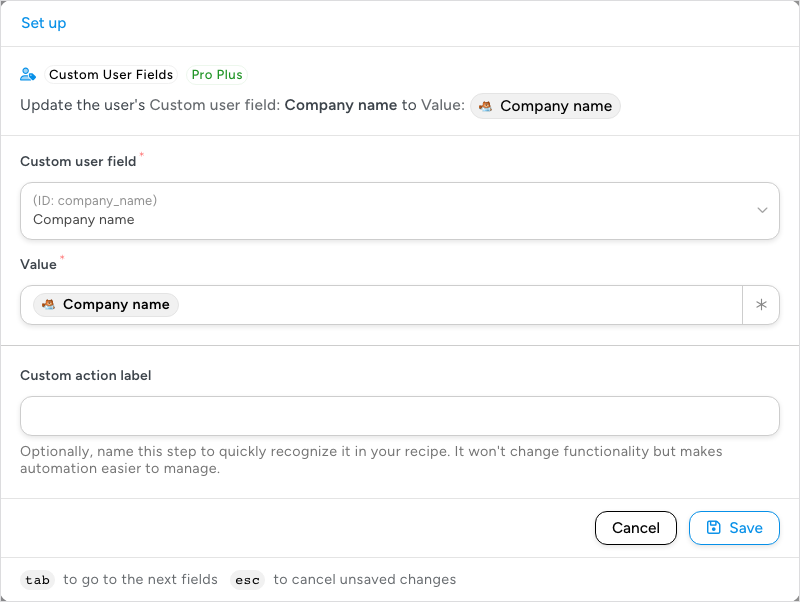
The Custom User Fields integration adds the action Update the user’s custom user field to a value. It has two fields:
- Custom user field — the field to update, chosen from the fields you have defined. You no longer need to look up or type the field’s meta key.
- Value — the value to store. Type a fixed value, or insert a token with the ∗ button so the stored value comes from the event that fired the trigger: a form field, an order total, a course name.
The action acts on the recipe’s user, so it belongs in a Logged-in users recipe, or inside a Users loop (next section). This example stores the company name a user types into a form.
- Create a form with a Company name field in your form plugin.
- In your WordPress dashboard, go to Automator > Add new recipe, choose Logged-in users, and click Confirm.
- Click Add trigger, pick your form plugin’s integration, then its form submission trigger for logged-in users. For WPForms, that is A user submits a form a number of time(s): select the form, leave Number of times at 1, and click Save. Triggers that run for everyone, such as WPForms’ A form is submitted, are greyed out in a Logged-in users recipe.
- Click the + under the trigger. In the picker, search for “custom user field”, click Custom User Fields, then Update the user’s custom user field to a value.
- Under Custom user field, choose Company name. Each option shows the field’s meta key as its ID above the name.
- In Value, click the ∗ button and choose the form’s Company name field from the trigger’s tokens.
- Click Save. This action has no Test step, so its only buttons are Cancel and Save.
- Switch Recipe off to Recipe on.
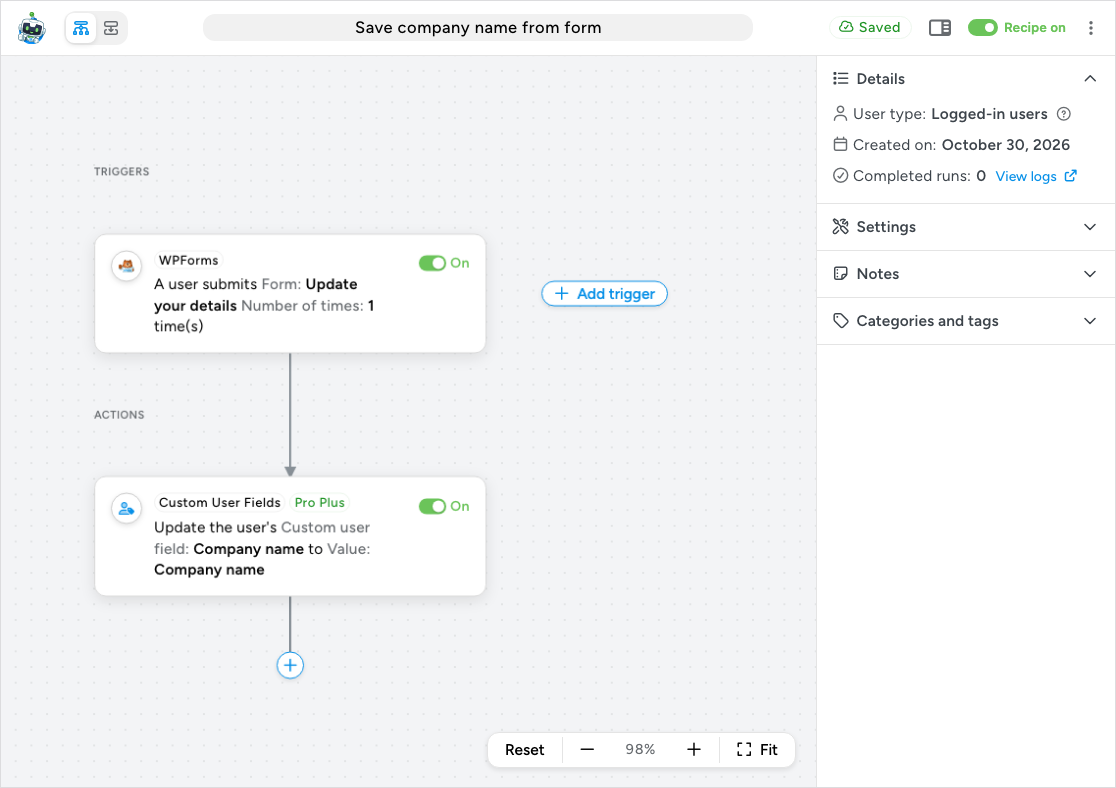
From now on, each time a logged-in user submits the form, the value they entered is written to their Company name field. Check the recipe’s Times per user setting in the sidebar’s Settings panel: a new recipe starts at Unlimited, and it must stay there if the same user may update the field again later.
Note: If the value being stored is the same as the value already in the field, WordPress reports that nothing changed and the action logs “Custom field update failed”. The field still holds the right value.
Updating many users at once
To fill or correct a field for a whole group of existing users, put the same action inside a Loop block:
- Create an Everyone recipe with the Run now trigger (Trigger recipe manually).
- Add a Loop block with Loop type Users, and use Add modifier to filter the users, for example User has a specific role or a LearnDash or WooCommerce filter.
- Click + Add inside the loop and add Update the user’s custom user field to a value. The Value can be a fixed value for everyone, such as “Legacy customer”, or a token from the Loop section that differs per user.
- Click Run now in the top bar and follow the loop in the log.
Inside a Users loop, the action updates the user of the current pass, not the administrator who clicked Run now. Bulk update users with a recipe walks through this recipe shape step by step, including how to test on a few users first.
Reading the values back
Storing a value is only useful if other recipes can act on it. The addon gives you three ways:
- Tokens — the token picker has a Custom User Fields section with one token per field, named after the field, that returns the user’s current value. Each field also has a “- Meta key” token (for example, Company name – Meta key) for developers who need the key itself. The section is on the token picker’s Global tab. Inside a Users loop, the field tokens return the value for the loop’s current user.
- Condition — A user’s custom user field meets a condition in a Filter block: choose the field under Meta key, a Criteria, and a Value, for example to email only users whose Plan field is “Gold”.
- Triggers — A user’s custom user field is updated and A user’s custom user field is updated to a value, so a change to a field can start another recipe. Both offer Any custom field as well as a specific field.
To show a value on the site, use the field’s shortcode; see Displaying Custom User Fields.
Other events that can set a field
A form submission is one source. Because any trigger can feed the action, and a recipe can have several triggers, you can record a value whenever a user does something that matters to you: purchasing a product, joining a group, completing a course, or viewing a page a number of times. Each recipe adds one more fact to the user’s profile, which your conditions, loops, and connected apps can then use to personalise what the user sees and receives.
Related: Managing Custom User Fields, Displaying Custom User Fields, Loop block: users, posts and tokens, Bulk update users with a recipe, Filter block and conditions, Managing tokens.

Comments (0)