

Sometimes the fastest way to get help is to show Uncanny Agent what you are working on. A screenshot of an error, a CSV of customer data, or a brief from your client gives Uncanny Agent more context to work with. You can attach files to a message or capture a browser tab, a window or your screen with the built-in screenshot tool; this article covers both.
The attachment menu
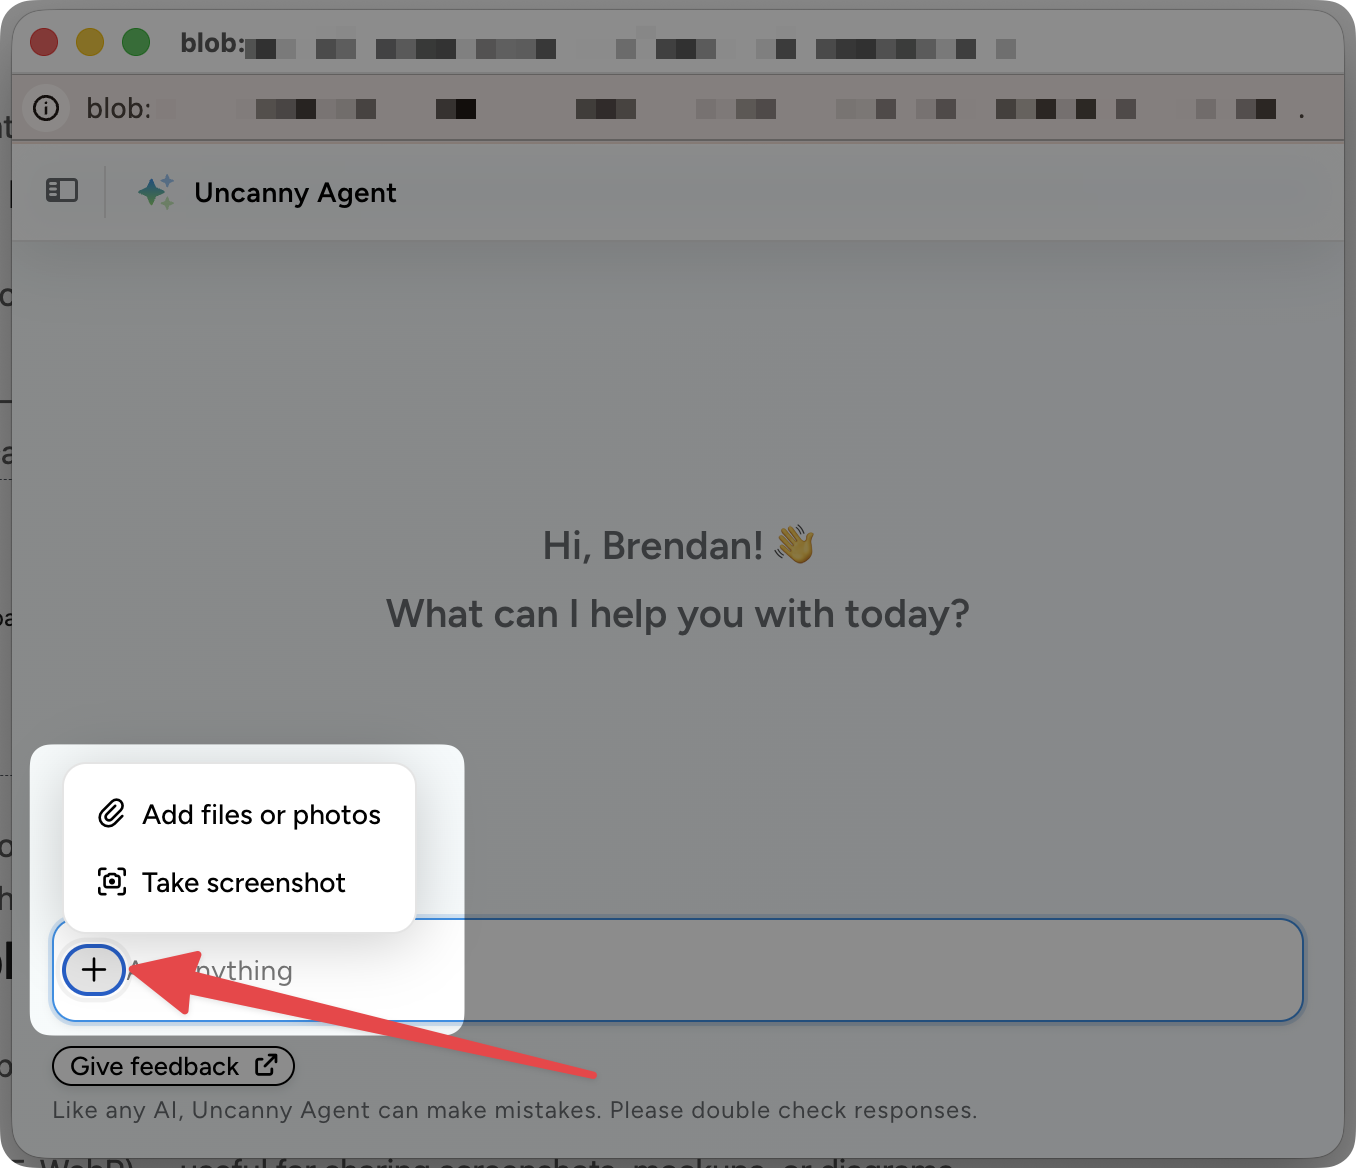
Click the + icon to the left of the Ask anything box to open the attachment menu. It has two options:
- Add files or photos: choose a file from your computer.
- Take screenshot: capture a browser tab, a window or your screen without leaving Uncanny Agent.
You can attach more than one file to a message, up to five files of up to 5 MB each, and you can mix attachments with text. For example, attach a screenshot of your Automator logs and ask, “Why is this error happening?”
Adding files or photos
Add files or photos opens your browser’s file picker. These file types are supported:
- Images (PNG and JPEG), for screenshots, mockups, or diagrams
- PDFs, for briefs, specs, or supplier documents
- Word, Excel, and PowerPoint files, and Pages, Numbers, and Keynote files
- CSV, JSON, and XML files, for data you want Uncanny Agent to review or import
- Plain text and Markdown files
Each attached file appears as a chip above the input. Send your message, and Uncanny Agent reads the file as part of your request.
Using the built-in screenshot tool
Take screenshot captures a browser tab, a window or your screen and attaches it to your message in one step. It is the fastest way to ask questions such as:
- “Why is this option greyed out?”
- “What does this error mean?”
- “Can you replicate this layout in the recipe builder?”
After you click the option, your browser asks what to share: pick a browser tab, a window, or your entire screen, then confirm. Uncanny Agent captures that view once, stops sharing, and attaches the screenshot to your message. To share only part of the screen, crop the image first and attach it with Add files or photos.
Privacy reminder
Anything you attach is sent to Uncanny Agent for processing.
Important: Avoid uploading files that contain real customer credentials, payment details, or other sensitive material that does not belong in a support workflow.
Our Privacy Policy and Terms and Conditions give the full details.
Tips for getting useful answers from attachments
- Say what you want. A screenshot on its own is ambiguous, so add a sentence such as “What’s wrong with this recipe?” or “Recreate this email in WordPress.”
- Crop tightly. A focused screenshot of the relevant area is easier to interpret than a full-screen capture.
- Use a CSV for bulk data. If you want to import a list of users, products, or orders, a CSV is much more efficient than describing the data in text.
Related: How to ask Uncanny Agent for help, Privacy and what Uncanny Agent can see, Managing your Uncanny Agent conversations

Comments (0)