

A registration form in Uncanny Automator is an Everyone recipe that creates a WordPress user from a form submission. The trigger is your form plugin’s A form is submitted trigger, the recipe runs its actions as a new user built from the form’s fields, and the actions do whatever the new account needs: a welcome email with a password link, a course enrollment, a group membership. It works with any form plugin Automator integrates. This article builds the recipe once, then covers what differs for Contact Form 7, WPForms, Gravity Forms, Formidable Forms, and Ninja Forms.
Creating the user requires Uncanny Automator Pro. The form triggers, Everyone recipes, and the Run actions as dialog are in the free plugin, but the step that finds or creates the user when the recipe runs is part of Pro, so without Pro the Run actions as card shows that choosing the user requires Uncanny Automator Pro, and its choices are turned off. Build your form first; the recipe needs it to exist before you can pick it.
How it works
The recipe is an Everyone recipe, because the person filling in the form has no account yet. Its single trigger is the form plugin’s A form is submitted trigger for the form you built. In the RUN RECIPE AS section, Run actions as is set to A new user, with the form’s fields mapped to the account’s email, username, first name, and last name. Every action after that runs for the account that was created: send them an email, enroll them in a course, add them to a group. Recipes for Everyone explains the Run actions as dialog in full, including the existing-user option; this article uses only the new-user path.
Build the recipe
The steps below use WPForms. For the other form plugins only the integration you search for and the fields your form supplies change; see the section for your plugin.
- Go to Automator > Add new recipe.
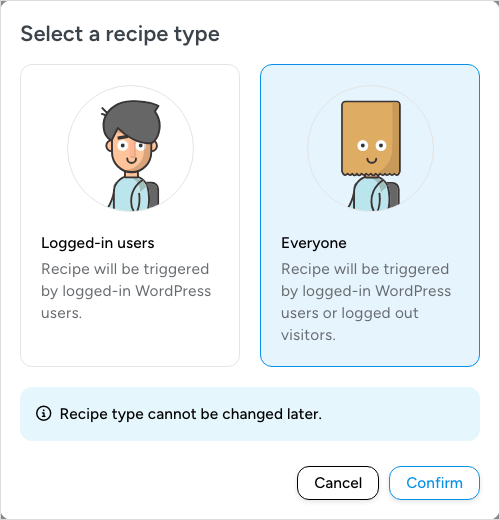
- In Select a recipe type, click Everyone, then Confirm. The type cannot be changed later.
- Click Name your recipe and type a title, for example the name of the form. The recipe saves automatically.
- In TRIGGERS, click + Add trigger. In the picker’s search box, type the name of your form plugin and click it under Integrations (the Items list below shows only the more specific Pro triggers that match the name). If it shows as Not installed or Not active, install and activate the form plugin first; Finding integrations in the recipe builder explains the picker’s states.
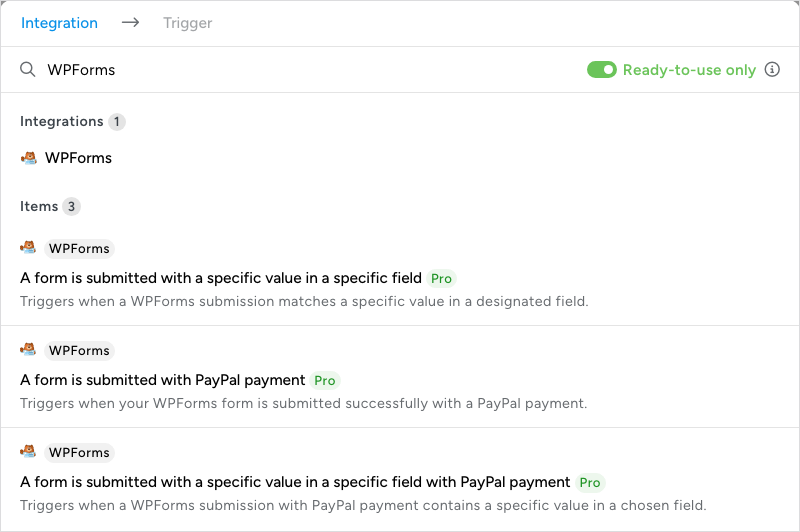
- Click A form is submitted. The logged-in variant, A user submits a form, is for Logged-in users recipes and is not offered here.
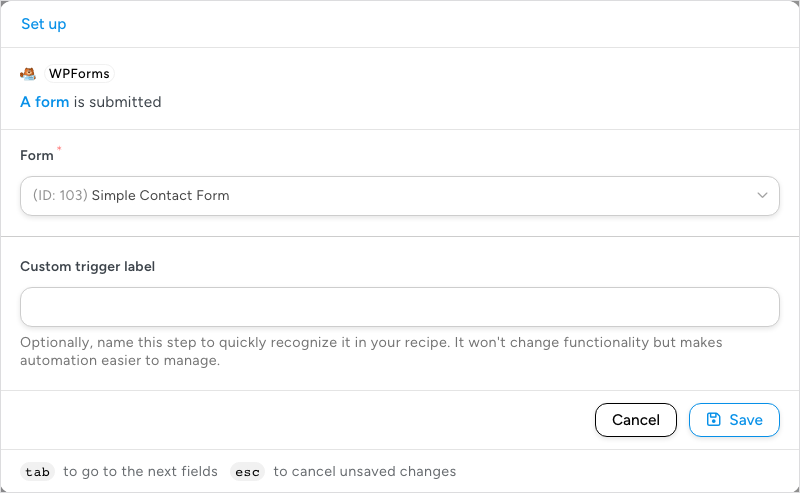
- On the Set up step, choose your form in Form (when the plugin has only one form, it is already selected) and click Save. Form triggers have no Test step, so the buttons are Cancel and Save. The trigger node now reads Form: [your form] is submitted, and Add trigger is disabled because an Everyone recipe has one trigger.
- Click the + at the end of the flow and add the first action for the new member, for example LearnDash > Add the user to a group (requires Uncanny Automator Pro) or Emails > Send an email. Set it up and save it; step 10 comes back to the email.
While the recipe holds only its trigger, the canvas shows TRIGGERS and ACTIONS only. Once it holds an action that acts on a user, a RUN RECIPE AS section appears between them with the card Choose which user the recipe runs as and the notice User data needed.
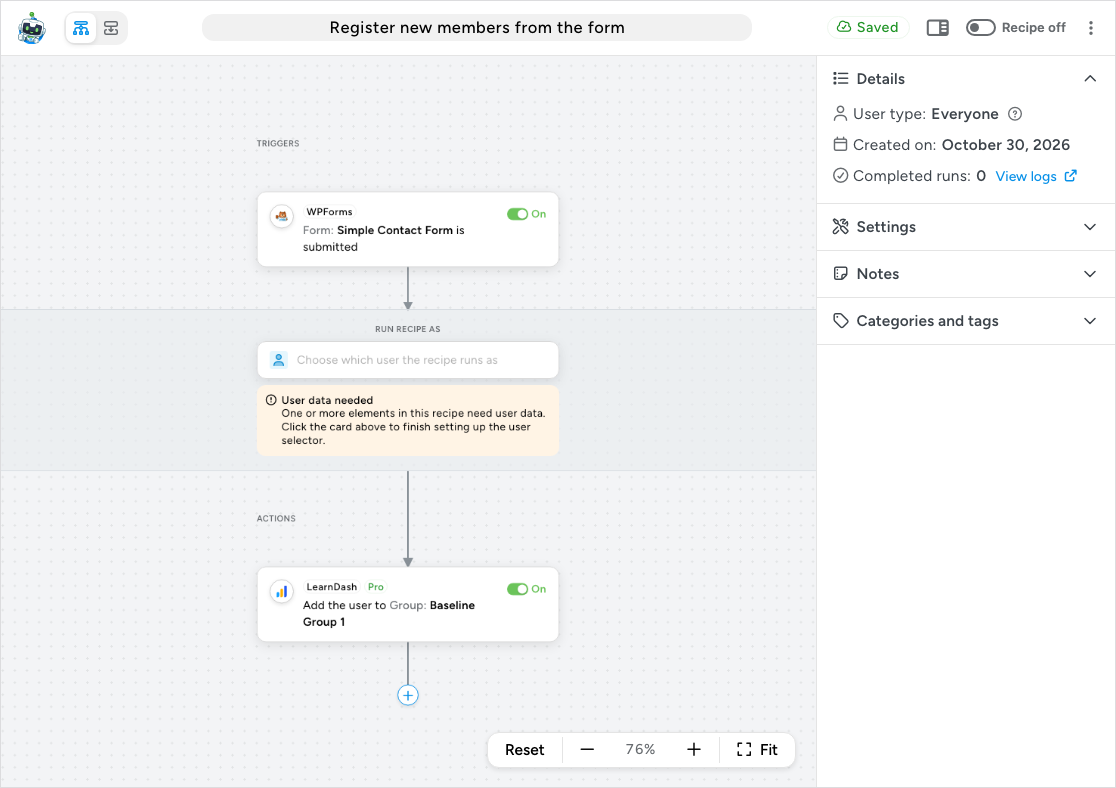
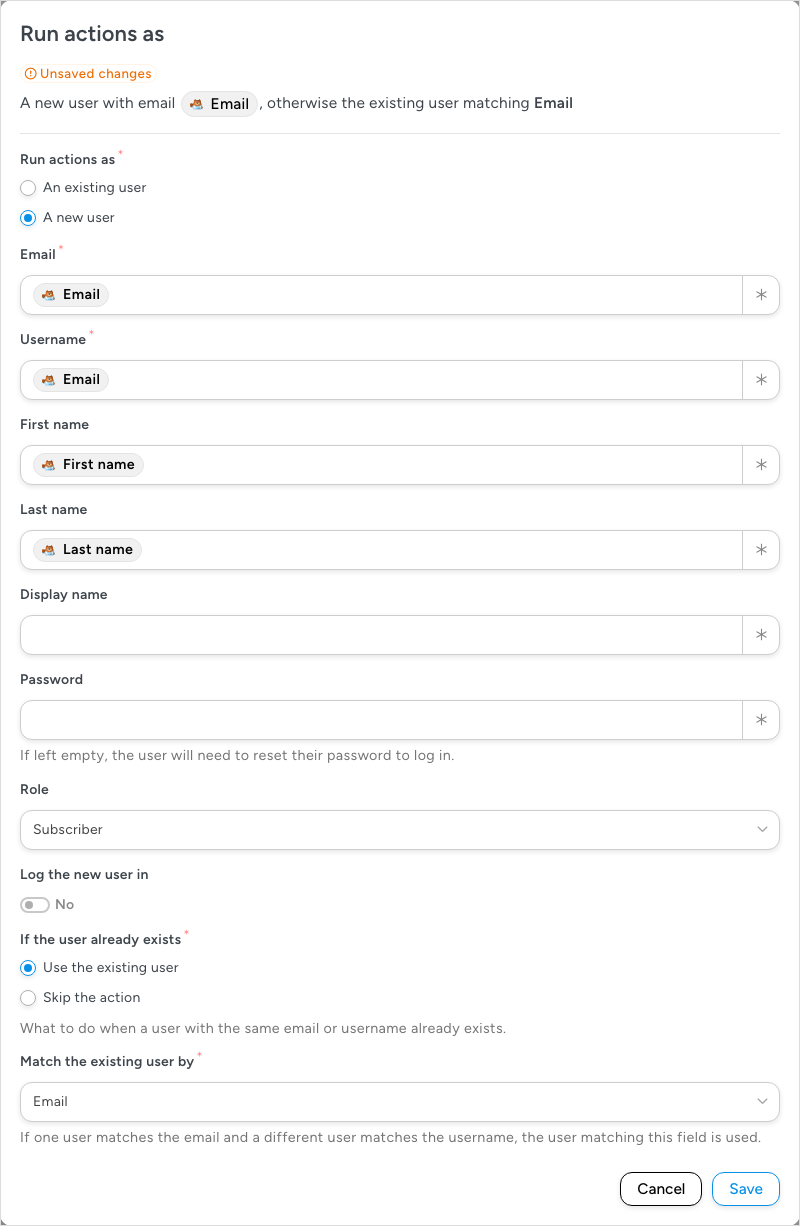
- Click the card. In the Run actions as dialog, select A new user. The account fields appear:
- Email: click the ∗ button and choose the form’s email token (for WPForms, Email), so each submission creates an account with the address the visitor typed. This is the one field to get right.
- Username: contact forms rarely ask for a username, so insert the same email token here.
- First name and Last name: the matching form field tokens (for WPForms, First name and Last name). Leave Display name empty unless your form collects one.
- Password: leave it empty. As the field says, “If left empty, the user will need to reset their password to log in”; the welcome email in step 10 carries the reset link, so no password travels in plain text.
- Role: Subscriber, Contributor, Author, or Editor. Subscriber is selected when the dialog opens and is right for members and learners.
- Log the new user in: set to No when the dialog opens. Switch it on if the visitor should land on your site already signed in. Leave it off when someone else fills in the form on the member’s behalf.
- If the user already exists: required, with neither option selected, so choose one. Use the existing user runs the actions on the matching account, so a returning member who fills in the form again is enrolled rather than refused; Skip the action stops there. With Use the existing user, Match the existing user by (Email, selected when it appears, or Username) settles the case where one account matches the email and another matches the username.
- Click Save. The card now summarizes the choice as A new user with email followed by the token (and “otherwise the existing user matching” when you chose Use the existing user), and the User data needed notice is gone.
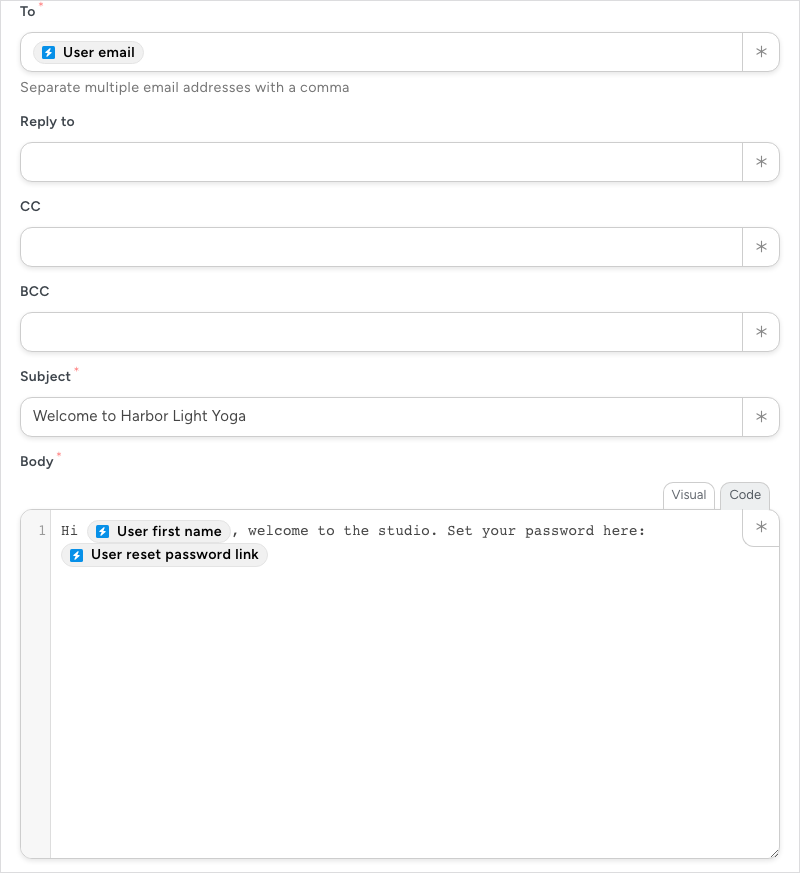
- Click + and add Emails > Send an email (or open the one you added in step 7). On the Set up step, in To, click ∗, open the Global tab, and choose User email from the Common group. Write a Subject, then in Body greet the member with the User first name token (same group) and insert the User reset password link token so they can set a password straight away. Click Save, or Test to send yourself a copy first; tokens are not replaced in a test email, so the placeholders arrive as typed.
- Add any other actions the new member should get, such as LearnDash > Enroll the user in a course. Each runs for the account the recipe created.
- Check that the trigger and every action show On, then click Recipe off in the top bar so it reads Recipe on.
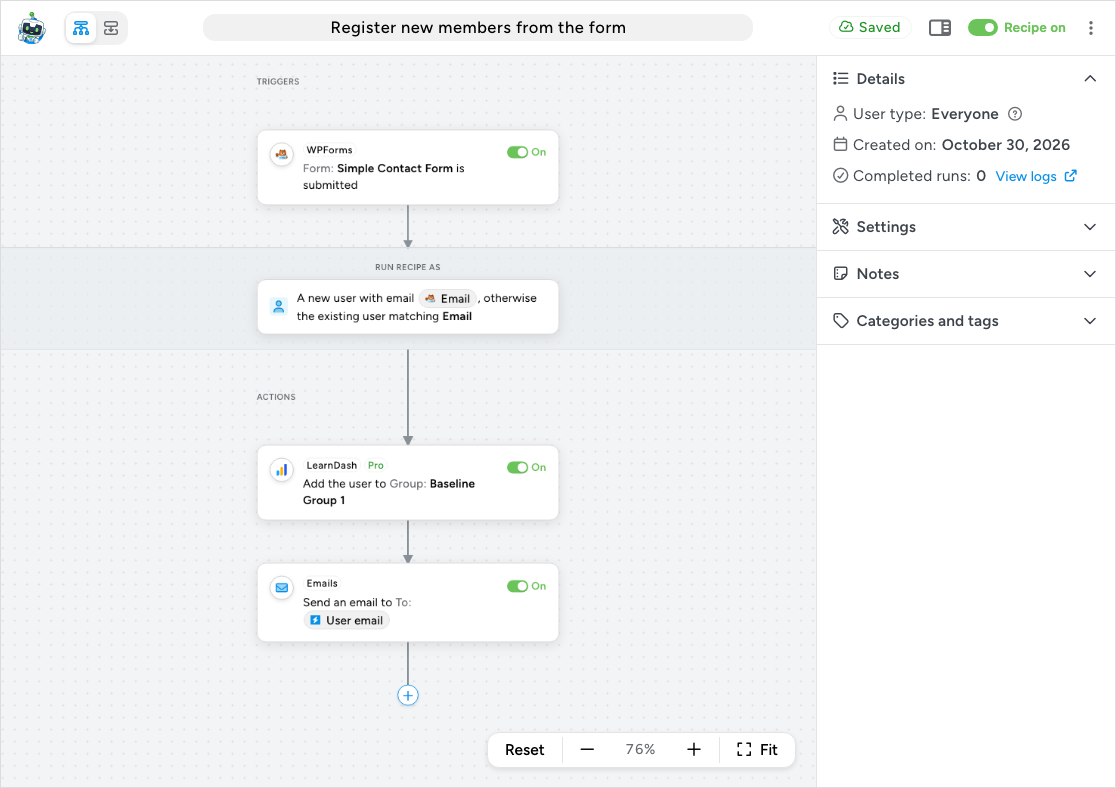
To test it, open the page that holds the form in a private browser window, so you are logged out, and submit it with a test name and an address you can read. The new account appears under Users in WordPress, the welcome email arrives with its reset link, and in the builder Details > Completed runs counts the run; View logs shows what each action did and for which user.
Contact Form 7
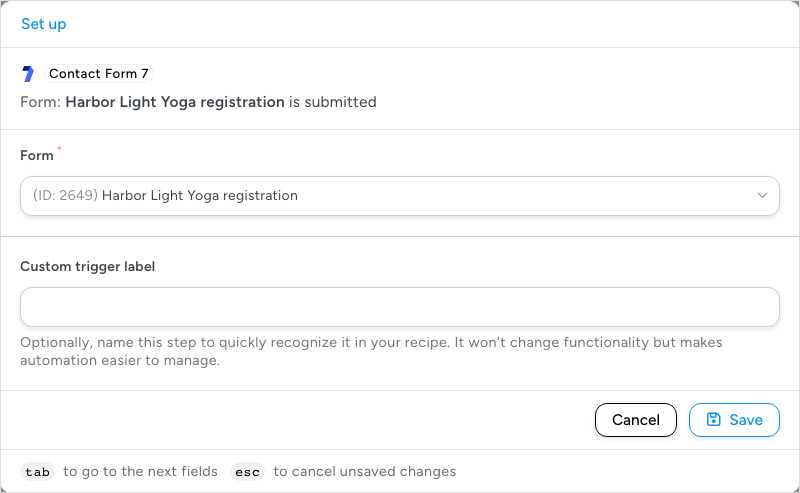
Search for Contact Form 7 in the picker and choose A form is submitted. Contact Form 7 submits every form anonymously, even when a logged-in user fills it in, so an Everyone recipe is the right type for any Contact Form 7 trigger; the subscribers_only setting described in the Contact Form 7 FAQ matters only for Logged-in users recipes.
To build the form, go to Contact > Add New, name it, and in the Form tab replace the default Your name tag with two text tags, one for the first name and one for the last name. Keep the Your email tag, delete the Subject and Your message tags, change the submit button’s label to Register, and click Save. Add the form to a page with its shortcode. In the recipe, the form’s fields appear as tokens named after the tags, with hyphens and underscores shown as spaces and each word capitalised: the default your-email tag appears as Your Email, and a tag named first-name as First Name.
WPForms
Search for WPForms and choose A form is submitted. Go to WPForms > Add New, name the form, and pick the Simple Contact Form template. It already has Name and Email fields; delete the Comment or Message field, change the submit button text to Register, and click Save. Add the form to a page with the WPForms block or its shortcode. In the token picker, the template’s Name field supplies separate First name and Last name tokens and the Email field an Email token, listed under the trigger’s group with the form’s title, ID, entry ID, and submission date. The screenshots in Build the recipe show this form.
Gravity Forms
Search for Gravity Forms and choose A form is submitted. Go to Forms > New Form, enter a title, and click Create Form. From Standard Fields, add two Single Line Text fields labelled First Name and Last Name and mark each Required; from Advanced Fields, add an Email field, also required. Click Update, then open the form’s Settings, change the Button text to Register, and save the settings. Add the form to a page with the Gravity Forms block.
Two caveats from the Gravity Forms FAQ apply. If the Gravity Forms User Registration add-on creates the account instead of Automator, use the A user registers with a form or A user is registered trigger; other submission triggers are not linked to the user that add-on creates. And its Password field type cannot be read as a token, for security reasons, so a password the visitor types cannot be passed to the Run actions as dialog. Leave the password empty and send the reset link.
Formidable Forms
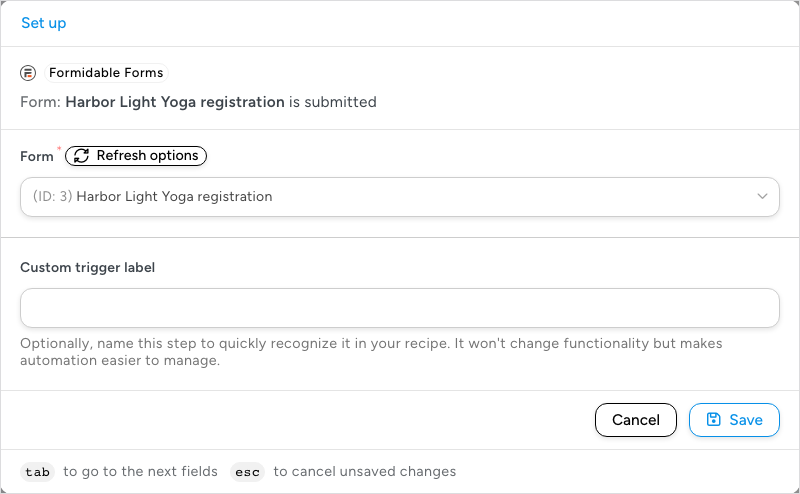
Search for Formidable Forms and choose A form is submitted. Go to Formidable > Add New, choose the Contact Us template, name the form, and click Create. Delete the Subject and Message fields and click Update. To rename the button, click the submit button in the form builder, change its Field Label to Register, and click Update again. Add the form to a page with the Formidable Forms block or its shortcode. The template’s name and email fields supply the tokens.
Ninja Forms
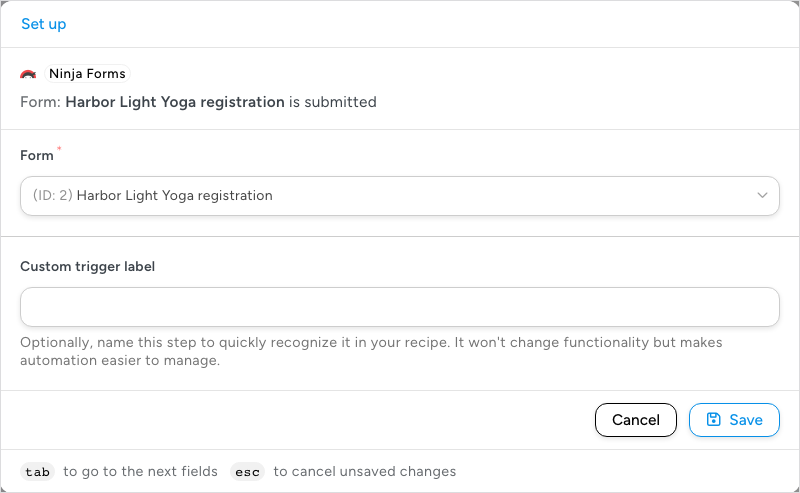
Search for Ninja Forms and choose A form is submitted. Go to Ninja Forms > Add New and choose the Contact Us template. Delete the Name field and add a First Name and a Last Name field from User Information Fields; keep Email, delete Message, and change the submit button’s Label to Register. Give the form a title in the Form Title field under Advanced > Display Settings (the template sets it to “Contact Me”), then click Publish. Add the form to a page with the Ninja Forms block or its shortcode.
Things to know
- One trigger: an Everyone recipe has exactly one trigger, so one recipe registers users from one form. To register from several forms, duplicate the recipe from the ⋮ menu and change the form in each copy.
- Duplicate emails: WordPress allows one account per email address and one per username, so If the user already exists decides what a repeat submission does: Use the existing user serves returning members, Skip the action leaves their accounts untouched.
- Role: the dialog offers Subscriber, Contributor, Author, and Editor only. Pick the lowest role that gives the member what they need, since anyone who finds the form can create the account.
- Passwords and login emails: with Password empty the member must set one through the reset link, so always include the User reset password link token (or User reset password URL, the bare address) in a Send an email action. WordPress does not send its own new-user notification for accounts the recipe creates.
- Times per user: this setting applies to Logged-in users recipes only and does not appear for an Everyone recipe; a repeat submission is handled by If the user already exists instead. The Settings panel of an Everyone recipe lists Throttle and Total times only; use them to cap the recipe overall. See Recipe settings: times per user, total times and throttling.
- Extra profile fields: to store more of the form’s answers on the account, add extra fields to the form and a WordPress Core > Set user meta action (Uncanny Automator Pro) that maps each one to a user meta key.
- Who can reach the form: anyone who can reach the form can create an account. Restrict the page if only certain people should register, and decide whether search engines should index it; Recipes for Everyone lists the questions to ask.
- Caldera Forms: the Caldera Forms integration was removed in Uncanny Automator 8.0. If you arrived here from the Caldera Forms tutorial, rebuild the form in one of the plugins above.
Related: Recipes for Everyone, Recipe types: logged-in users and everyone, Creating a recipe, Managing tokens, Testing triggers and actions


Comments (0)