

Uncanny Automator is two plugins. The free plugin comes from WordPress.org and is all you need to start building recipes. Uncanny Automator Pro is a second plugin you download from your account; it runs alongside the free plugin and unlocks the paid triggers, actions, recipe blocks, and addons. This article covers installing and activating both and activating your Pro license. Setting the site up afterwards is covered in Setup wizard and dashboard.
Requirements
Both plugins require WordPress 5.8 or newer and PHP 7.4 or newer, and you need an administrator account on the site to install plugins. Uncanny Automator Pro requires the free plugin to be installed and active; WordPress will not activate Pro without it.
Install the free plugin
- In your WordPress dashboard, go to Plugins > Add Plugin.
- In the search field, enter Uncanny Automator.
- On the Uncanny Automator card in the results, click Install Now, then Activate. If the plugin is already installed and active on the site, the card shows Active instead and there is nothing more to do.
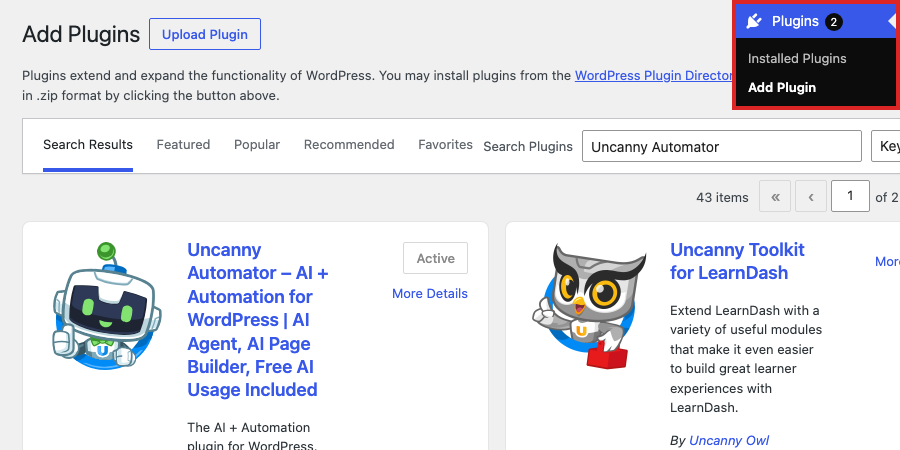
Uncanny Automator is now installed, and an Automator entry appears in the sidebar. You can also download the plugin zip from the WordPress.org plugin page and upload it the same way as Pro below.
The free plugin is the Lite plan: every built-in integration and every trigger and action it includes are free to use without limit. App integrations such as Google Sheets, Slack, and Mailchimp use app credits from a free Uncanny Automator account, which the Setup wizard helps you link.
Install Uncanny Automator Pro
Uncanny Automator Pro is included with every paid plan; see the pricing page for what each plan includes. After purchase, the plugin zip is in your account at automatorplugin.com/my-account/downloads/, and the confirmation email links to it too. Download the zip without unzipping it.
- In your WordPress dashboard, go to Plugins > Add Plugin.
- At the top of the page, click Upload Plugin.
- Click Choose File, select the Uncanny Automator Pro zip, and click Install Now.
- When the upload finishes, click Activate Plugin.
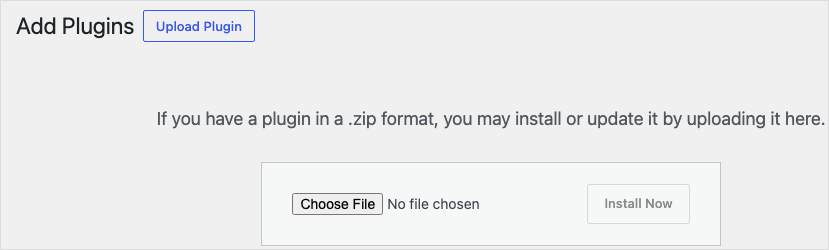
Pro features stay locked until its license is active, so activate the license next.
Activate your Pro license
The license key is in your account under Licenses and in your purchase email. If the Setup wizard opened after activation, its first step, Activate license, takes the same key. Otherwise:
- Go to Automator > Settings. The General tab opens on its License panel.
- Paste your key into Uncanny Automator Pro license key.
- Click Activate license.
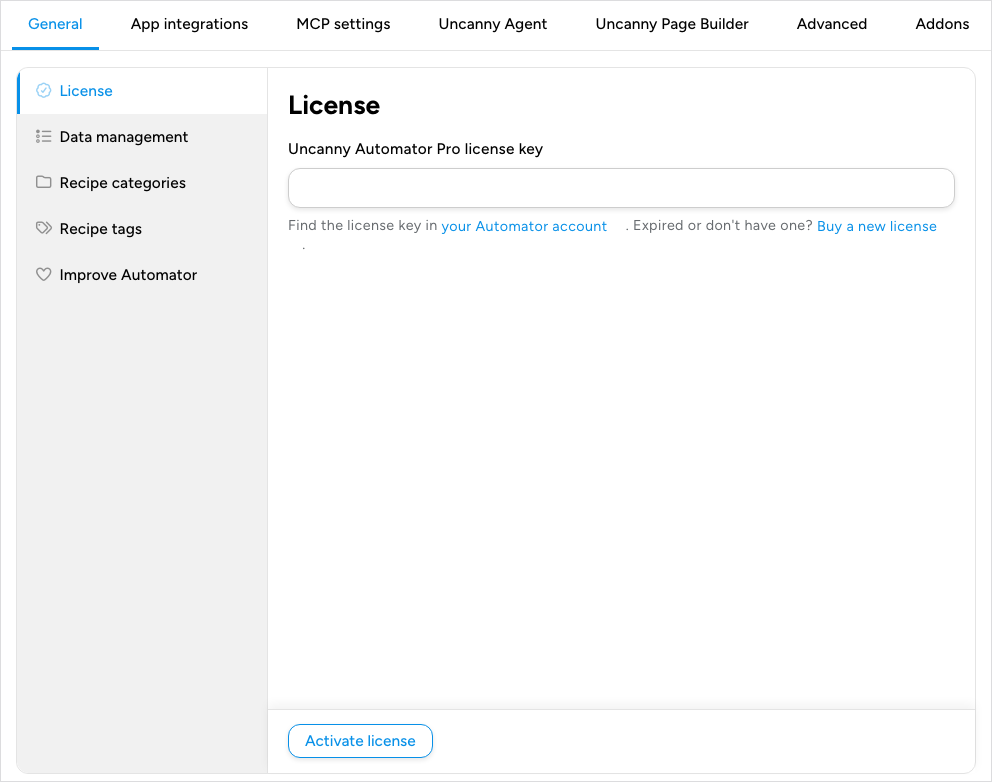
When the key is accepted, the panel shows Your license is active with the details of the license:
- Account: the name and email the license was bought under.
- Plan: your plan, such as Basic, Plus, or Elite. A plan bought before the current plans were introduced shows its name with “(Legacy)”.
- Activations left: how many more sites this key can be activated on, as “n of m”, or Unlimited.
A license with an expiry date also shows an Expires line with that date.
The key field is then read-only and masked. Two buttons manage the license:
- Change license key — deactivates the license on this site immediately, then shows an empty key field so you can enter and activate a different key. Pro features stay locked until a key is active again, so have the new key ready before you click it.
- Deactivate license — at the bottom of the panel, deactivates the license on this site and frees one activation so you can use the key on another site.
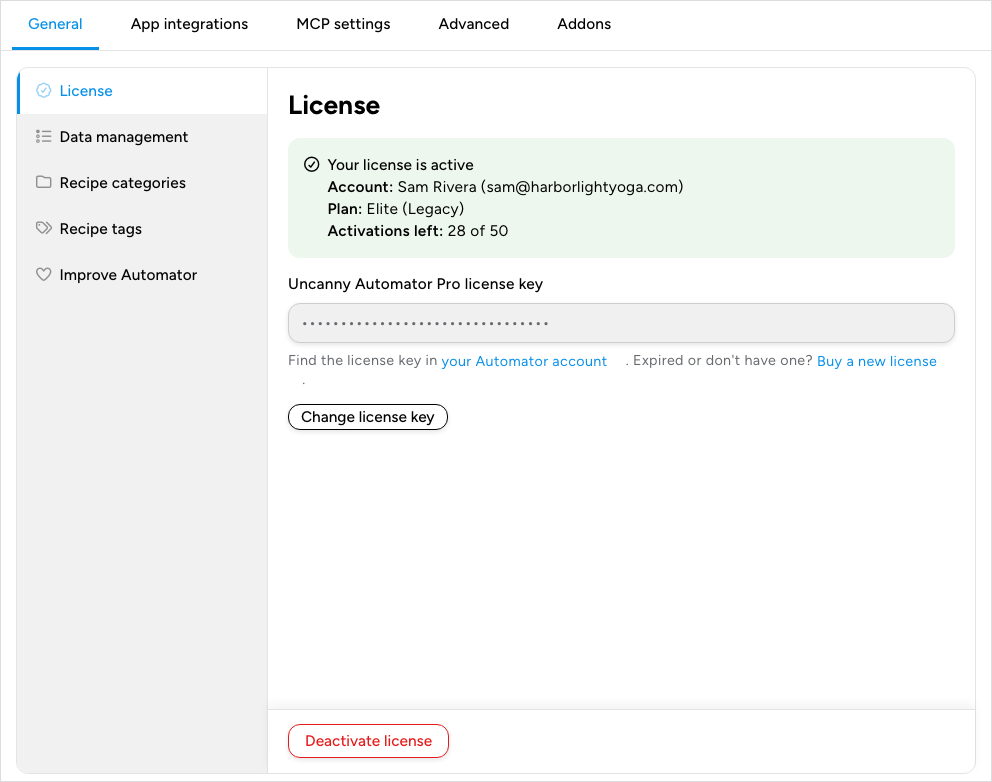
An active license gives you plugin updates for both plugins, priority support, unlimited tool usage for a connected AI, app integrations without credits, and, on the Plus and Elite plans, the addons.
Note: If the panel reports that the key has expired or has no activations left, renew or manage the license from your account; the panel links to your Automator account and to Buy a new license under the key field.
Next: Setup wizard and dashboard, Creating a recipe, Where can I find my license key?

Comments (0)