

A recipe with a Posts loop changes many posts, pages, or custom post type items at once: tag every post in a category, unpublish an old section, move a set of products to a new author, or fill in a missing field. You build it once, run it from the Run now button, and follow the results in the log. This article walks through a recipe that adds a tag to every published post in one category, using only the WordPress integration, and then covers how to adapt and run it safely.
You need Uncanny Automator Pro: the Loop block, the Run now trigger, and most of the post-editing actions are Pro. For the full reference on loop types, filters, and tokens, see Loop block: users, posts and tokens.
How the recipe is shaped
- A trigger that you control. The Run now trigger (“Trigger recipe manually”) runs the recipe when you click a button in the builder; a Schedule trigger runs it at a set time or on a repeating schedule. Both are Pro, and both run for everyone, so they can be used only in Everyone recipes. In a Logged-in users recipe the picker shows them as unavailable with “This trigger runs for everyone and cannot be used in a recipe for logged-in users.”
- A Loop block with Loop type Posts, with loop filters for the post type, the status, and whatever else narrows the set. Unlike a Users loop, a Posts loop does not know which posts you mean until you tell it the post type.
- The actions inside the loop, each pointed at the loop’s current post through the Post ID token. This is the step people miss: a post action’s Post field normally names one fixed post, so inside a loop it must be switched to Use a token/custom value and hold the Post ID token.
Building the recipe
- In your WordPress dashboard, go to Automator > Add new recipe.
- In Select a recipe type, choose Everyone and click Confirm.
- Type a name such as “Tag all published news posts” in the title field and wait for Saved.
- Click Add trigger. In the picker, search for “run now”, click the Run now integration, then Trigger recipe manually, and click Save. The top bar now shows a Run now button in place of the Recipe on / off switch.
Add the Posts loop
- Click the + under the trigger, scroll the picker to Recipe blocks, and click Loop.
- Choose Posts as the Loop type and click Save.
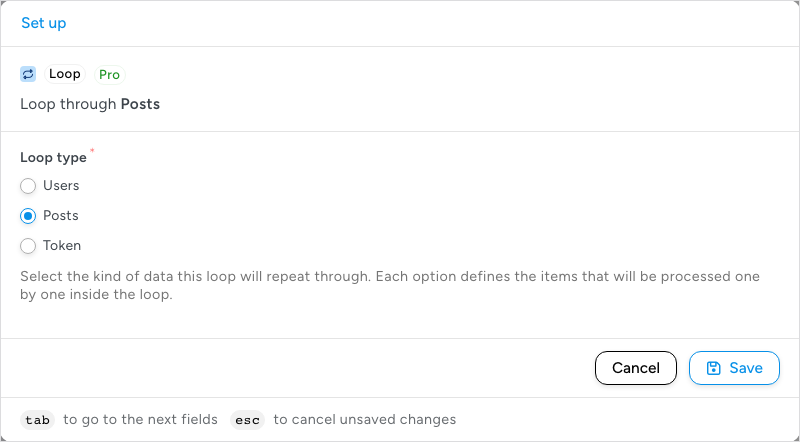
The new block reads “Loop through Posts” and shows “No modifiers in this block” until you add a filter.
Choose the posts
Add the filters in this order; each one narrows the set further, and a post must pass all of them.
- On the Loop block, click Add modifier, click WordPress Core, then A post is a specific type of post. Set Post type to Post and click Save.
- Click Add modifier again, then A post has/does not have a specific status. Set Condition to has. The Status list opens on auto-draft, so change it to Published (listed as “(ID: publish) Published”), and click Save. The filter then reads “A post Condition: has Status: Published status”.
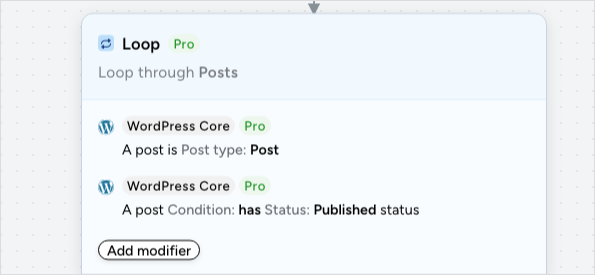
- Click Add modifier once more, then A type of post has/does not have a term in a taxonomy. Set Post type to Post, Condition to has, Taxonomy to Category, and Term to the category you want, then click Save.
Other WordPress post filters you can add: A post has/does not have a specific meta key (find posts missing a field), A post’s meta value meets a condition, A post’s field meets a condition, The author of a post is/is not a specific user, A specific type of post’s date meets a condition (posts not modified for a year, with the Date modifier “-1 year”), A post comment count meets a condition, A post has/does not have a featured image, and A post is/is not password protected. WooCommerce, Yoast SEO, Rank Math, and The Events Calendar add filters for their own post types.
Add the action
- Click + Add inside the Loop block.
- Click WordPress Core, then Add a taxonomy term to a post in a post type.
- Set Post type to Post.
- In Post, select Use a token/custom value (the list starts on All posts). Click the ∗ button at the end of the new field, open the Loop section, and choose Post ID.
- Set Taxonomy to Tag and Taxonomy term to the tag to add. To create a new tag, select Use a token/custom value and type its name; the field’s help text reads “To create a new term, enter its name. To use an existing term, enter a name, slug, or ID.”
- Click Save. This action has no Test step.
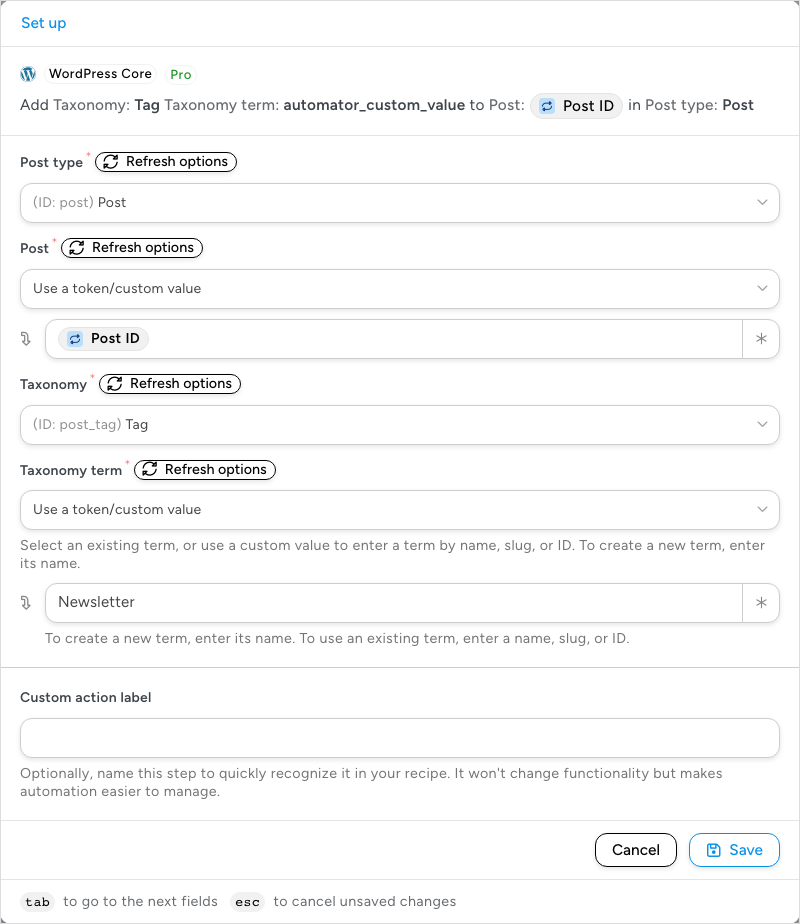
With the Post ID token in the Post field, the action targets a different post on each pass. If you leave a fixed post selected, every pass of the loop updates that one post.
Running the recipe
- Check the canvas: the trigger, the Loop block with its filters, and the action inside the frame, switched On.
- Click Run now in the top bar.
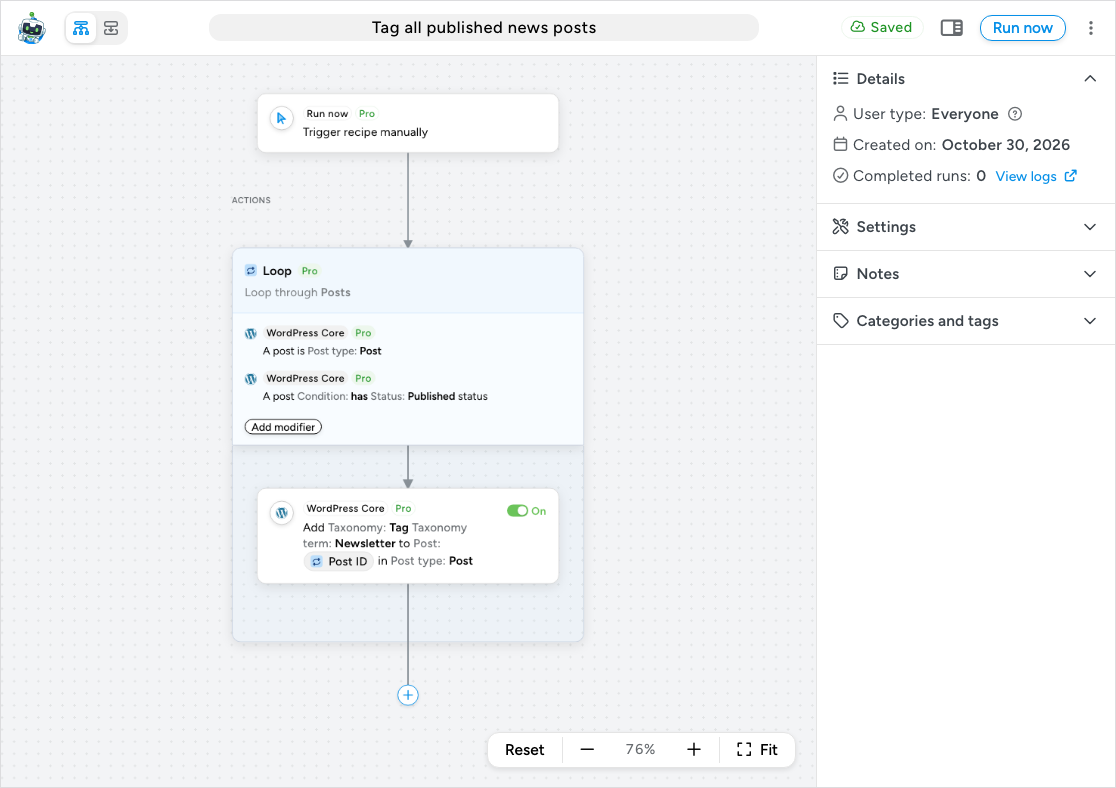
The recipe starts immediately and the builder opens the log of this run. If the recipe is incomplete, the dialog This recipe can’t be run yet lists what to fix. While the loop runs, the recipe is locked and the Run now button is disabled.
Checking the results
In the run log, the Loop block shows its status, a counter of posts finished out of the total with a percentage, a progress bar, and Pause and Cancel buttons while it runs. When it completes, click View details on the action to open its Action details panel, where the Iterations section lists each post by ID and title with its status; open a failed post’s entry to see the reason above its properties. Then open Posts > All Posts, filter by the category, and confirm the tag appears on each post.
Adapting the recipe
Keep the trigger and loop, change the filters to describe your posts, and swap the action. Every post action takes the loop’s Post ID token in its Post field the same way. WordPress actions that are useful in a Posts loop:
- Set a post to a status: unpublish a whole category by setting Published posts to Draft, or publish a batch of drafts.
- Update the title of a post, Update the content of a post, and Update the excerpt of a post: for example, append a disclosure to the content of every post in a category, using the Post content loop token followed by the new paragraph.
- Update the author of a post: reassign a departed author’s posts.
- Set post meta: fill a custom field, such as a price or an SEO description, on every post missing it (filter with A post has/does not have a specific meta key set to does not have).
- Change the post type of a post and Move a post to the trash.
Pair a post loop with an app or AI action for heavier jobs: send each post’s title and URL to Google Sheets for an audit, or send the Post content token to an AI integration and write the reply into a meta field. To treat some posts differently, add a Filter block inside the loop.
Things to know
- There is no undo. Test on one post first: add the filter A post’s field meets a condition with ID is a single post’s ID, run, check the post, then remove the test filter. Trashing posts or changing their status affects the public site at once, so prefer a staging copy for those.
- Always add a post type filter. Without one, the other filters match items of every post type: a status filter on its own also matches published pages, products, and other custom post type items. A loop with no filters at all processes nothing, and its log shows “No posts met the filter criteria.”
- The loop processes posts that exist when it starts. A post published after you click Run now is not included. For an ongoing rule (“tag every new post in this category”), build a second recipe with an event trigger such as a post being published.
- Running the recipe twice repeats the actions. Adding a tag a post already has is harmless; appending text to the content a second time is not. Add a filter that excludes posts already changed (for example, A type of post has/does not have a term in a taxonomy set to does not have, for the tag you add).
- Loops run in the background in batches. A large loop takes a while, and app actions are subject to the receiving service’s rate limits. If a loop over thousands of posts fails part-way on an app action, split it with narrower filters, such as one category or one date range at a time.
Related: Loop block: users, posts and tokens, Bulk update users with a recipe, Run Now, Schedule, Filter block and conditions, Post meta tokens, Using Automator Logs.


Comments (0)