

An action is what a recipe does once its triggers have completed: send an email, create a post, add a tag in your CRM, enroll a user in a course, post a message to Slack. A recipe can have as many actions as you need. This article covers adding and setting up an action in the Uncanny Automator 8.0 recipe builder, the controls on an action’s node, ordering actions and placing them inside recipe blocks, using tokens in action fields, and where to see what an action did.
Adding an action
- In the recipe, click the + at the end of the flow. Inside a recipe block, click + Add in the path the action belongs to. The picker opens on its Integration step.
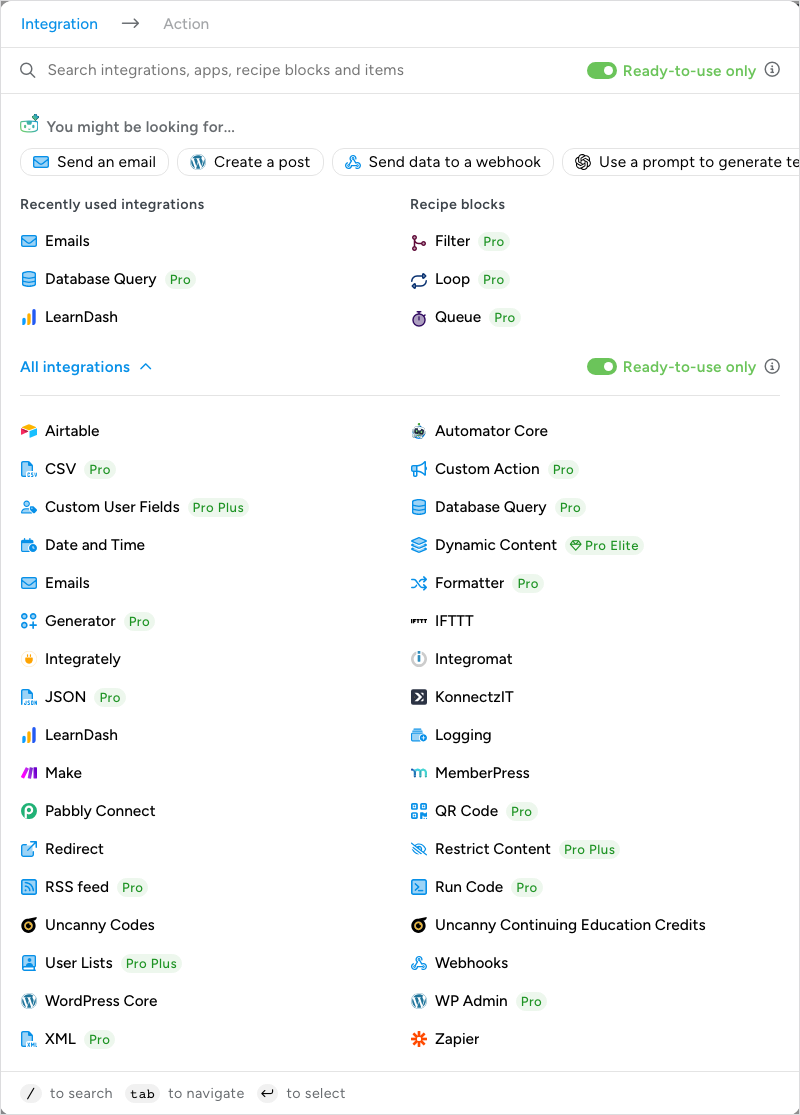
- Choose the integration: the plugin or app that will do the work. Click it in the All integrations list, search for it, or pick one of the suggestions under You might be looking for…. Integrations your recipes already use are listed first, under Recently used integrations and Most used integrations. The picker shows only ready-to-use integrations until you switch Ready-to-use only off; see Finding integrations in the recipe builder.
- Choose the action from the integration’s list. Each action shows its sentence, such as Send an email, and a one-line description.
Setting up the action
The action opens in the Set up step. For an action that has a test, the bar at the top reads Set up → Test. The sentence below it fills in with your values as you complete the fields (a part still to fill in is highlighted), and the fields are where you tell the action what to do. Send an email, for example, starts with Content type, then From, From name, To, Reply to, CC, BCC, and Subject, with the body and the Custom action label further down.
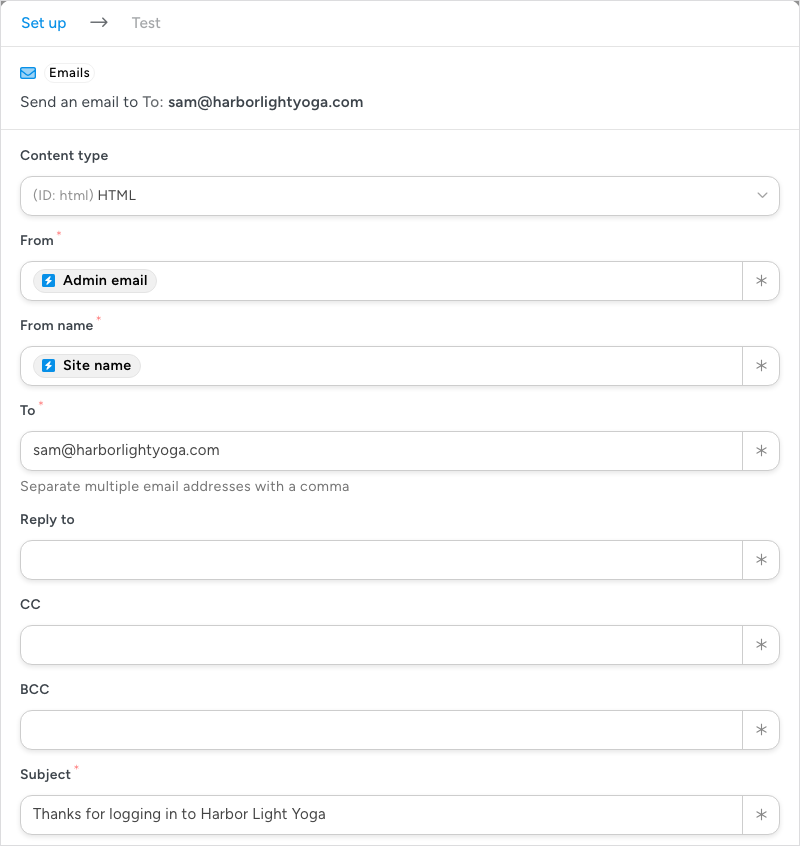
- Fields — an asterisk marks a required field. Some fields are pre-filled with sensible tokens, such as From set to the site’s admin email and From name set to the site name for an email; change them when the message should come from someone else. Helper text under a field explains its format, for example “Separate multiple email addresses with a comma”.
- ∗ — the button at the end of a field opens the token picker, so you can insert data from the triggers instead of a fixed value (see Using tokens in actions below).
- Custom action label — an optional name for this step. It does not change what the action does. On the canvas it becomes the title of the action’s node, which helps you tell apart several similar actions, because a node shows the action’s sentence and not its other settings. In Automator > Logs, a run’s Details view also shows the label above the action’s sentence.
Finish with one of the buttons at the bottom. Save adds the action to the recipe straight away. Actions that come with a test, such as Send an email and Send data to a webhook, also show Test, which opens the Test step so you can try the action first; see Testing triggers and actions. Cancel (or Esc) closes the modal and discards your changes.
Actions on the canvas
Each saved action is a node in the Actions section, showing the integration, the sentence with your values, and these controls.
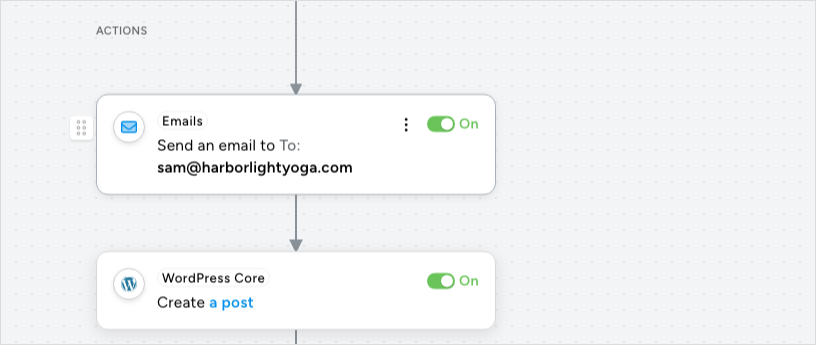
- Drag to reorder — the grip of six dots on the left of the node, which shows while the pointer is over the node. Actions run in the order they appear, from top to bottom, so drag an action up or down when one depends on another, for example creating a user before enrolling them. One exception: an app action that supports background processing hands its request to the Automator App Platform and the recipe moves on at once, while later actions that use its tokens, or that belong to the same app, wait for it to finish. The Background app actions setting under Automator > Settings > Advanced controls this.
- On / Off — a new action is On. Switch it Off to keep it in the recipe without running it, which is useful while you test the rest of the recipe or pause a step temporarily. Switching off the last action that is On also switches the recipe to Recipe off.
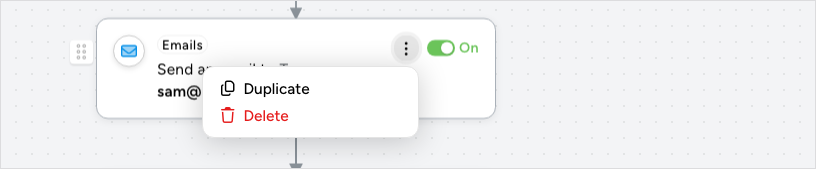
- ⋮ — opens Duplicate, which adds a copy with the same values below the original, and Delete, which asks you to confirm (“This removes the item from the recipe.”) and then removes the action.
- Click anywhere else on the node to reopen Set up and change the values.
Actions run only while Recipe on is switched on in the top bar; the recipe saves automatically as you work, so there is nothing else to publish. Switching a live recipe off asks you to confirm first.
Putting an action inside a block
Recipe blocks, available with Uncanny Automator Pro, are containers that change how the actions inside them run: a Filter block runs them only when its conditions are met, a Queue block runs them later, and a Loop block runs them once for each user, post, or token value. Add a block from the Recipe blocks section of the picker, then click + Add inside one of its paths to add an action there. An action inside a block is set up and controlled exactly like one outside it. To move an existing action into a block, drag it by its handle into the path; dragging works out of a path too. The drop line appears only where the action is allowed. See Recipe blocks: Filter, Queue and Loop.
Using tokens in actions
Tokens are the dynamic values in a recipe: the user’s first name, the title of the post that was published, the value of a form field, today’s date. Click the ∗ button at the end of a field to open the token picker and insert one; the field shows the token as a chip, and the recipe replaces it with the real value on each run. The picker has a Search tokens box and two tabs: From previous steps lists the tokens of the recipe’s triggers, grouped under each trigger’s sentence, and Global holds the common tokens that every recipe can use. In an email field, the picker also has an Email tokens only switch. Tokens are what make a single recipe serve every user, so use them wherever an action should carry data from the event: the recipient’s address in an email, the user’s name in a message, the form answers in a spreadsheet row.
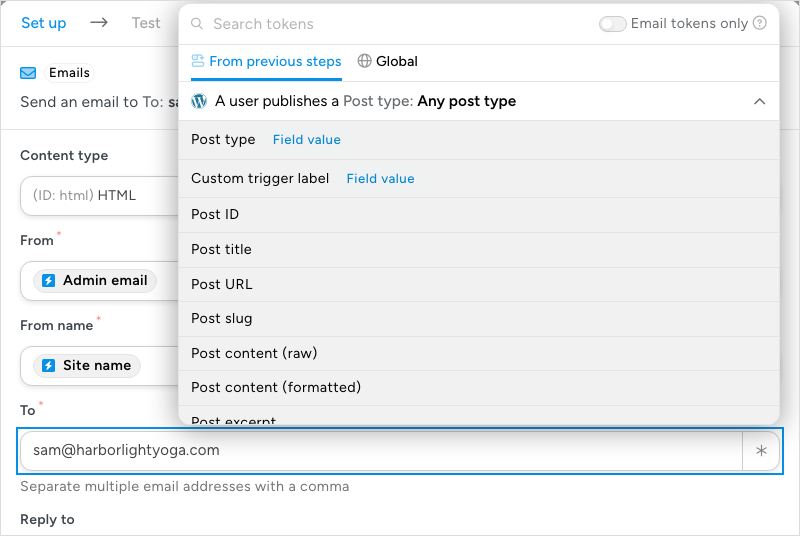
The tokens on offer depend on the recipe’s triggers. A form-submission trigger adds tokens for the form name and every field, a post trigger adds the post’s title, URL, and author, and so on. Add your triggers first so their tokens are there when you set up actions. See Managing tokens for the token types and the {{token}} syntax.
Where action results appear
Every action run is recorded in Automator > Logs, on the Action tab. The columns are Action, Action status, Notes, Completion date, Recipe, Recipe status, Run #, and User. Notes stays empty for an action that completed; when an action fails or is skipped, it explains why, for example a missing user or a Slack channel that no longer exists. In an Everyone recipe with no user, the User column is empty. Use the filters above the table to narrow the list to one recipe, action, user, date range, or status.
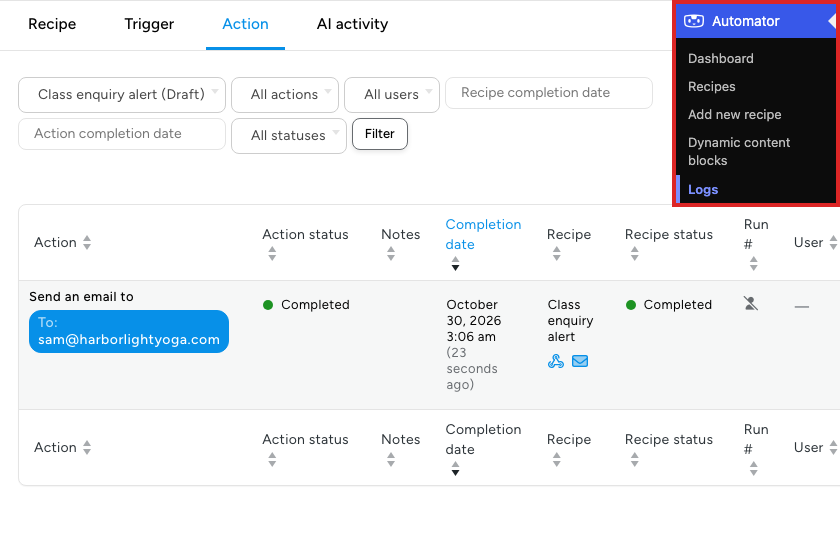
From inside the builder, View logs in the sidebar’s Details panel opens the logs for the recipe you are editing. Actions inside a Queue block that have not run yet are listed under Delayed actions at the bottom of the canvas. To run a waiting action early or cancel it, open the run’s Details from the Recipe tab of the logs: the Queue block’s row reads Delayed and has two icon buttons, Run now and Cancel. See Using Automator logs.
Related: Managing triggers, Testing triggers and actions, Recipe blocks: Filter, Queue and Loop, Managing tokens

Comments (0)