

Connecting Salesforce to Uncanny Automator lets a recipe create and update Salesforce contacts and leads, and add them to campaigns, when people do things on your WordPress site: buy a product, fill out a form, complete a course, register for an event. This article covers connecting your Salesforce account, the seven Salesforce actions, and adding one to a recipe.
Salesforce is an Elite integration. You need the Elite plan, Uncanny Automator Pro, and the Elite Integrations Addon installed and active, plus a Salesforce account that you have read and write access to.
Connecting Uncanny Automator to your Salesforce account
- In your WordPress dashboard, go to Automator > Settings > App integrations and select Salesforce in the list of apps. The panel lists the seven actions the connection enables.
- Click Connect Salesforce.
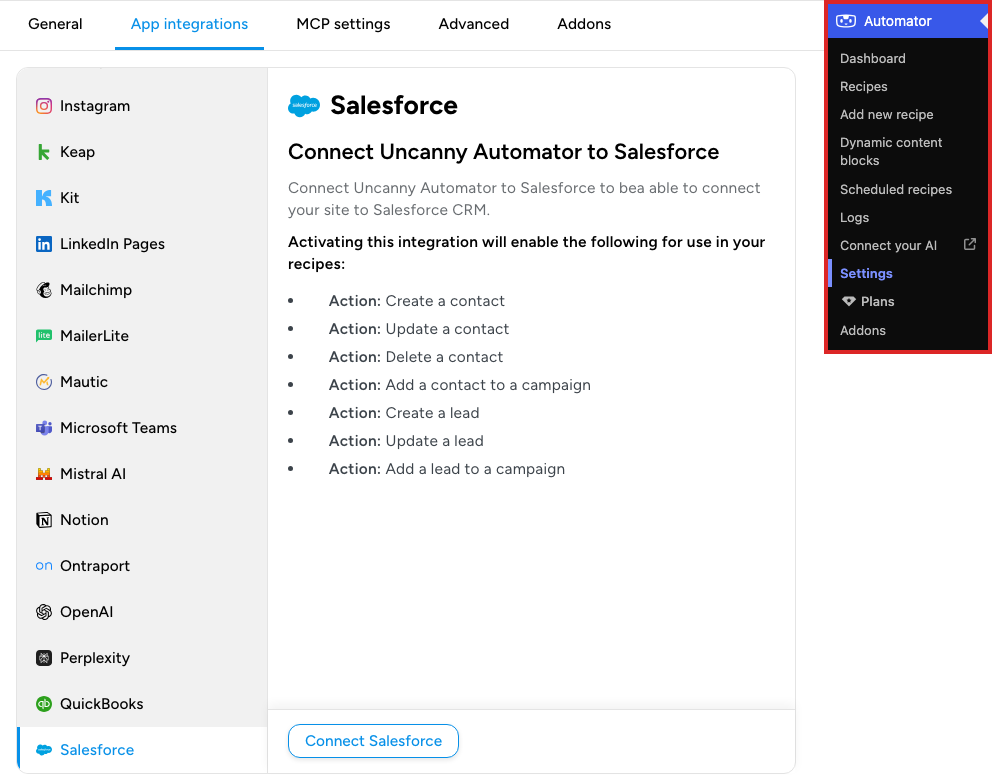
- Log in to Salesforce when you are prompted.
- Salesforce asks you to allow Uncanny Automator to manage your Salesforce data. Click Allow.
You are returned to the App integrations tab, which now shows the connected Salesforce user and their account email, with a Disconnect button. Uncanny Automator connects to one Salesforce account at a time; to use a different one, click Disconnect and connect again.
Until Salesforce is connected, the recipe builder’s picker hides it while Ready-to-use only is on, so connect the account before you build the recipe. See Finding integrations in the recipe builder.
Salesforce actions
Every Salesforce action works from the contact’s or lead’s email address, and none of them needs a logged-in user, so they work in recipes for Everyone as well as recipes for logged-in users.
- Create a contact: creates a contact with an Email, Last name, and optional First name, under the Salesforce Account you choose. Add more contact fields under Custom fields.
- Update a contact: updates the contact with that Email, setting the fields you add under Custom fields. A field left empty is not changed; to clear a field in Salesforce, set its value to
[delete], including the square brackets. - Delete a contact: deletes the contact with that Email.
- Add a contact to a campaign: adds the contact with that Email to the Campaign you choose.
- Create a lead: creates a lead with an Email, Company, Last name, optional First name, and a Lead status, plus any Custom fields.
- Update a lead: updates the lead with that Email: its Lead status and any Custom fields.
- Add a lead to a campaign: adds the lead with that Email to the Campaign you choose.
The Account, Campaign, Lead status, and custom field lists are loaded from your Salesforce account. The create, update, and delete actions give later actions a Contact ID or Lead ID token.
Using Salesforce actions in recipes
Some ideas for recipes:
- Send new contacts to Salesforce when someone makes a purchase.
- Add leads to Salesforce when someone fills out a form.
- Add a lead or contact to a campaign when a user completes a course, registers for an event or webinar, visits a specific page, or adds an item to their cart.
- Open the recipe at Automator > Recipes, or create one from Automator > Add new recipe, and add the trigger that should run it; see Creating a recipe.
- Click the + at the end of the flow. In the picker, search for “Salesforce”, click Salesforce, then the action you need.
- In the Set up step, fill in the fields. Use the ∗ button at the end of a field to insert tokens from the trigger, such as the email address and name typed into a form, so each run sends that person’s details.
- Click Save.
- Check that the trigger and the action are switched On, then switch Recipe off to Recipe on.
That’s it! The recipe now runs whenever the trigger fires and sends the update to your Salesforce account.
Note: The update, delete, and campaign actions find the contact or lead by its email. If none has that email, the action fails and the recipe log shows that it was not found; nothing is created. If several have the same email, the action changes only the first one Salesforce returns. If you are not sure the contact or lead will exist when the recipe runs, add the matching create action earlier in the same recipe.
Related: Installing the Elite Integrations Addon, QuickBooks Online, Finding integrations in the recipe builder, Managing actions, Recipes for Everyone.

Comments (0)